
Its the work week and as we’re busy with projects on the current house so I thought I’d share a project from our first home. (Warning: the pics used in this post are circa Christmas 2010 and a bit fuzzy)
The Murphy Dog bed came to fruition when I had to stash the dog beds in the garage and clean up before guests arrived. When I brought them back into the house, I brought also a BW (black widow) in as well! EWWWW! Creeped me out royally! Hence I needed a place to stash or fold away dog beds when not in use but didn’t want to drag them into the bedrooms.
Hence MURPHY DOG BEDS!
THEY LOOK LIKE CABINETS….
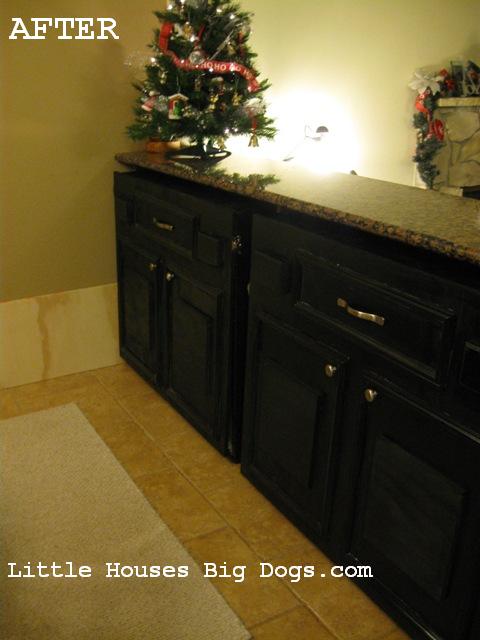
BUT WHOA! DOG BEDS…
They were a bit unfinished (this was my first foray into cabinetry and staining, I’ve learned a bit since then)
Lets take a walk down memory lane…
Here are some before pics:
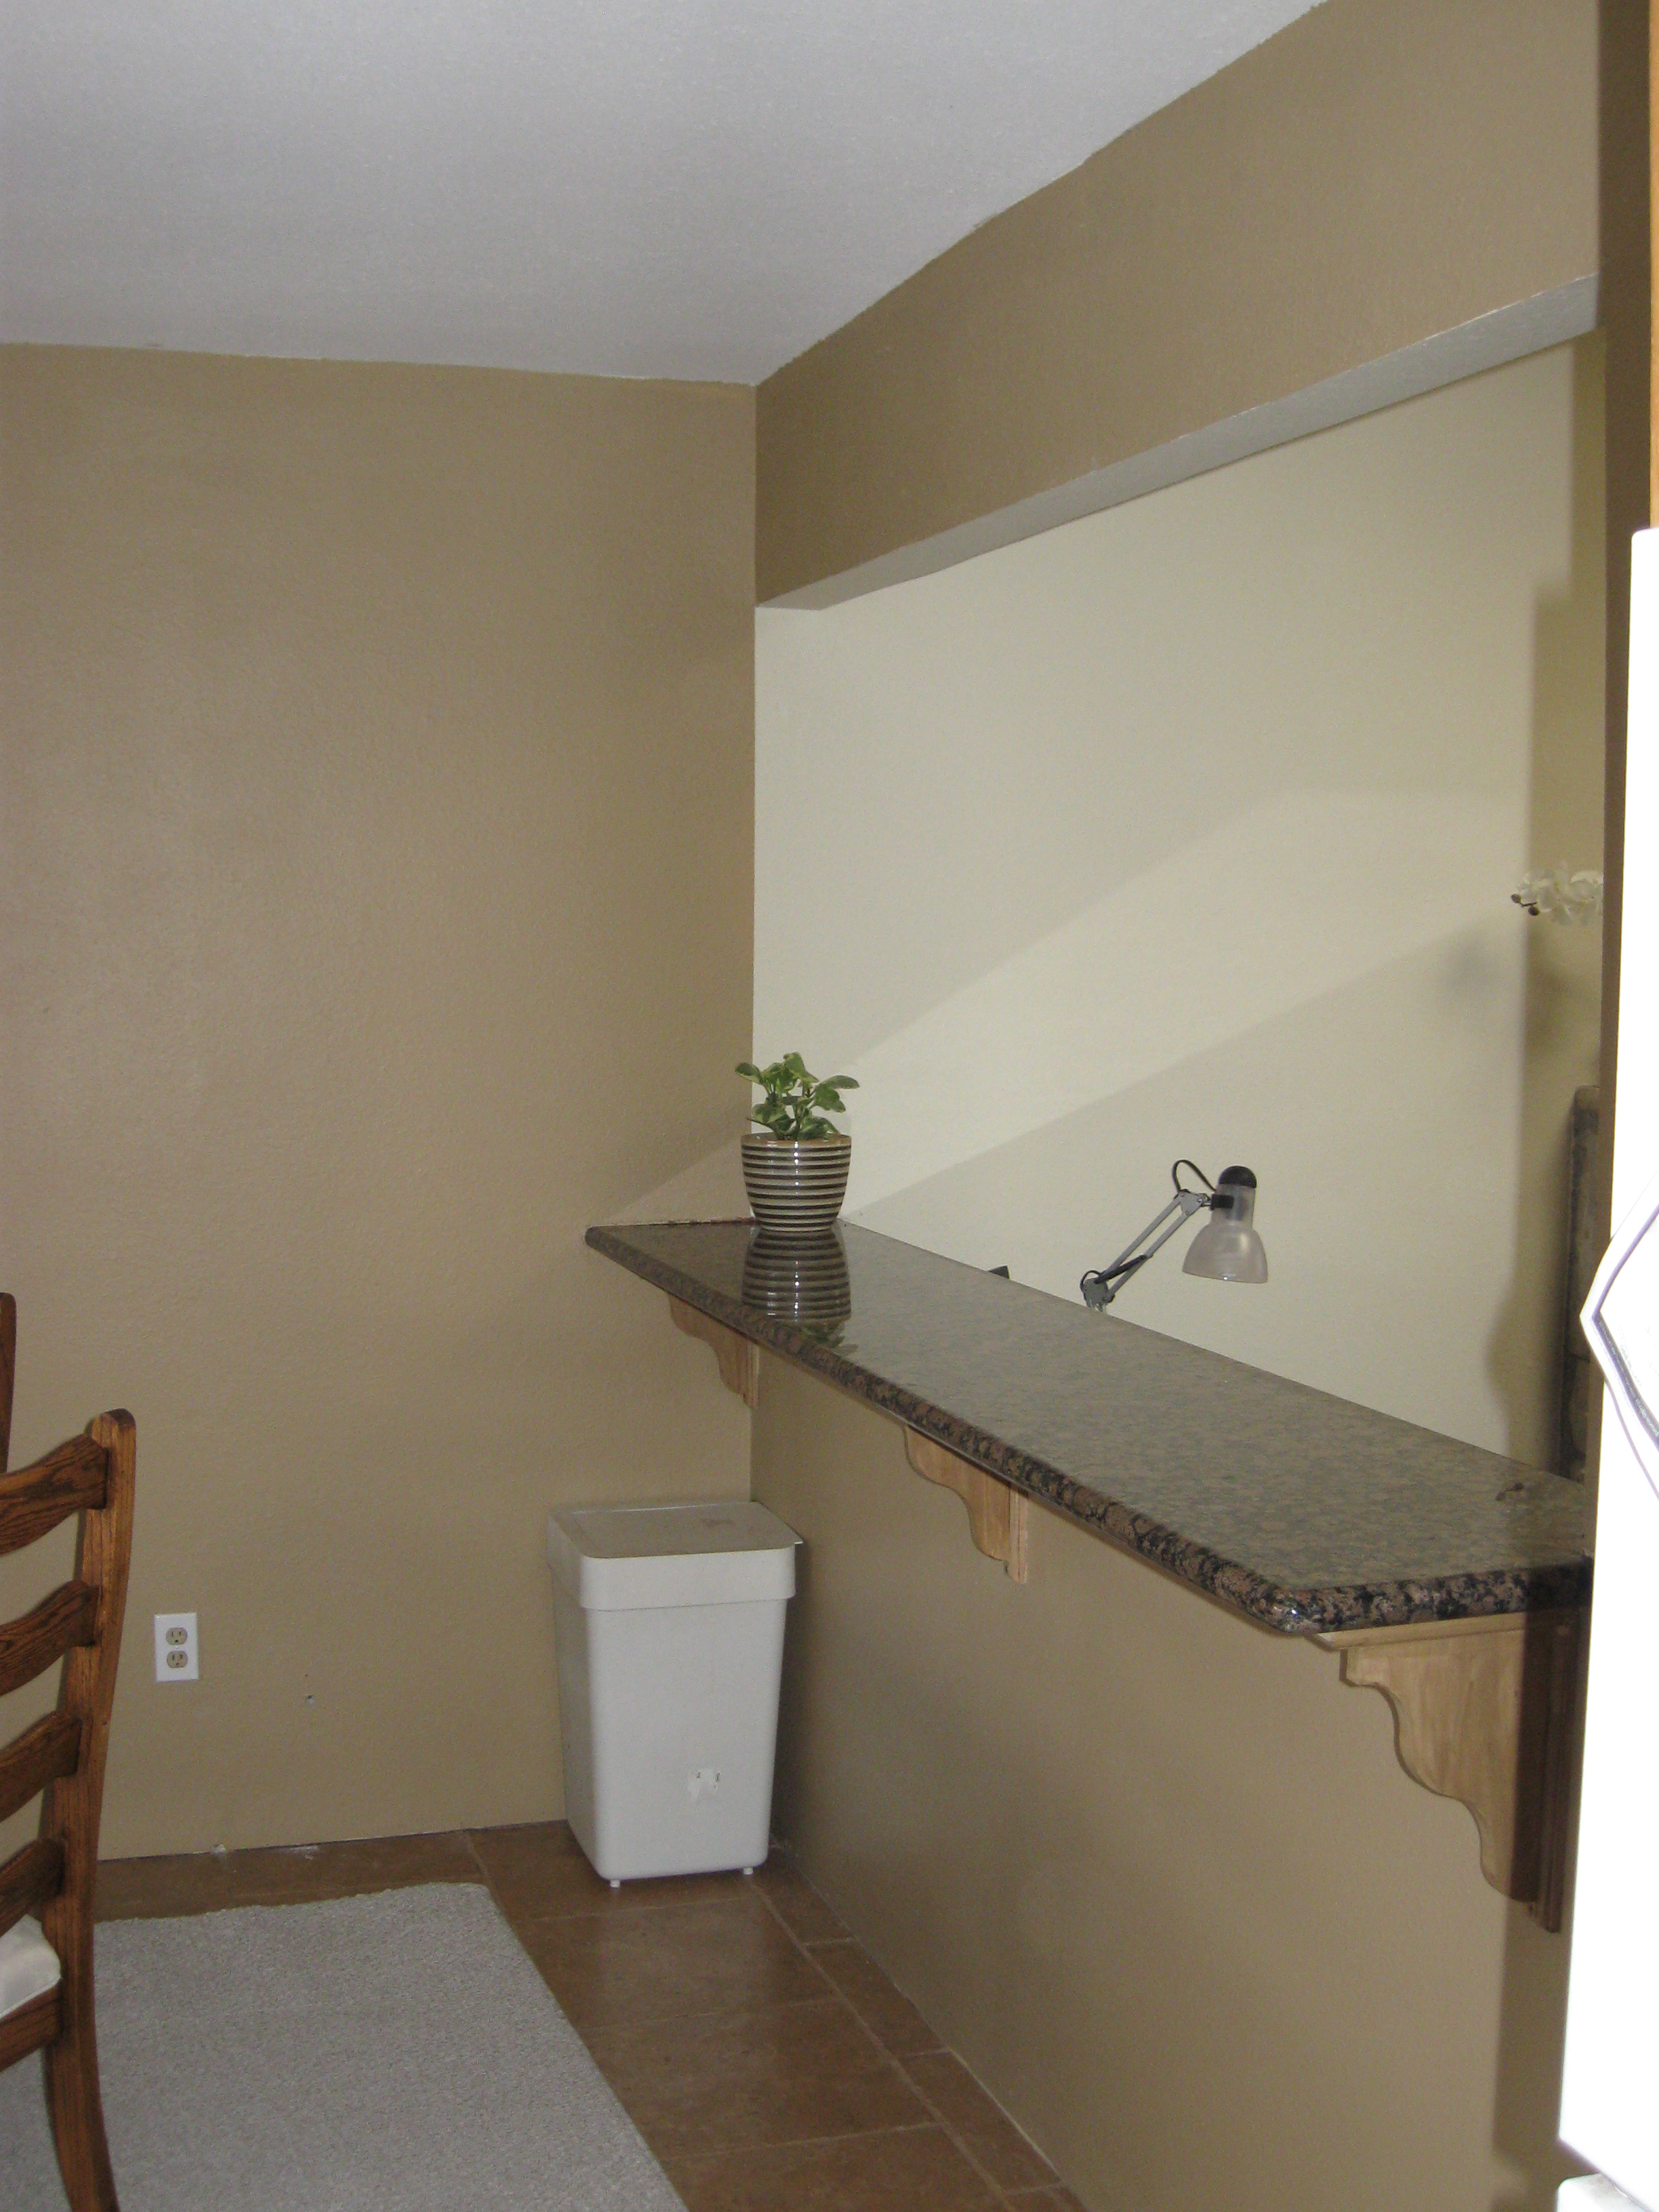
This was what we originally moved into…It was a major fixer foreclosure after all…

Then we re-painted and added a granite breakfast bar…Improvement…
We still needed a place for the dogs to sleep and they’d grown out of their crates. Our bedroom was not an option, since it was and still is the only dog free zone in the house. (These pups can snore like no other!) Therefore I had to get creative…
After measuring the space under the counter top and a standard Costco dog bed, I had wood cut to dimensions that would form a large box with a lid. After adding some heavy duty door hardware, and screwing everything together I let them test it out.
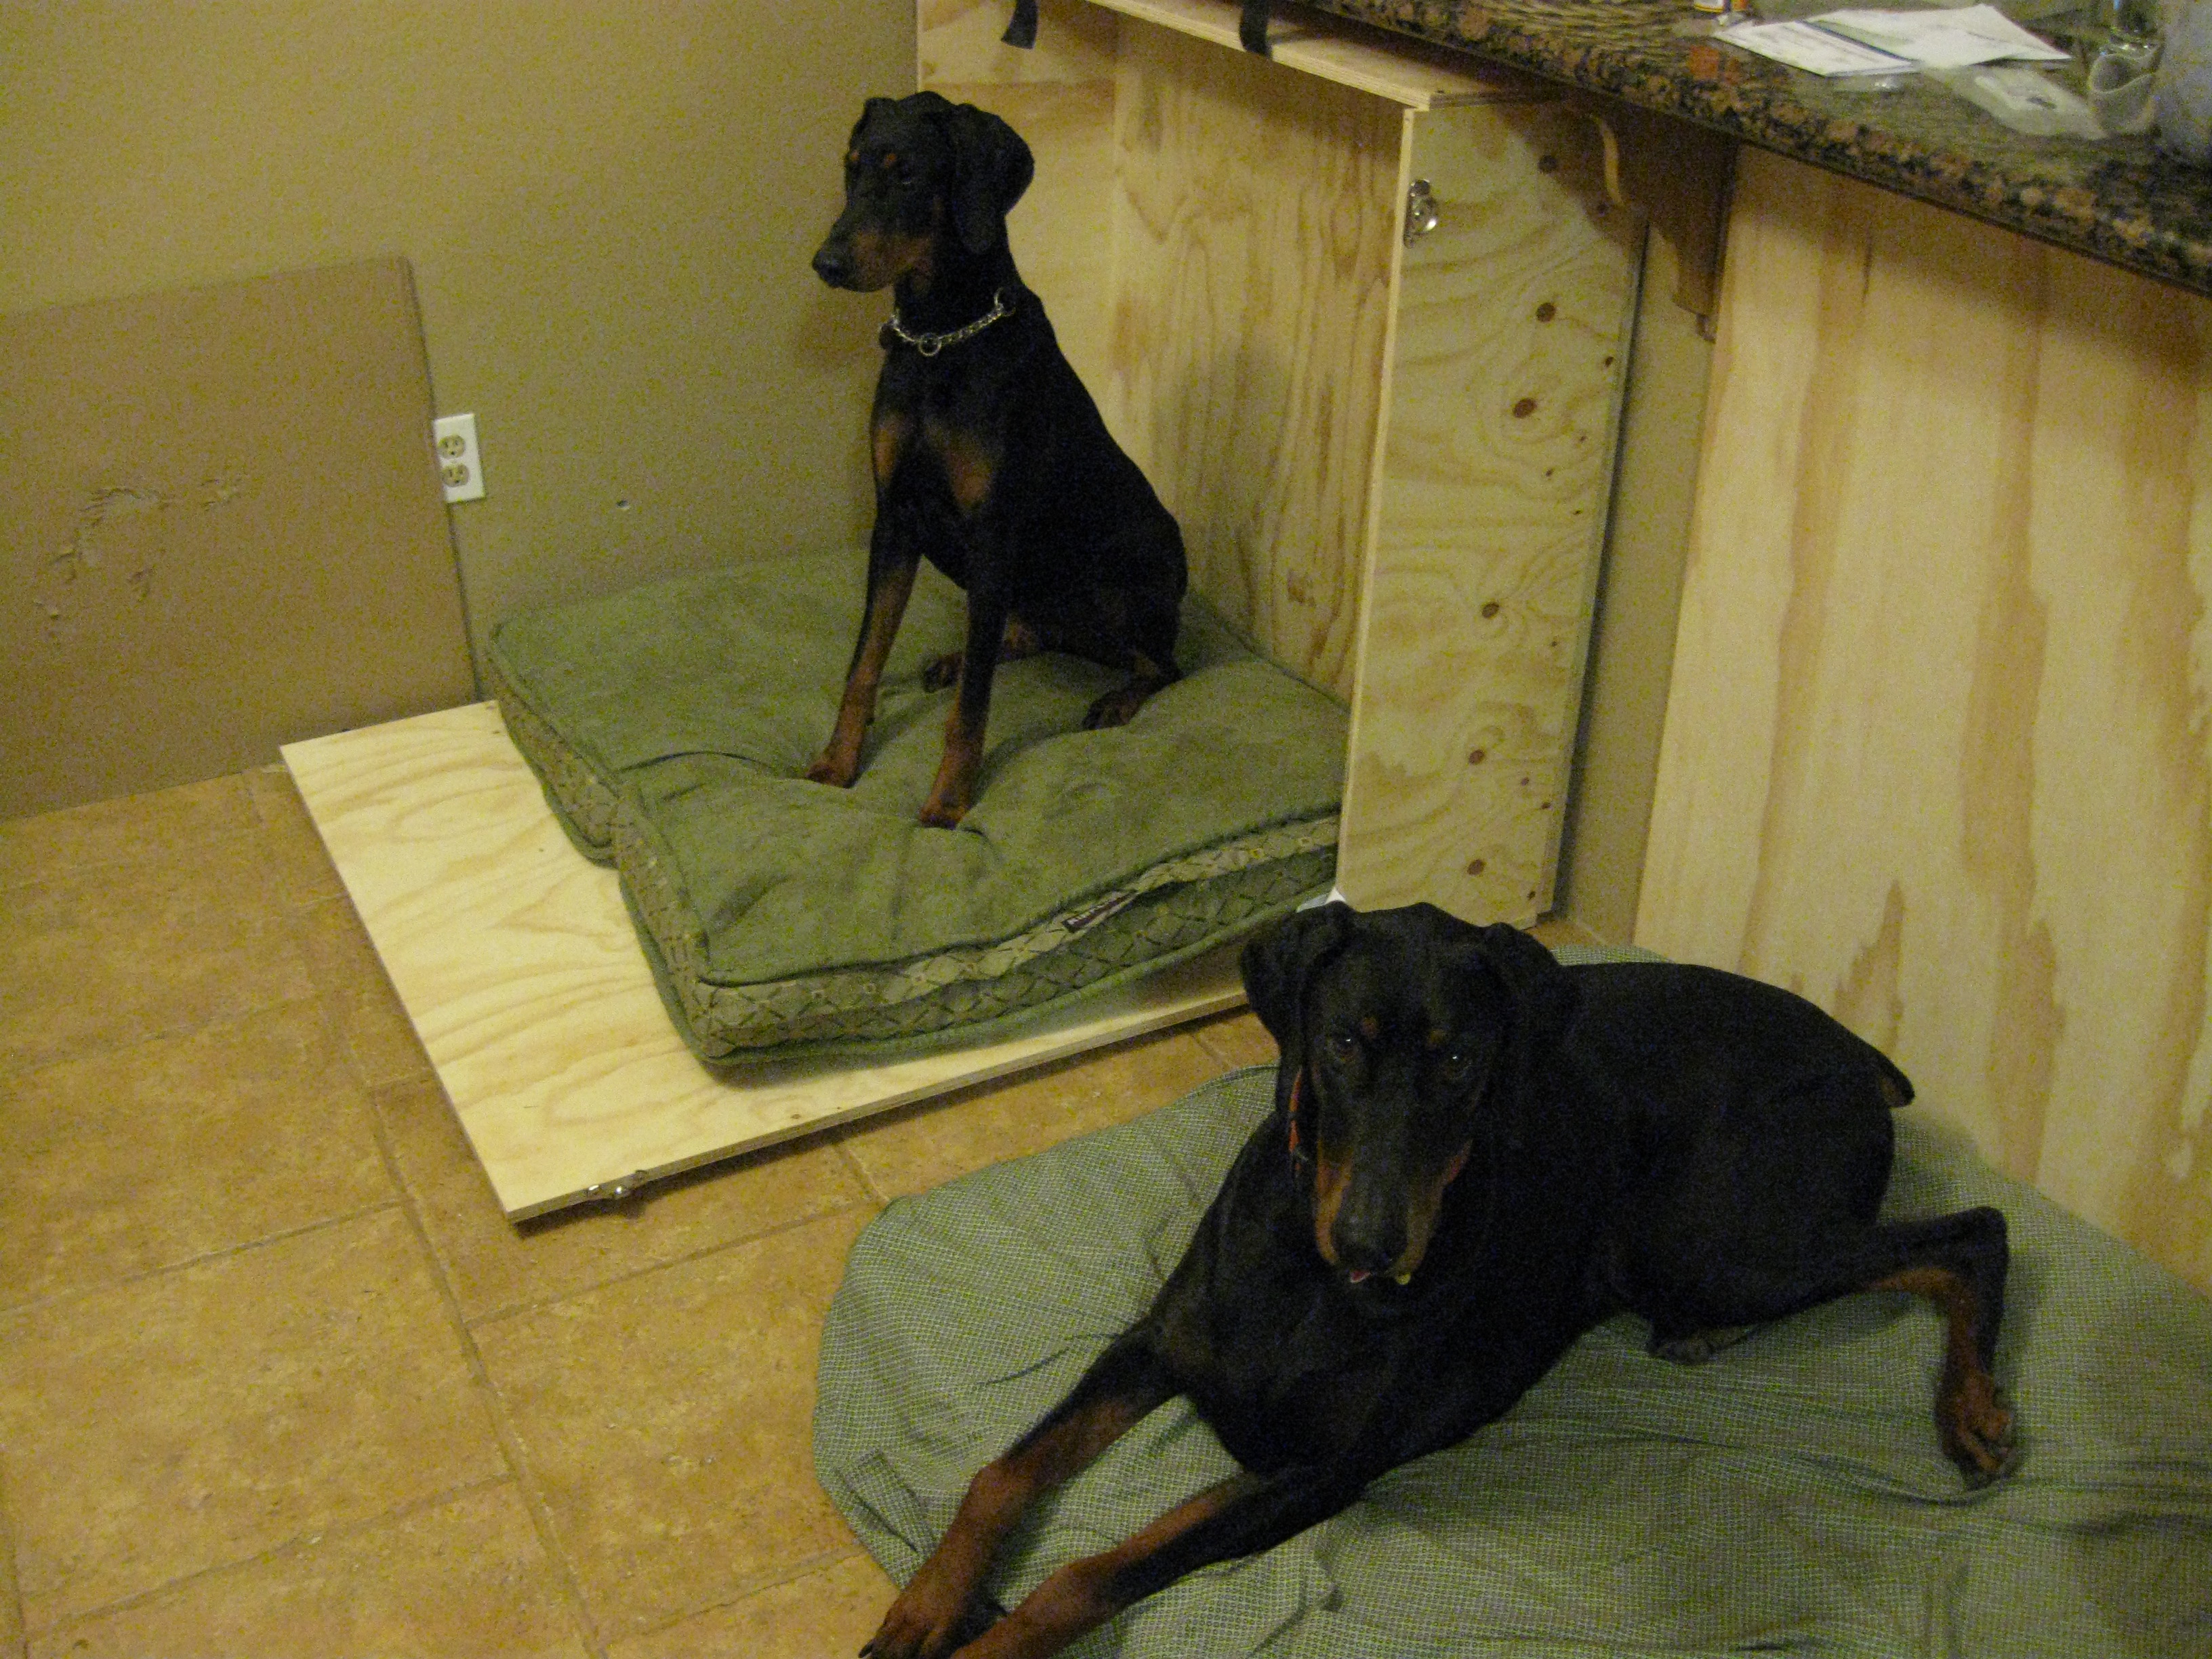
They didn’t seem to have an issue with it and I made sure the folding mechanism was working. Next came creating a second box and adding a cabinet facade…However the trick of the front details was that the extra pieces of wood were actually additional support pieces for when 90 lbs of doberman laid on them.
I had to strategically glue fake molding from Home depot to add detail to the facade of cabinets. One of the mistakes you’ll see at the bottom, that I originally made was not lining up the front piece perfectly with the box. Oh well, I luckily corrected it on the second Murphy Bed….

Then painted and added low profile hardware to give the look of cabinets and drawers. We also added a little safety chain and latch on the inside to prevent any injuries. (When completed the front piece was heavier than expected and we didn’t want to lose any toes from it falling). We also secured the back box portion to the wall for stabilization, just in case of an earthquake or even just rambunctious play.
Unfortunately this is a project from the first home so I don’t have any specific notes on the wood used, or the dimensions. However since these are custom pieces we hope you will at least find some inspiration from ours. We are currently in the process of making another set of dog beds for the new place. We’ll have to reveal those soon…
