Gator Done!… (Laying a Flagstone Patio)

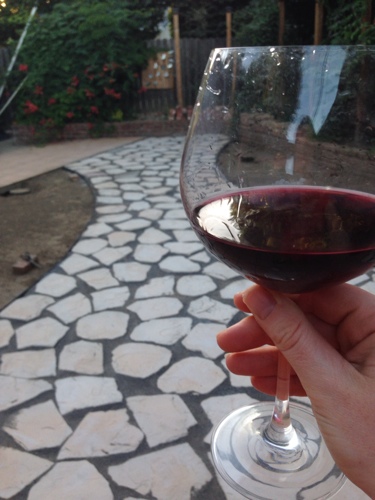
Disclaimer: Corny jokes and awful word puns reside at this blog. Especially after laying a flagstone patio, and the celebratory wine kicks in…

Here is where we left off…removing-weeds-and-sod-in-backyard.jpg
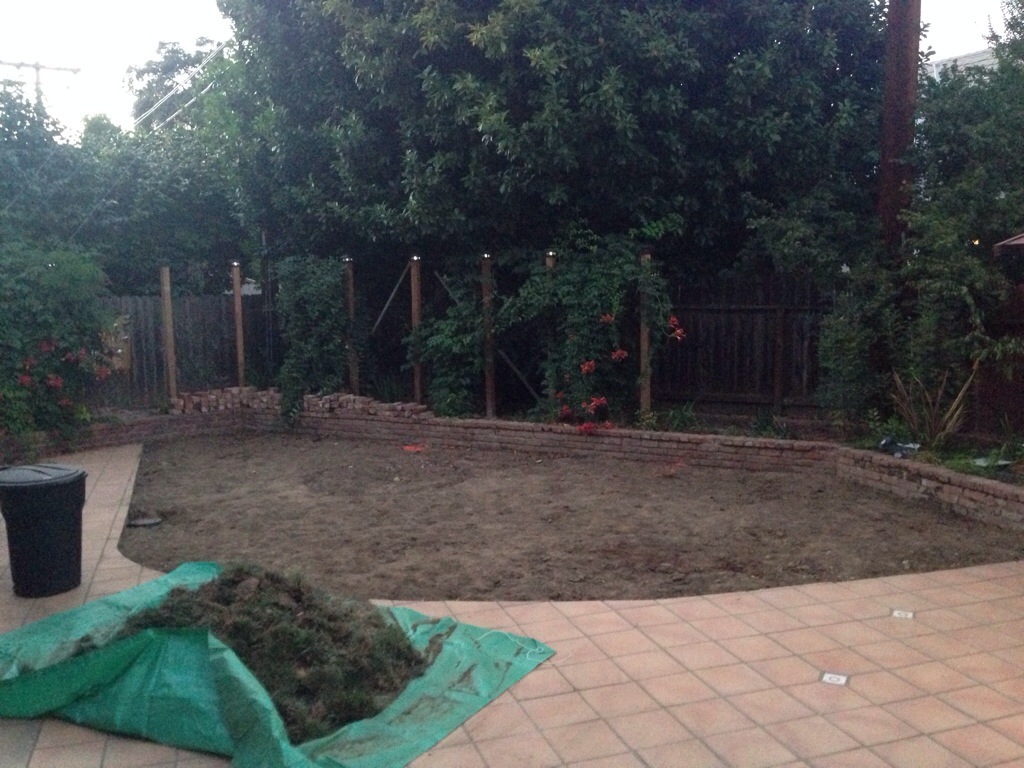
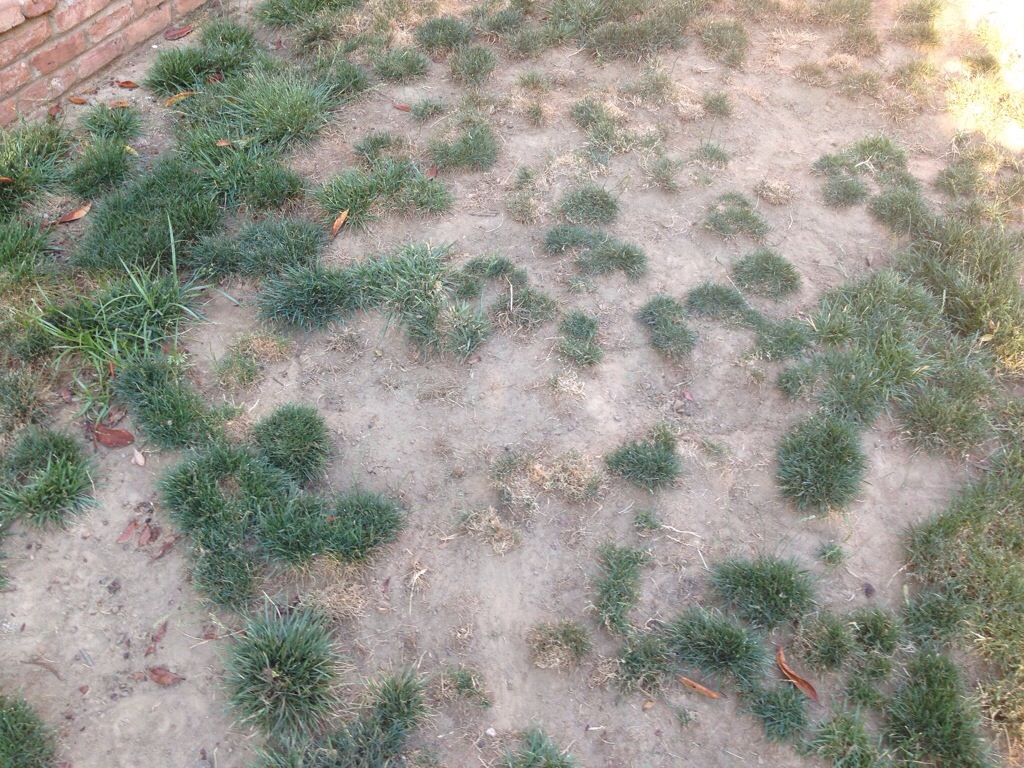
A barren wasteland of dirt that was once weed infested grass…There were two options, resod and start fresh, or get creative and drought “appropriate”…We went with option número dos.

If you haven’t heard, Northern California is under extreme drought conditions and even though there is talk of El Niño (freakish storm systems that finally bring rain every five years). We knew we’d be back to drought conditions again.

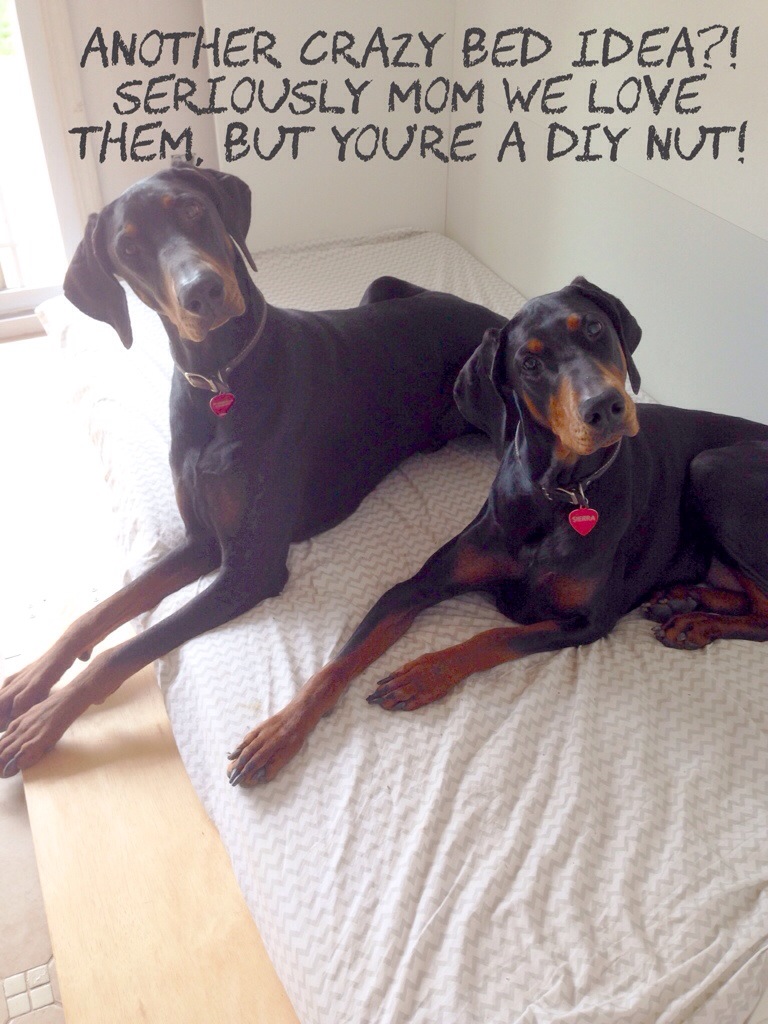
Also there are still these two hams to consider…floppy-ear-dobermans-begging-for-a-treat.jpg
 

Who were responsible for this…

20140621-215619-78979143.jpg

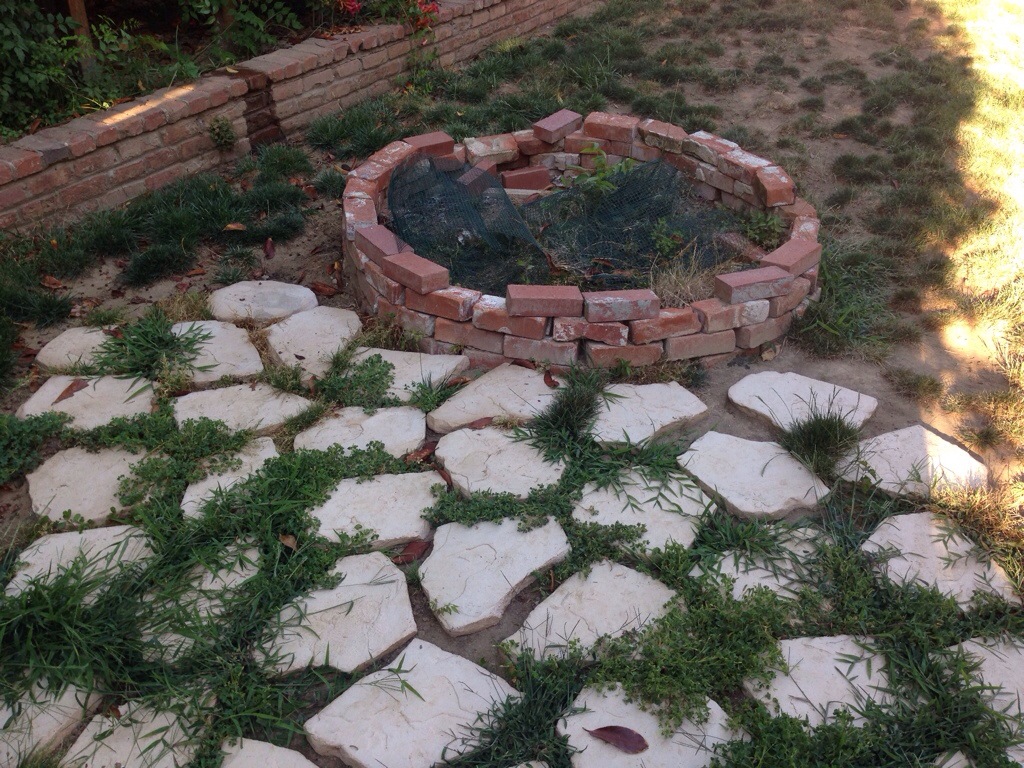
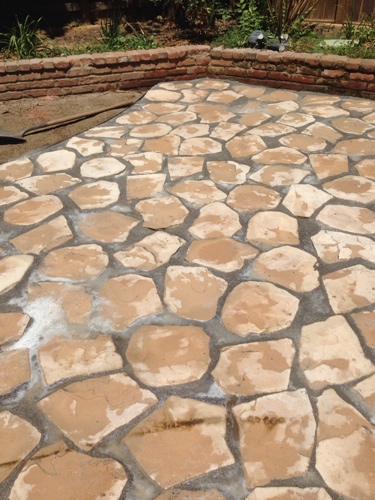
In our previous home we knew flagstone works for both us and the two bruisers. They like to sunbathe, we like less dust and dirt. However with this go- around we’d change it up a bit. Instead of real flagstone and piles of DG (decomposed granite) we’d opt for the faux flagstone and a product called Gator dust.

Why? Well, to be honest as we’re getting older we appreciate the easier and less expensive approach to projects. Plus Gator dust is a polymeric stone dust that hardens to a mortar-like joint when in contact with water. YAY FOR LESS DUST!

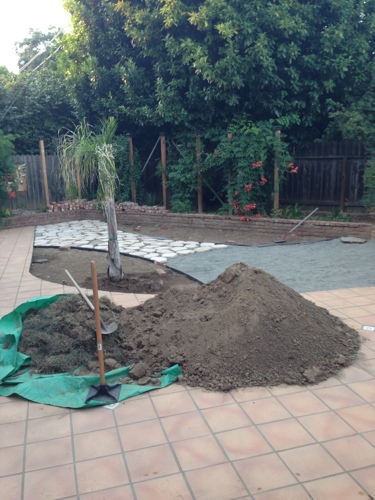
Heres how the project started…It began with multiple trips to Home Depot in (tiny cars) for many loads of Canyon oak faux flagstone, bender board, all purpose sand, and weed block. (This is when I sing, “some day my truck will come” and hubby rolls eyes…We’re saving up for one as we speak)

Followed by laying down said bender board, weed block, leveling sand, and the flagstone.

laying-flagstone-in-a-weekend.jpg

laying-home-depot-canyon-oak-faux-flagstone.jpg

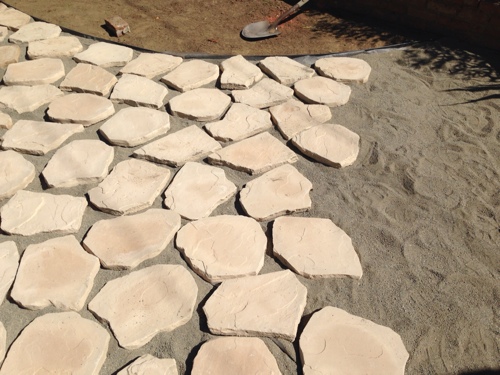
Once the flagstone is squared away, and you’re happy with the layout…(For any other uber-analytical, perfectionists out there, setting the flagstone was the worst part) “Honey wait I need to rotate that one 36 degrees!”

Then follow the instructions on the gator dust bag. Dump a bag on the flagstone, sweep, and repeat. Making sure all joints, cracks and crevices are filled and level with the stones. (Just remember if your flagstone joints are up to 4inches, use the “large joint” gator dust)

Then spray the stones, by carefully following the water schedule explained in the directions. Once done with the water, using a powered blower, blow the remaining puddles away.
spraying-large-joint-gator-dust-with-water-.jpg

blowing-puddles-off-with-blower.jpg


Let the patio cure for 24-48 hours, keeping the pups off it (if it’s even possible). Then sit back and enjoy with a glass of well deserved vino. Cheers and Happy Sunday everyone!

labdscaping-job-well-done-new-flagstone-patio.jpg

Stress=Digging…Does that make me part dog?

As my friends know when all is not right in my world, I do things like this…

20140621-212222-76942301.jpg
And this…

20140621-212248-76968864.jpg
When I’m stressed I like to randomly “excavate” yards. Four years ago I was so stressed that I installed four different flagstone and rock patios in our last home…It’s a sickness. Hubby jokes that I must be part dog, since only puppies seem to dig with a smile on their face.

This past weeks digging attack was due to work. Nothing awful is happening, but we are going through tremendous organizational changes so my little “cubicle world” has been rocked.

Also there was another reason for my need to update the backyard…My fabulous in-laws found us a gently used BBQ at an estate sale (normally $500) for instead $100! Score! We are super grateful for their keen noses for sniffing out that deal! …And what a great excuse to make-over the backyard!

We’ll be sharing the pics of our BBQ “central” in the coming weekends.

Now the third reason…Is well, I have visions of this being my backyard…

20140621-215346-78826808.jpg

20140621-215346-78826767.jpg

20140621-215346-78826884.jpg
But sadly we have this…

20140621-215619-78979143.jpg

20140621-215620-78980898.jpg

20140621-215620-78980055.jpg
A grossly ignored backyard, that was waiting patiently for the day when I’d come home stressed out, and running for the shovel.

A week later, we’re now knee deep into the project and will be sharing the pics as we go. (Right now there is nothing much to show) However we hope to have a backyard deserving of our new BBQ and summer parties very soon…Happy Sunday everyone!

Happy Fathers Day!

Better late than never…We only sort of fell off the face of the earth this weekend…Or at least we could’ve stepped off it…

20140615-175254-64374732.jpg
This was one of the many beautiful views from our Father’s Day weekend. My dad is a hang glider pilot…41 years he’s been jumping off mountains with nothing but essentially a kite…And for 31 years I’ve been his kid; camping, trekking and driving to some of the most gorgeous views (and a few not so gorgeous campsites) all over Northern California.

20140615-175927-64767165.jpg

20140615-175928-64768409.jpg
This was Eric’s first time (and the pups) to experience the hang gliding “culture” first hand. A group of awesome guys and gals (with just enough adrenaline addiction) to soar motor less 14, 15, 16,000 feet in the air.
Do I hang glide? Absolutely not! Scared out of my pants of heights! Only one in the family to not have jumped out of a plane or soared in the sky. But I do have an incredible appreciation of the nature, company and camping experiences that come with the flying community.

20140615-181542-65742423.jpg

20140615-181539-65739987.jpg

20140615-181541-65741220.jpg
Thanks pops for raising a daughter who loves Northern California, would choose a pair of hiking boots over high heels and a deep respect for Mother Nature. Happy Father’s Day! And happy Sunday everyone!

PS…We’ve received a lot of “travelling with big dogs” questions this past year. In the coming weeks we’ll be showcasing our favorite travel and camping gear for pups just in time for summer trips.

Ikea Hack! SIDE MURPHY BED /dog bed…Again?!

Have you ever completed a DIY project, were proud of it, pinterest it, and, then you lived with it….Finally realizing…This sh—(stuff) ain’t workin for us!

Remember I had hacked an Ikea day bed, turning it into a trundle bed/ dog bed. Everything was going fine except one problem, “WE” were the problem.

It wasn’t a bad concept, and it was useful some of the time. We admittedly just got lazy, (like letting pups sleep on the comfy bench portion). Also it took up too much space in our little place.

Honestly I seriously started to miss the functionality of the old dog Murphy beds from our first home. This is also when I look over at the hubs, and say “you were right…you know your project obsessed wife was going to change her mind like 4 more times” then ask him sweetly to help me lug the daybed up into the guest house.

Some bleach, new mattresses…We have an actual bed again! Now on to recreating dog Murphy beds…

20140607-071514-26114640.jpg

This time the design was going to be a cross between this…

20140607-071712-26232964.jpg

20140607-071712-26232912.jpg
And this…

20140607-071806-26286577.jpg

We still had an extra Ikea mattress, and the piece of birch we used for “upholstering” the bench. I was hoping to piece the Murphy bed together with scrap wood lying around the house, when I found this…

20140607-072227-26547675.jpg
Waited a week, they knocked it down to $49.90…Huzzah!
I had a frame/box that perfectly fit the twin Ikea mattress.

20140607-072825-26905981.jpg
The only modification we had to make from the instructions was move the bottom/side a half inch to fit the piece of birch by re-drilling new holes.

20140607-073126-27086962.jpg
Next came the front piece, which was pretty easy, just bought some pieces of birch the same 6ft length, and with finishing nails and wood glue attached them to the front.

20140607-073515-27315553.jpg

20140607-073514-27314622.jpg

20140607-073513-27313790.jpg

20140607-073516-27316511.jpg
Followed by staining the piece with minwax polyurethane & stain in pecan

20140607-073640-27400082.jpg
The last part was the easiest, by adding a piano hinge.

20140607-073820-27500571.jpg
And also a locking mechanism…

20140607-073910-27550239.jpg

Overall you’ll noticed we set the piano hinge and front of the Murphy bed halfway in the box, to allow for more space on the floor when the bed is down.

20140607-074211-27731411.jpg

20140607-074212-27732365.jpg

Here is our final “Progress” pic, we’re still in the process of adding trim, etc to make it look less like a random box and more like a tall bar.

20140607-074525-27925034.jpg
But oh how functional it is! Dog beds disappear! You can also re-create this side Murphy bed ikea hack as an extra bed for guests. Cause I guess that’s what most people would use a Murphy bed for. (Com’on you’re not all crazy dog mamas?!)

Happy Sunday everyone!

Psst…We’ve recently improved the design for our Side Murphy Bed, click here for more details.


Stealth Microwaves and Toasters…Hiding those pesky kitchen appliances

Remember when…

20140531-104716-38836213.jpg
…the appliances took up the counter…Remember when…

20140531-105300-39180977.jpg
Microwaves were a total eyesore…
(Warning: cheesy blog post intros always occur when country music is playing in the background) Hopefully you don’t have that song stuck in your head for the rest of the day.
Luckily between countertops and backsplash we remembered to include our little kitchen appliance update. Notice how the “after” pics are missing a few pesky coffee makers, and a microwave…

20140531-110518-39918794.jpg
Well, we did the unthinkable for those of us with a tiny kitchen don’t do, we high jacked much needed cabinet space…before…

20140531-110829-40109748.jpg
After…

20140531-110937-40177097.jpg
Before…

20140531-111025-40225593.jpg
After…

20140531-111109-40269313.jpg
And finally found the perfect place for our toaster and blender…

20140531-111235-40355309.jpg
All it took was knocking out and removing a few extra shelves, and having our electrician friend wire a couple outlets to the inside of a shelf for the microwave. We did lose some valuable kitchen “real estate” for storage but right now we’re changing our lifestyle to “less is more”. (I don’t know if it’s because we’re now in our thirties, or if we’ve just lived in little houses for too long that we’ve turned this corner?) Perhaps you have a couple cabinets that just need some organization too?… Having a stealth toaster and microwave…in Martha’s famous words…”it’s a good thing” Happy Sunday everyone!