
Breaking down a few garage projects, one in particular was hiding left over grout on the wood paneling. (I promise there will be cute dog cameos at the end)
The previous owner must have installed a tile backsplash for his workbench. Unfortunately that tile was long gone by the time we moved in and instead we had this: 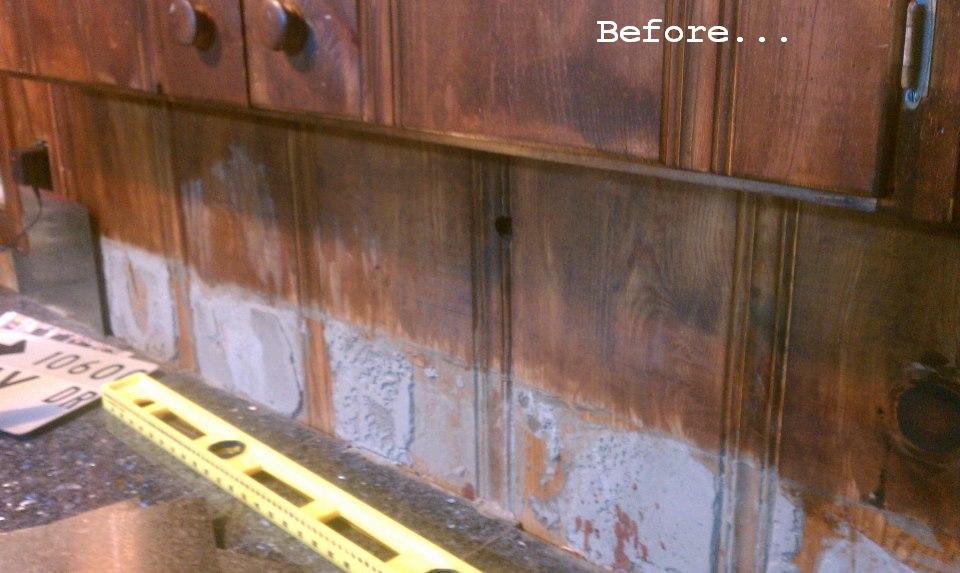
I had two options:
1. Scrape away, sand, then attempt to stain which would probably take hours
2. Hide it
I opted for choice #2. Only problem was I’m a tiling “kindergartener” and I didn’t want to attempt to match up tile/workbench or spend a bunch of money.
This is when I stumbled into Home depot and found squares of roof flashing at $0.78 cents a pop! I decided to try and “tile” the backsplash with metal roof flashing and screws. At least if it failed I could just unscrew it and remove the flashing and no one would know my “flashing tile” craziness. Here are some initial “in progress” picture where I tested one layer:
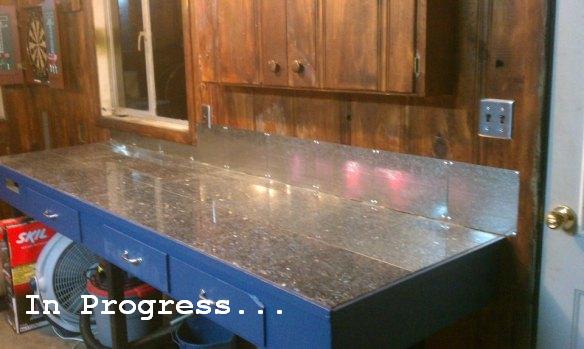
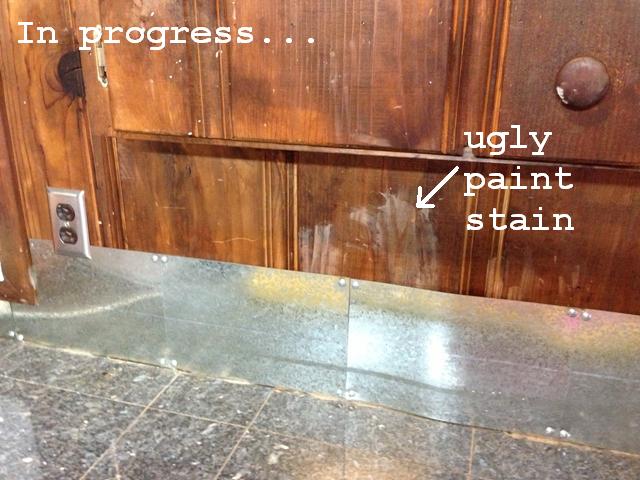
I realized the idea not only worked but it looked halfway decent and man cave-ish! I needed to finish off the rest and add another layer to hide old paint stains, holes in the wood etc. Here’s the step by step guide:
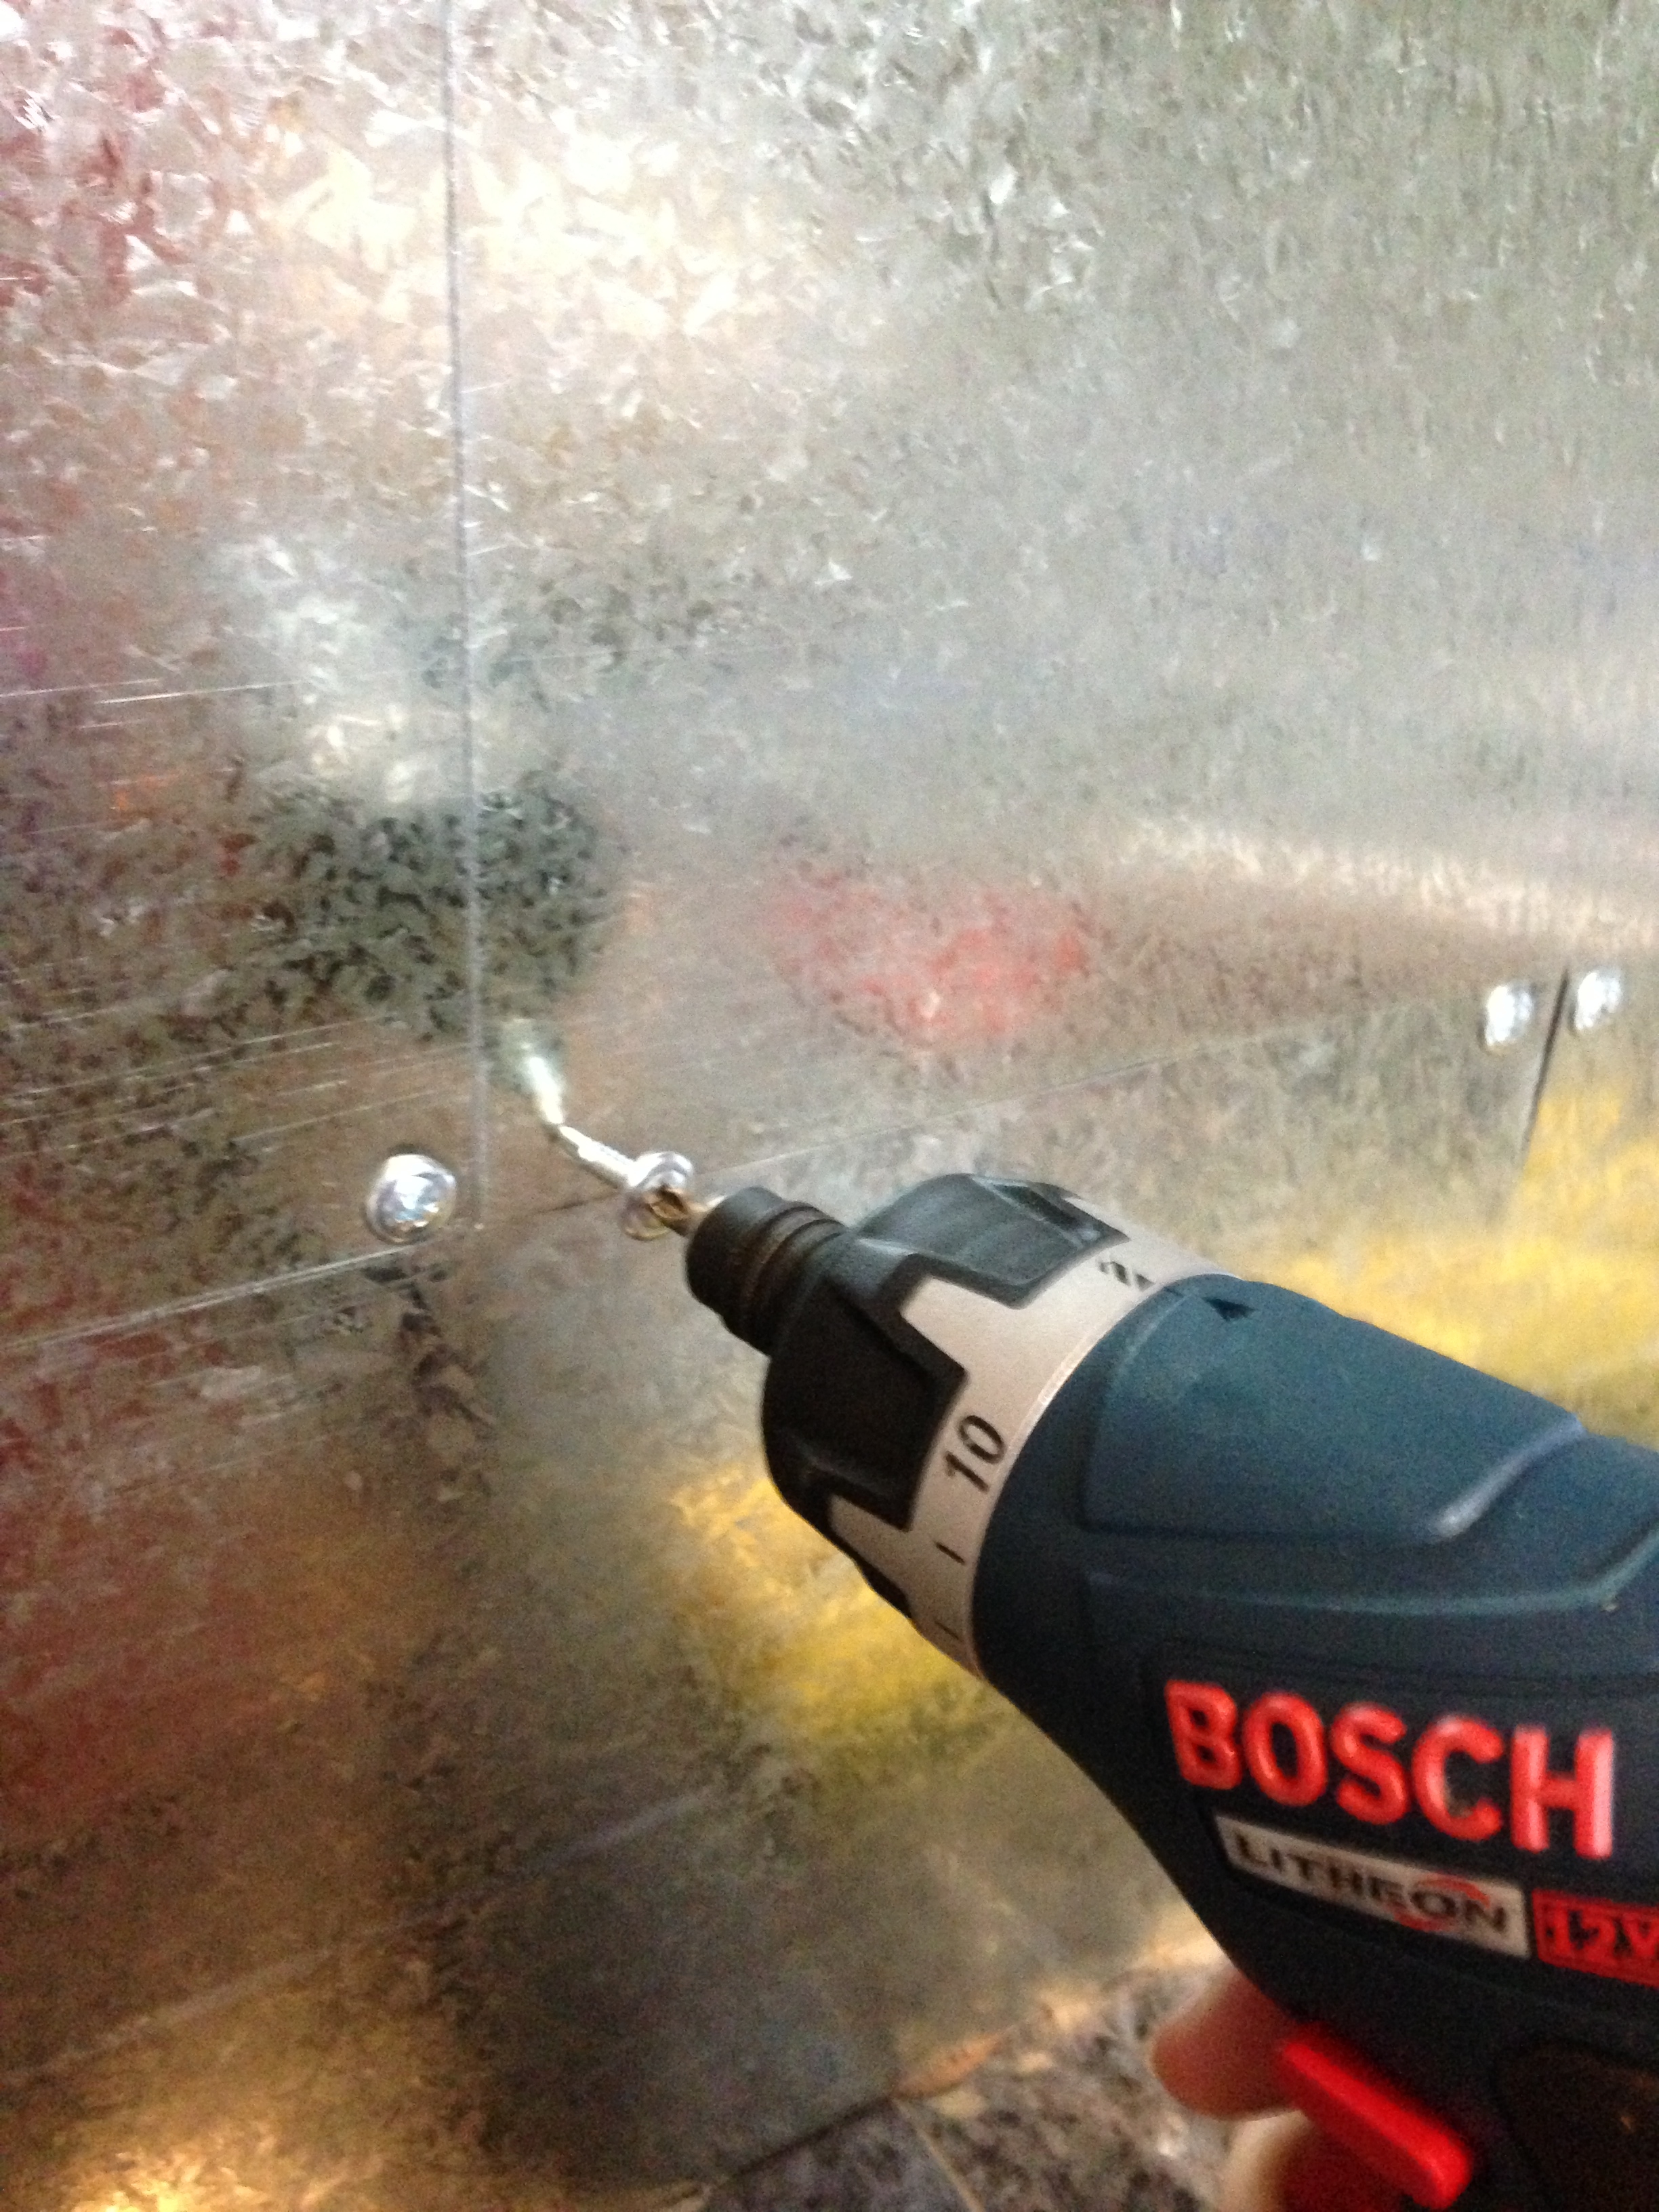
1. Gather the essential tools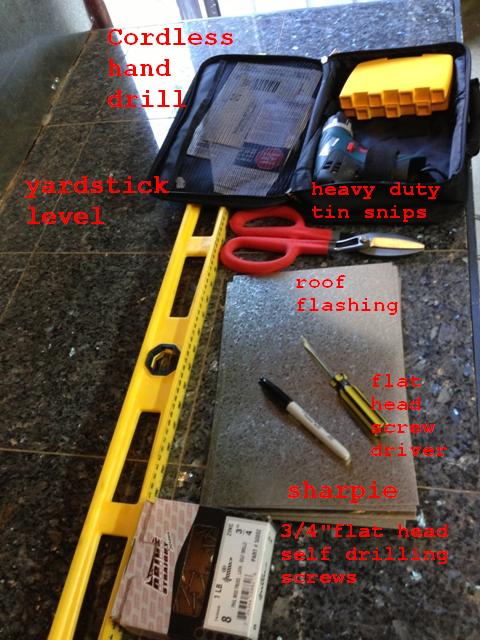 *Ooops, lingo self-correction… The screws are not flat head, but standard phillips head, but “flat” in reference to how they need to be flat and flush with the flashing/wall, not sticking out where they can poke someone.
2. Temporarily remove any outlet covers. Then start measuring the amount of tiles you will need for the area, taking into account, wall outlets and staggering the flashing for a tile effect. Trace the cuts you will need with the sharpie and ruler. If you’re worried about a level line, you can also trace guidelines/points along the wall using the level yardstick and sharpie. (Because I was working over old grout I had to check the levels as I went)


3. Once you are satisfied with a flashing placement, hold it firm to prevent bubbling(helps to have a second hand) and drill 1 screw into each corner. If you’re worried about symmetry you can mark each corner with the sharpie where you want to drill a screw.
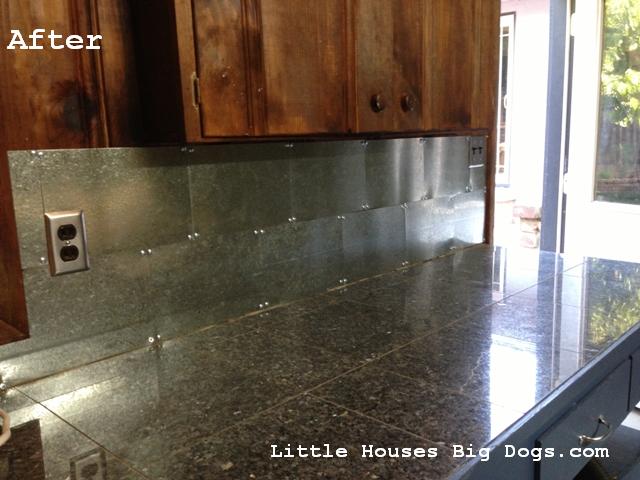
4. Keep going, checking your progress with the level, until you’ve reached your intended end. Place your outlet covers back on, and step back to view your finished product…Total cost about $12
Pups did not want to be left out, and crashed a few pics as usual…


