Framing Huge Art for $30

It’s that time of year again…Weather is perfect…Campsites are being reserved…And the last thing we want to do is be stuck at home…California is calling us…  


 Which is why it was kismet to find an enormous map of California at the Sacramento antique fair. I’ve been wanting one for our guest room/office for the past year. There are so many places to camp, enjoy, and discover in our home state that I wanted to mark off the travel bucket list. This map will be a visual tracker of our progress and very cool art piece. 

Plus maps seem to look fabulous against (already painted) baby blue walls… 

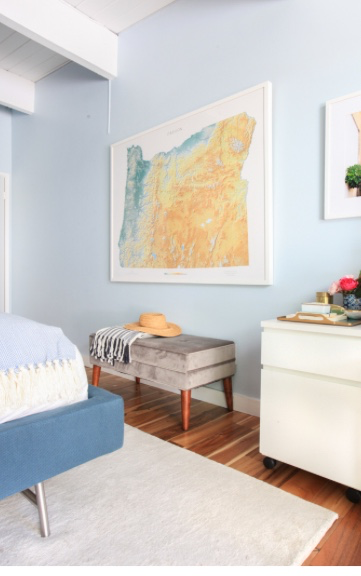
 (An example from the amazingly talented Emily Henderson’s guest room) Well, I’ve got blue walls too why doesn’t it look the same? Ours just looks sad?!

 I quickly realized the map needed a smooth backing and frame to finish it off. Yet to custom frame a map like this would cost me hundreds of dollars…So in the budget conscious style of LHBD we faked it. 

Here’s how we did it… (This is also super temporary should you be renting or just like to change your art around constantly)

  We bought some very thin cabinet backer board cut by Home Depot to the dimensions of the map. Then duct taped the two pieces together.   Command strips were our friend, lots and lots of them, all over the back of the boards. 

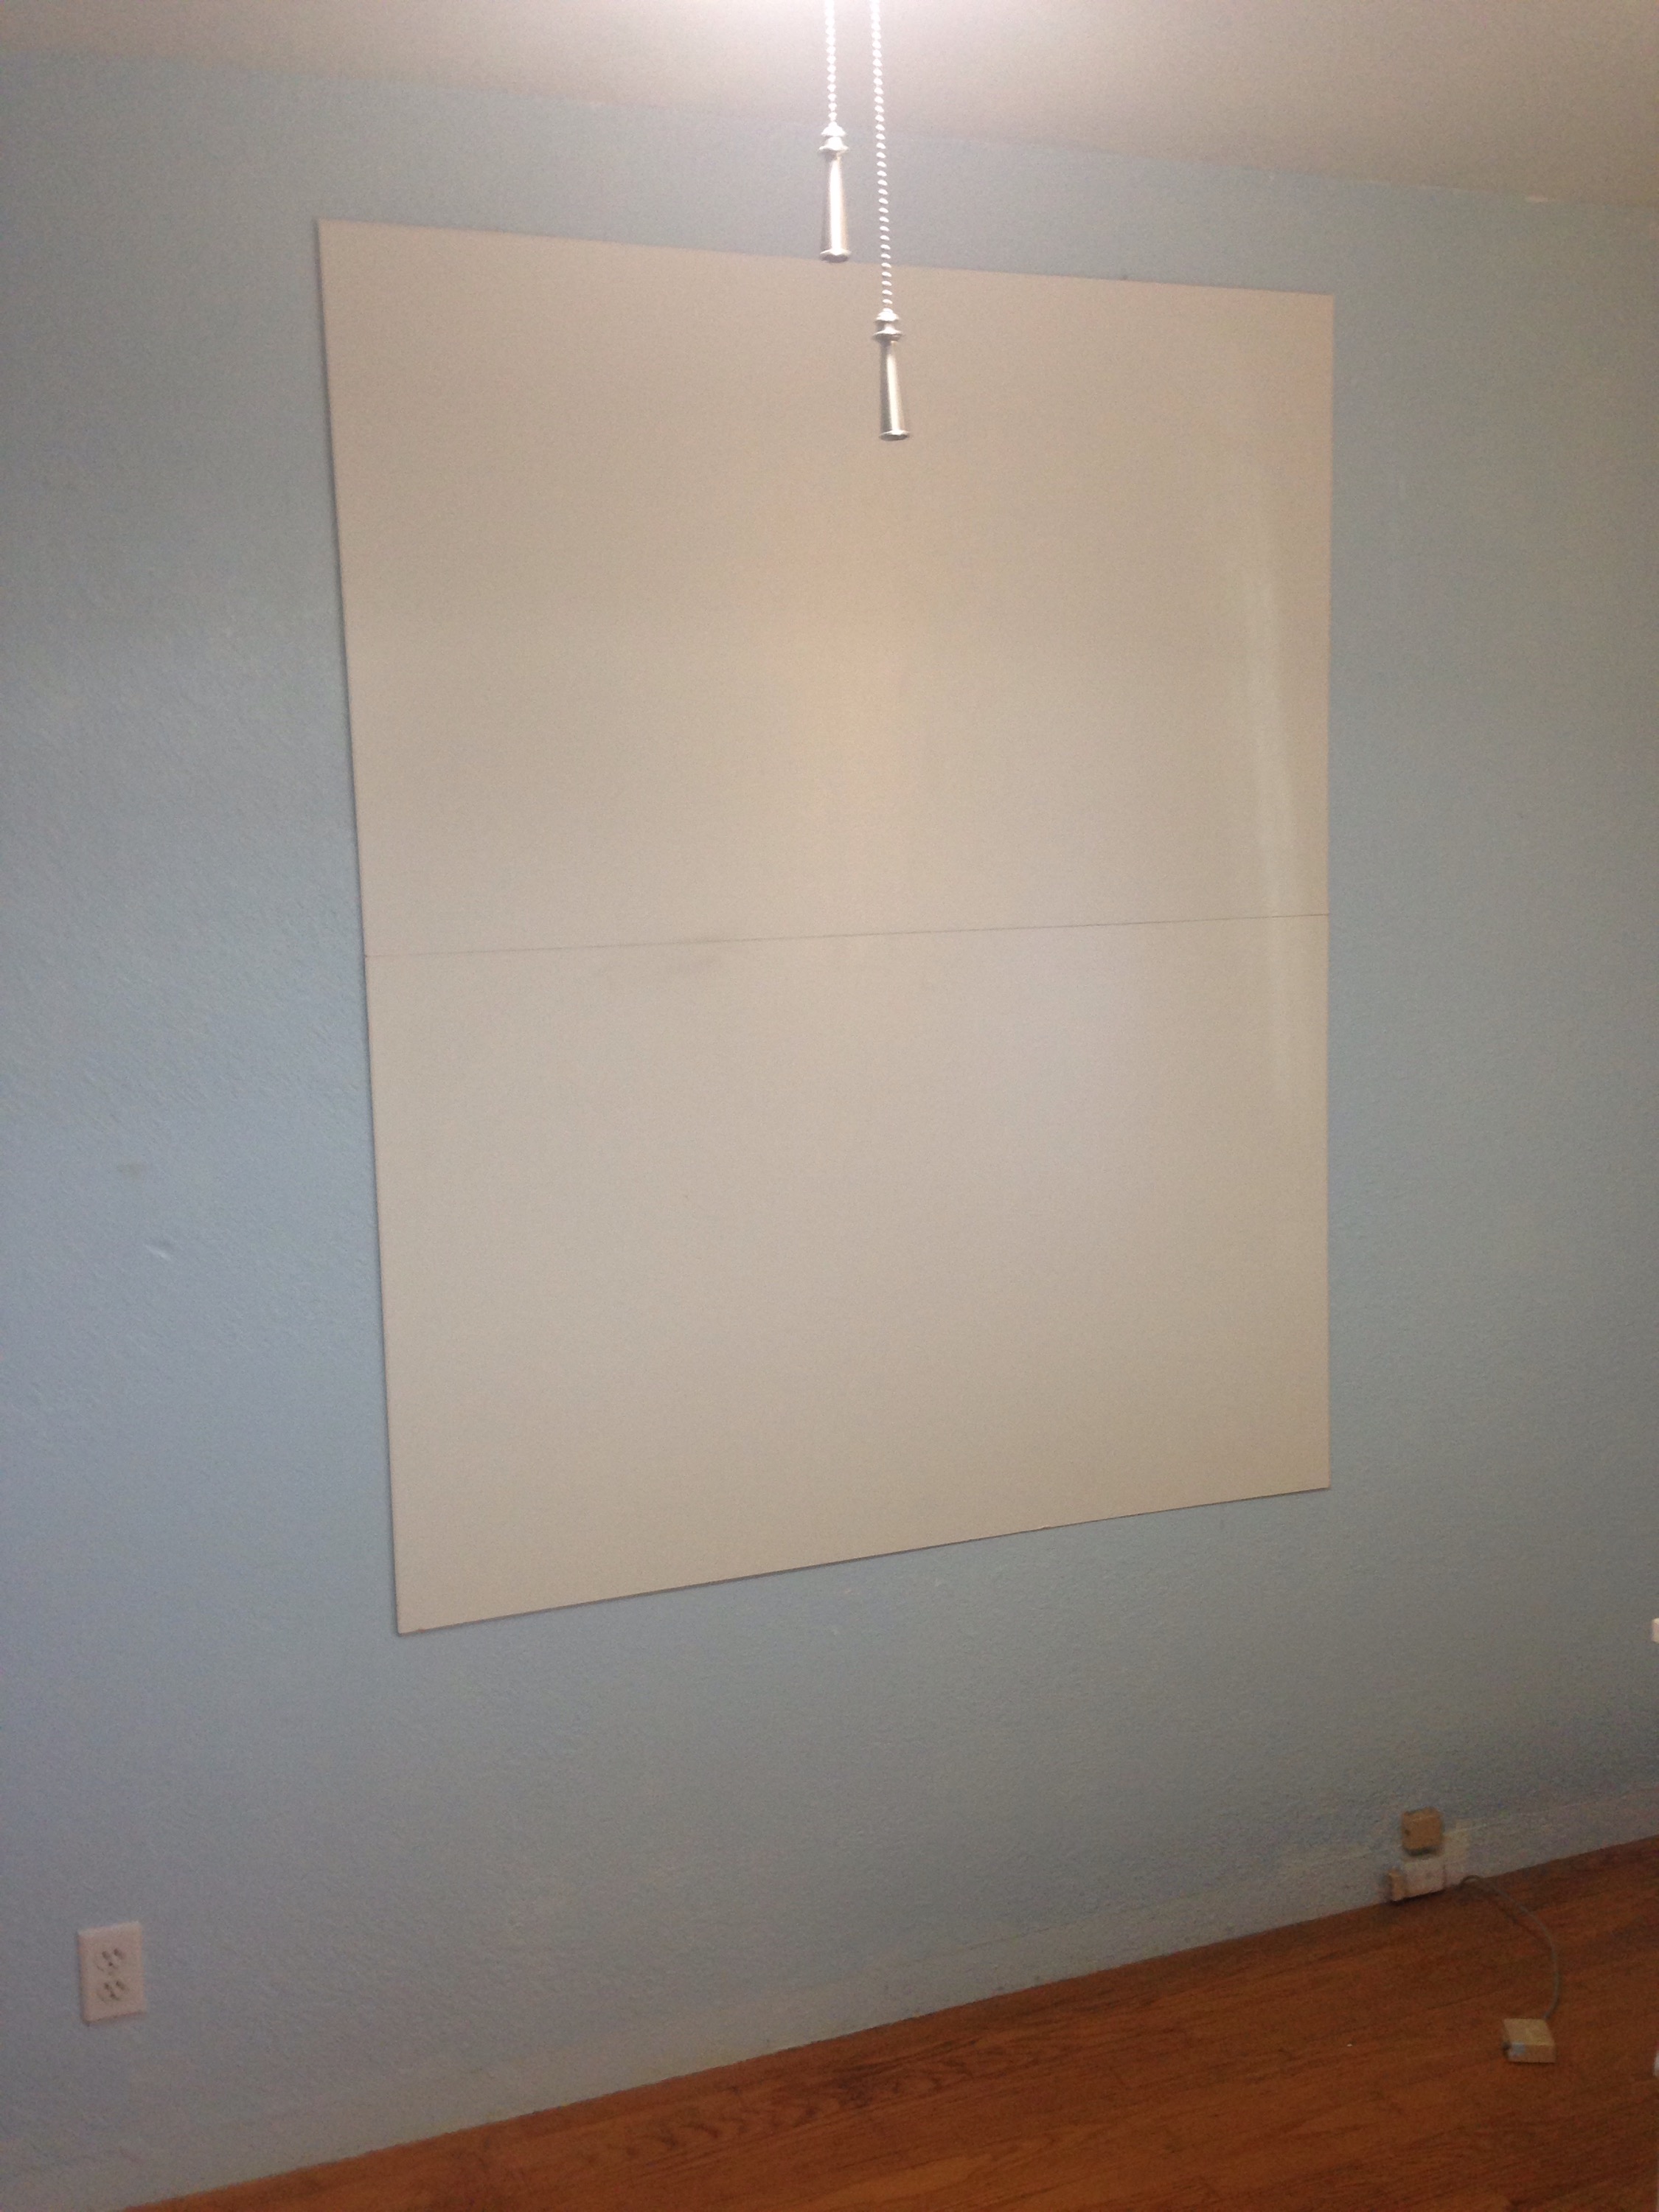
 Then stuck the boards to the wall. 

We hung the map using poster (light weight) command strips flattening it against the boards. 

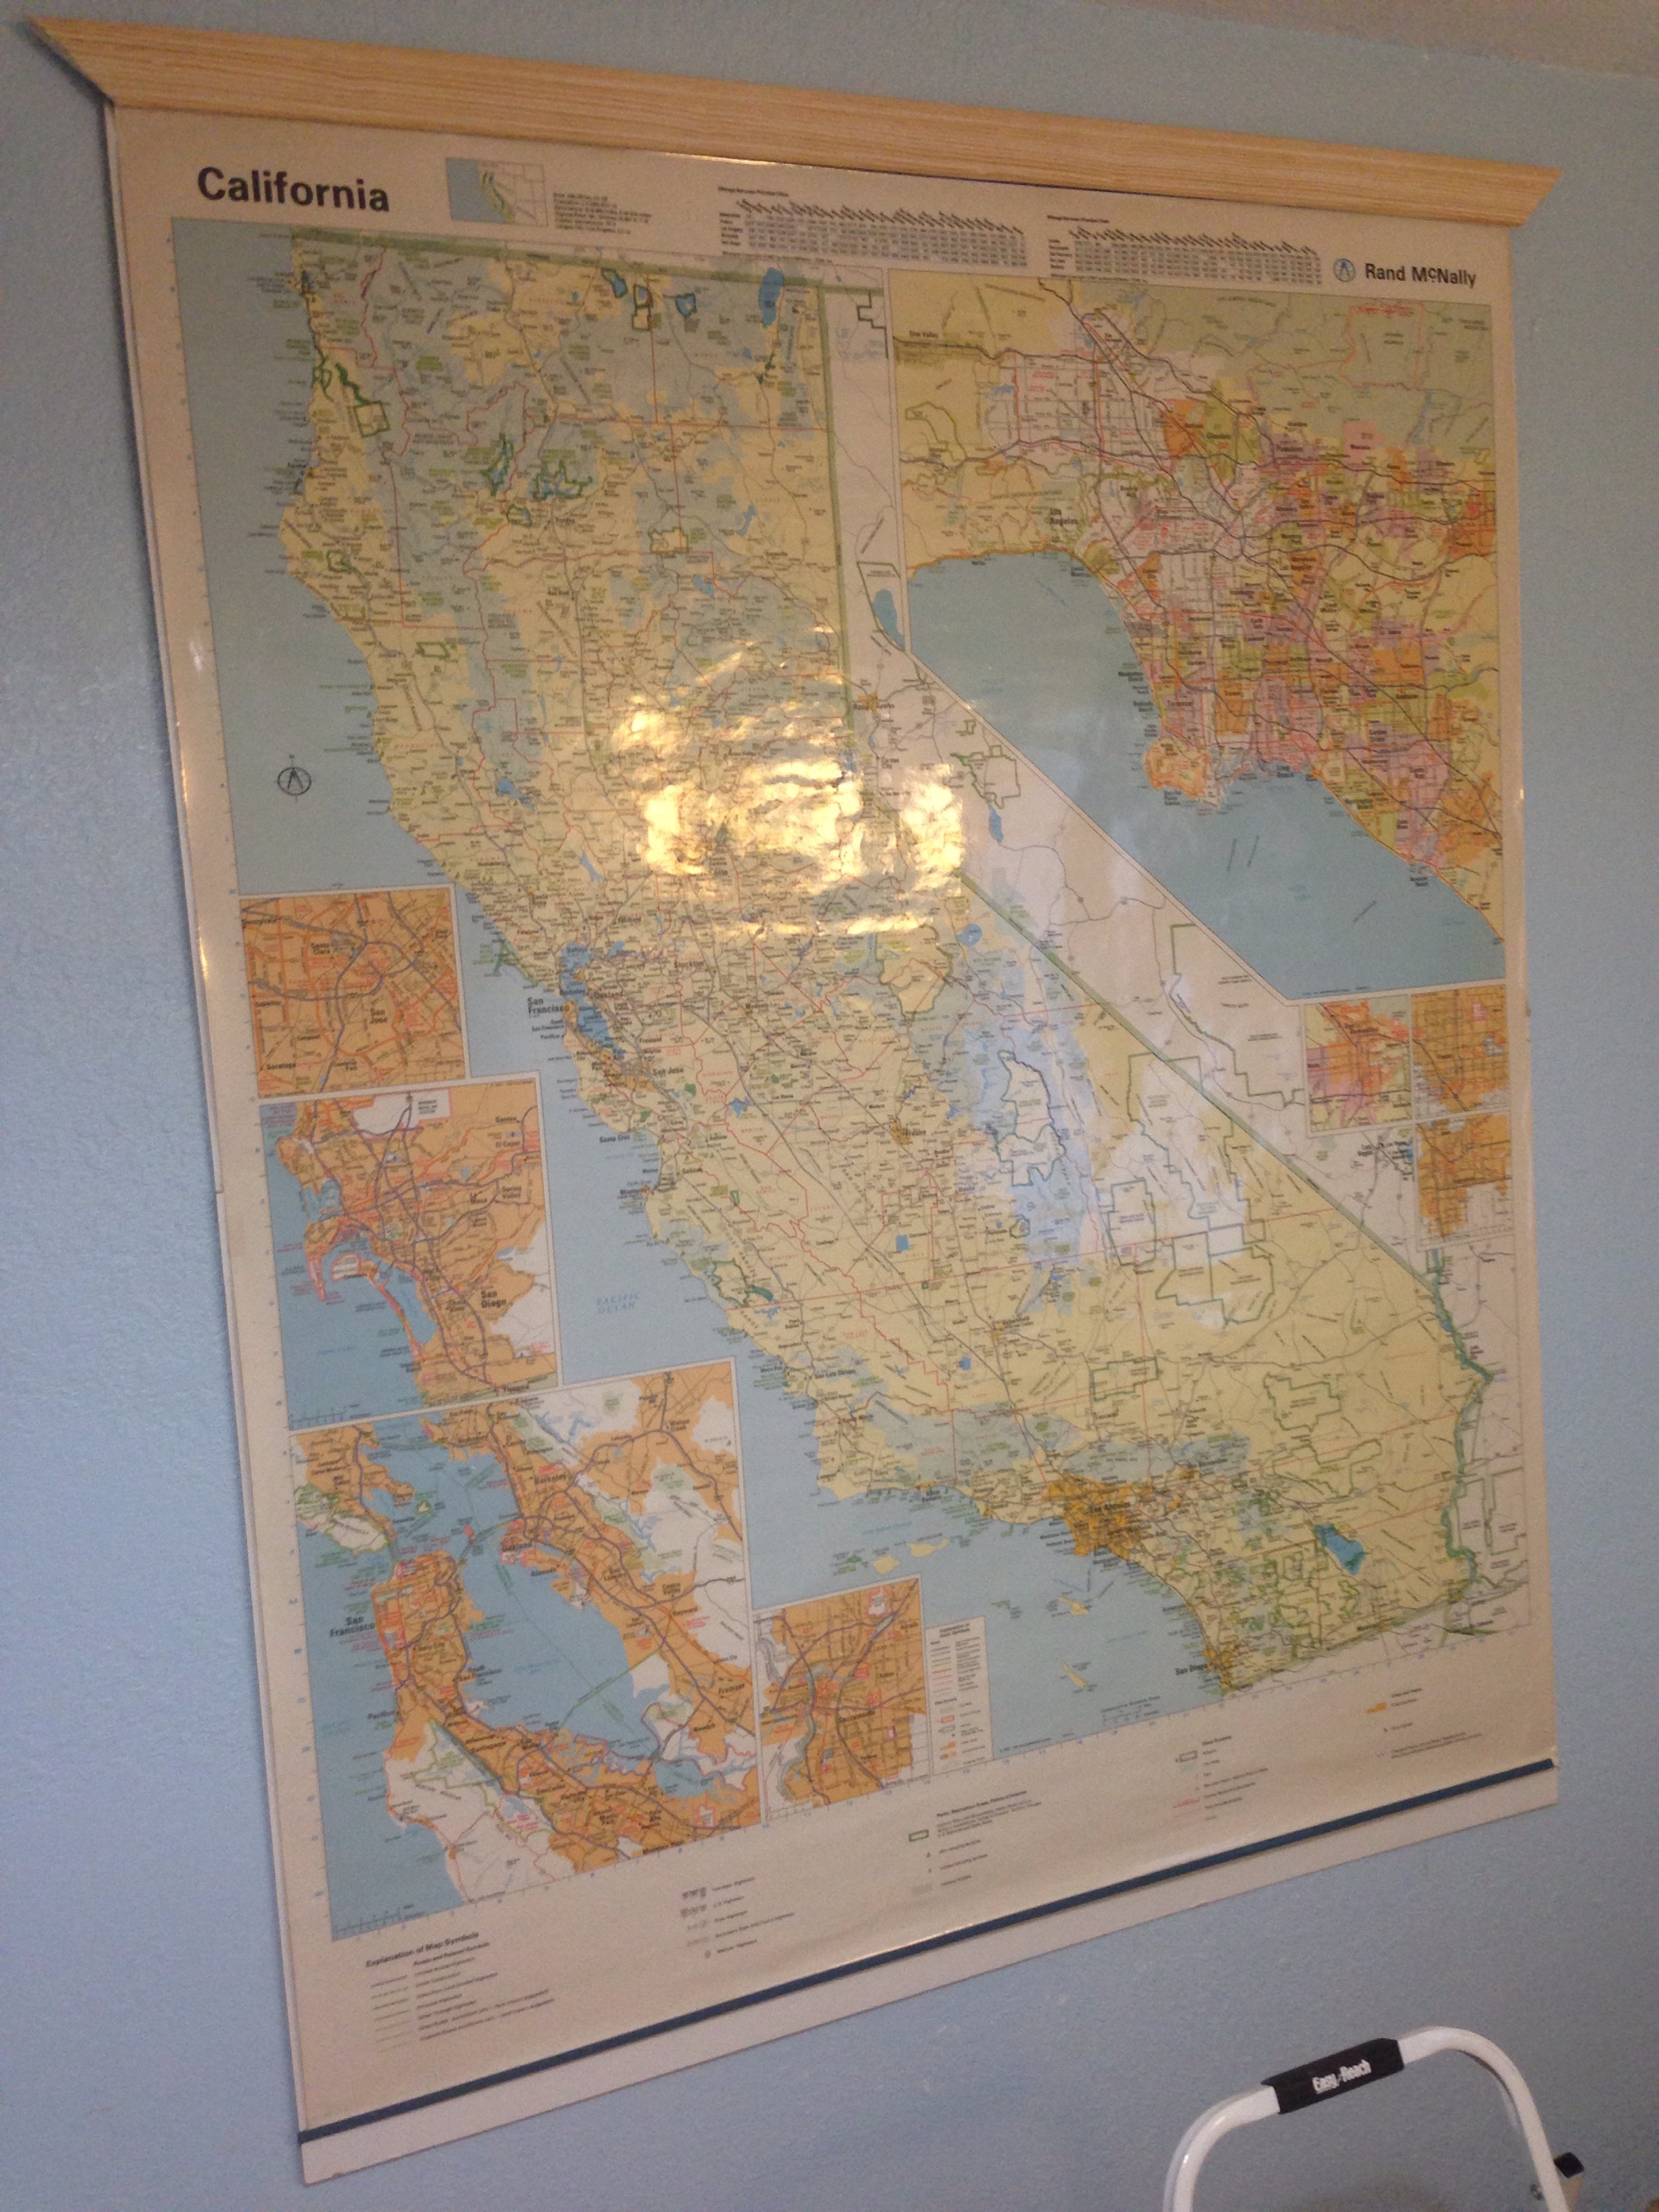
 We then found pvc/faux wood baseboard at Home Depot.  

  Much cheaper than wood, lightweight, and very easy to cut the angles for the frame.    
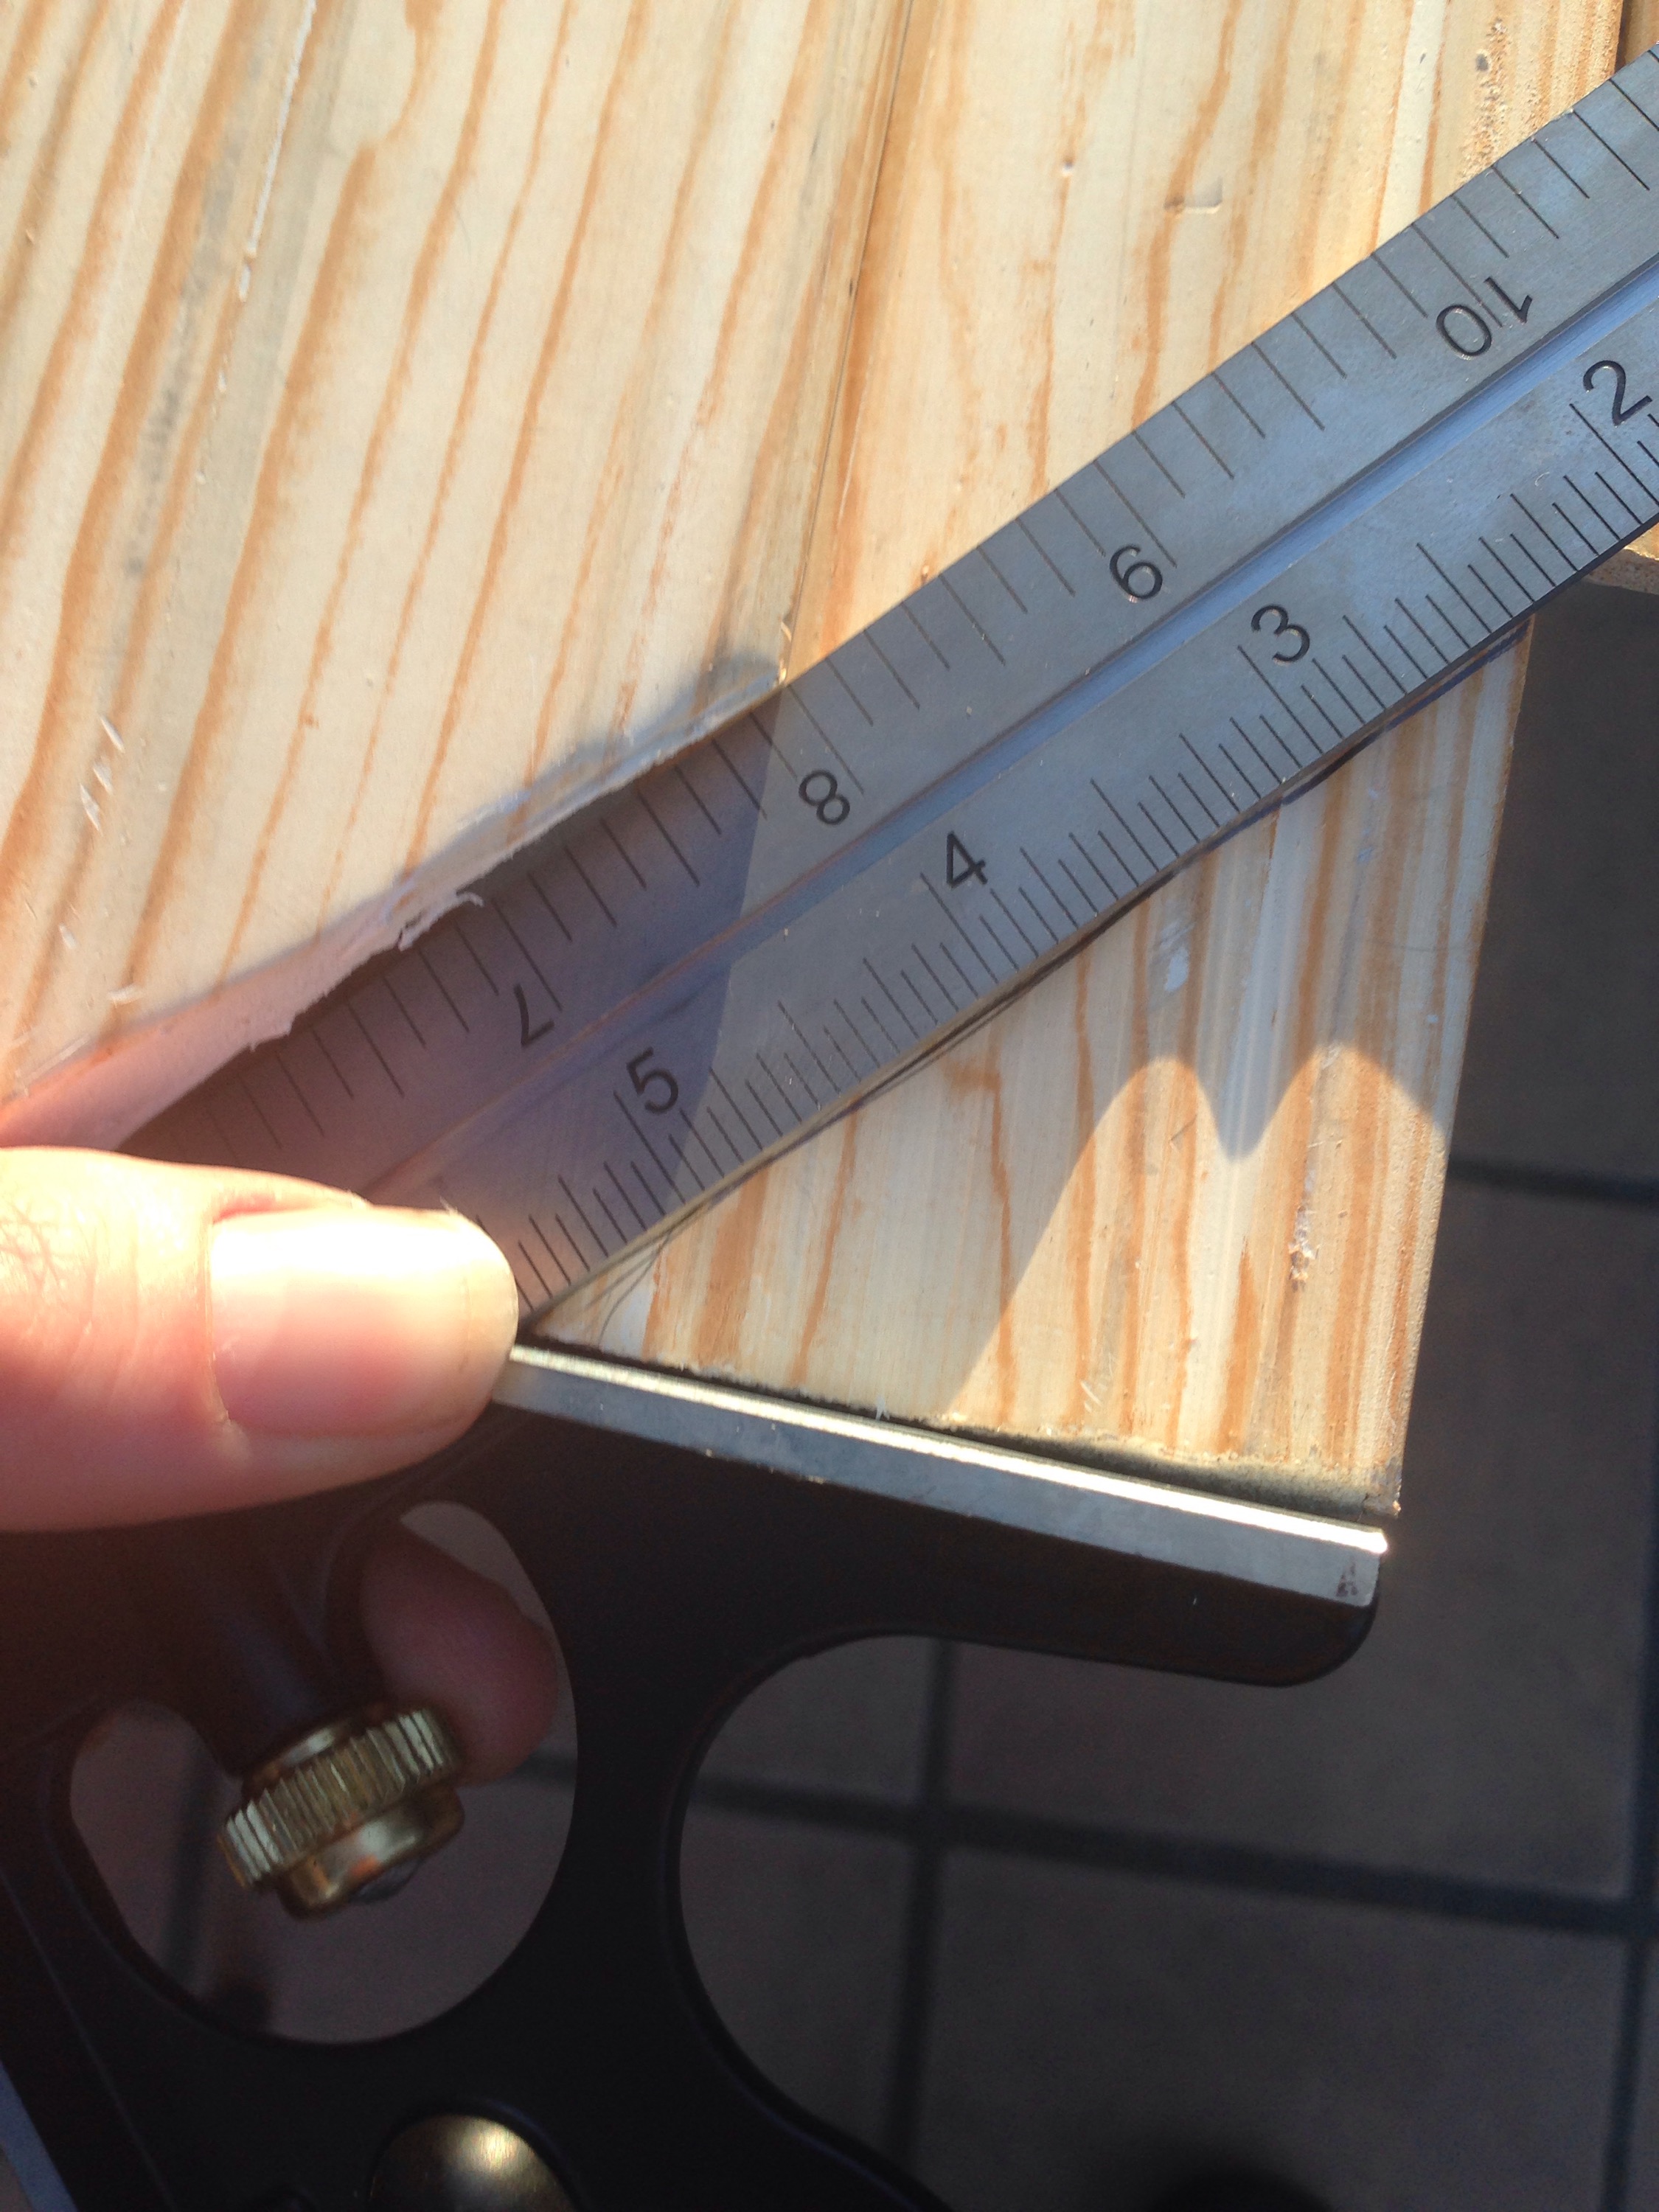
Next we used the scotch indoor mounting tape for the back of the frame pieces.  
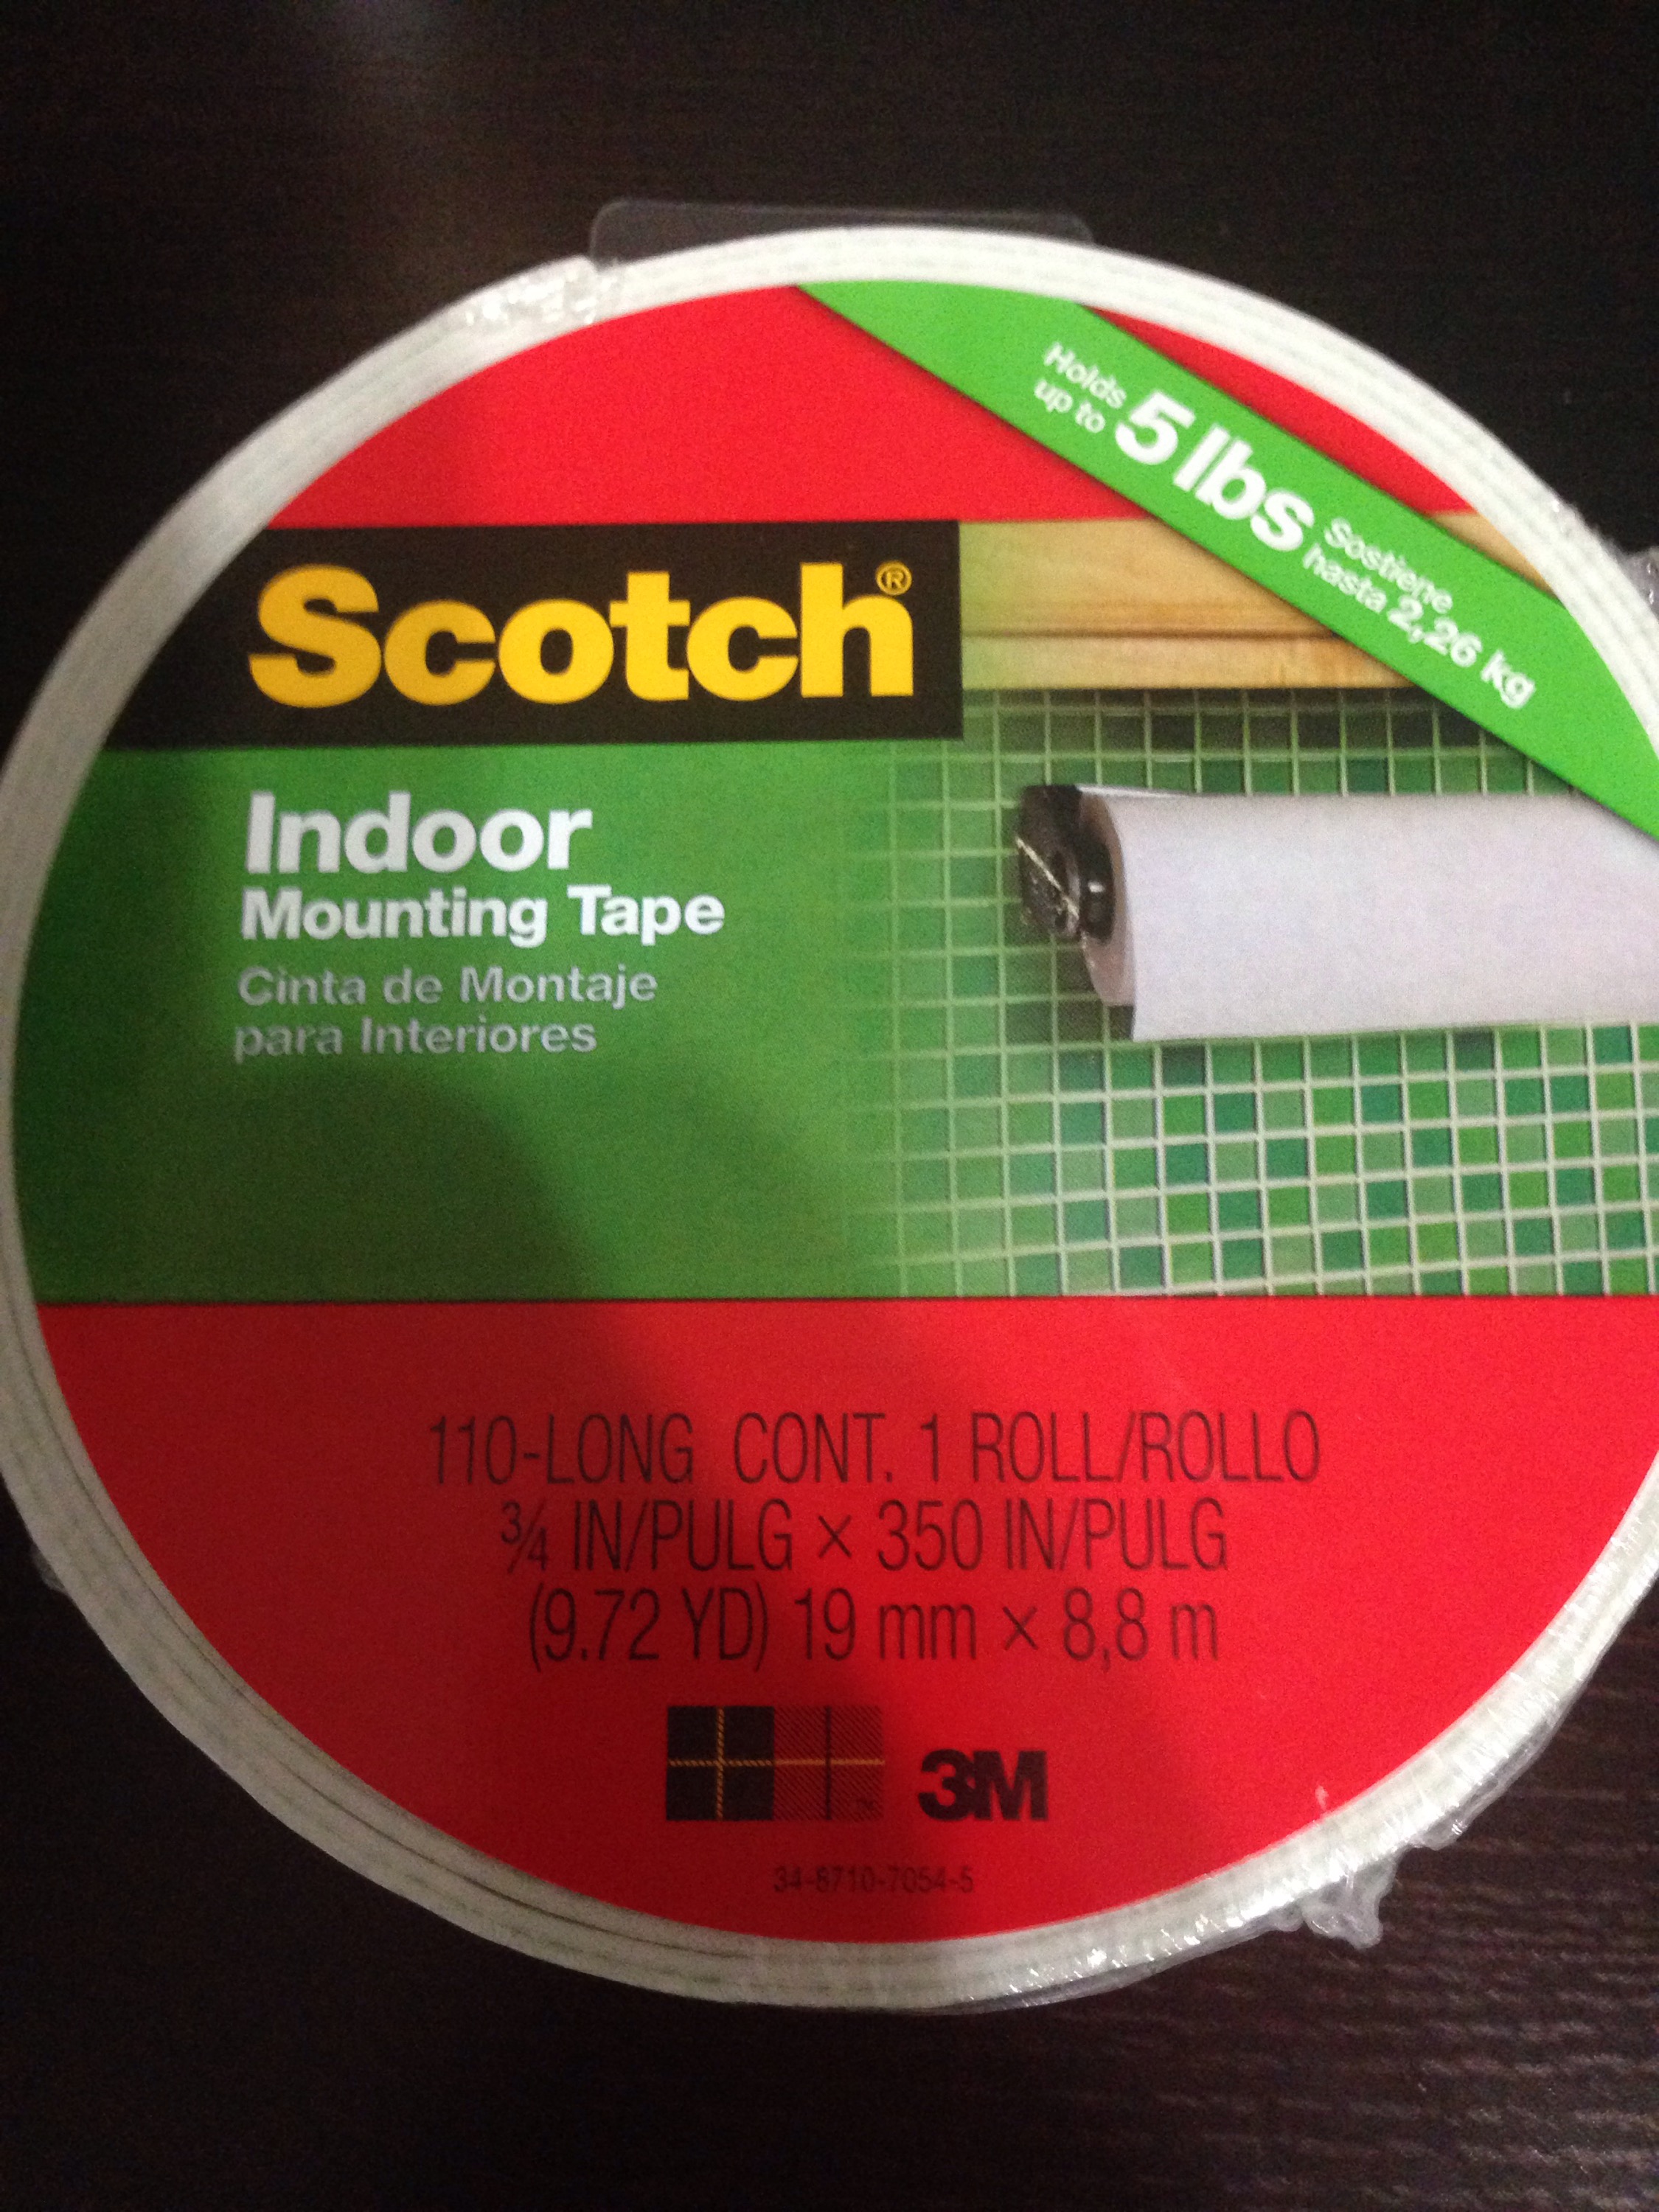
(Now if you’re renting we can’t guarantee this tape won’t take a bit of paint away. However a couple finishing nails at the corners and command strips may have the same results) 

Voila! Giant framed art for $30! 

 We can’t wait to start marking off the locations we’ve been, dog friendly places we’ve stayed and campsites to swoon over. Hopefully you have fun vacations planned for the summer and memories to make! Happy Sunday everyone!

Small California Backyard Transformation: Water wise and Dog Proof!

It all started with a stressful day, one fed up dog “mama” and a shovel…small-backyard-water-wise-and-dog-friendly-makeover-before-pic-.jpg

What should’ve been a quick project, or rather a band aid, for our lawn destroyed by two huge pups…Turned into a week long project of; a few broken toes, half dozen trips to the Home Depot, two bottles of wine and several expletives.

However the end result has been amazing! We now have a  beautiful, water wise, (nearly) dog proof backyard…That we will never have to mow again!

Before we reveal some final pics, we have another great Ikea hack and our new pergola to share.

sears-garden-oasis-steel-arched-pergola-under-400-8x10ft.png

We originally wanted to build a pergola from redwood, but reigned our DIY dreams in and realized this project was big enough. We then started hunting for a prefab steel pergola (that was budget friendly). Sears seemed to have the best option for our dimensions…It was also free delivery and on sale! SCORE! (FYI-Last time I looked these pergolas are still available at the same price)

sears-steel-pergola-in-box.jpg

It comes in a box and was super easy to assemble with 3-4 people…We had only 2, a ladder, and several bungee cords. Without going into the gory details, just take our advice and bribe a few friends with beer and pizza before you attempt to assemble one of these on your own.

However we managed to get the steel beast up with only minor injuries…

sears-garden-oasis-pergola.jpg

steel-metal-arched-pergola-sears.jpg

The next part of the project was to “sew” a custom pergola canopy…And when I mean “sew” that’s code for hacking something from Ikea. In this case we found the Ikea Dyning balcony wind barriers. These are meant to line your balcony or deck railing, but because of their dimensions, and crisp white outdoor fabric they were perfect as a draped canopy. Also at only $12 each on summer clearance, they are cost effective compared to other ready made pergola canopies.

ikea-hack-dyning-balcony-screens-for-arch-pergola.jpg

Super easy to install and drape, we will probably take them down at the end of each summer.

using-ikea-dyning-balconey-wind-block-for-pergola-roof.jpg

using-ikea-dyning-for-pergola-.jpg

Now we finally have a cabana-esque, pergola ready for cocktails and summer BBQs… Our before and after pics…

BEFORE…

epp3C4Sp6k7Lk9Gn.jpg

ugly-backyard-before-pic-weeds-brick-and-flagstone.jpg


small-backyard-water-wise-and-dog-friendly-makeover-before-pic-.jpg

before-pic-small-california-backyard-transformation-water-wise-dog-proof.jpg

AFTER…

water-wise-small-backyard-with-flagstone-patio-pergola-and-drought-tolerant-plants-small-california-backyard-with-big-dogs.jpg

small-water-wise-backyard-for-big-dogs-.jpg

small-water-wise-backyard-with-pergola-and-flagstone-patio-.jpg

There are still several more backyard projects to do and little plants to grow, before we have those  “perfect” After pictures. However we couldn’t be happier with the progress we’ve made and money saved by putting in the labor now. We’re so excited to finally enjoy our low maintenance, dog proof yard. We also hope we inspired a few people to consider a lawn-free, water wise backyard. Cheers! enjoying-the-new-backyard-with-a-glass-of-red-wine-california-small-dog-friendly-water-wise-backyard-make-over.jpg

To a Happy Summer and Happy Sunday everyone!


We Don’t Do “Easy”

DIYers can attest to the mantra, “we don’t do easy.” Especially a DIYer with the guts and gumption to buy an ugly, old, fixer home. Did you experience “the look” from friends and family when you were showing them your “little bundle of joy” the 60+ year old bungalow/cottage/mid century/craftsman, etc that you were now about to buy? The one with the roof so bad that looked like it was a hobbit’s home. The one with the tri- color master bath, the twenty six different kinds of wallpaper, and the ultimate, modern day, home- buying sin… the one without a dishwasher. (For shame!)

You know, “the look” where the friends and family glance at you as if you’ve grown a unicorn horn and your freckles turned to skittles. DIYers know if we chose the “easy” way, we would be stuck in a cookie cutter home, possibly in a location that required uber commuting, and neighbors living on top of you. (At least out here in California). If we did “easy” we’d call for the nearest handyman, or contractor, and be overcharged for a renovation with no heart and a cost that left us with no money.

DIYers have learned there is an intrinsic value of not doing “easy.” Primarily that value is experience and knowledge. Yes, the creative, mechanical, part of us loves to tinker, craft and play in the mud. However the real reason we DIY is for the gained experience. We also want to save a ton of money, but more importantly we want to push the experience envelope. We want that badge of honor in the form of fork-sized splinters, rough hands, and biceps that would put Madonna’s to shame.

When friends and family ask “how did you do that? You will have the experience and knowledge to explain or help them. Gained experience is so much more valuable (and fun) than “easy”. Don’t do easy! This can be related to so many aspects of our lives, not just home improvement. If struggling with a decision, or life issue, remember this well known quote, “All things worth doing are never easy.” Instead do creative, frustrating, sweat equity, and cheap, do it yourself. Gain experience, start small, take classes. Also evaluate your skill level and time against the huge list of tasks. Oftentimes if you know yourself well enough through experience gained, you can diagnose a task quickly and ask for help. Sometimes professional help is necessary when it involves safety, but at least you had the wisdom. knowledge, and experience to know when to ask.

Does “easy” not work for you either? Not just DIY, but also other aspects of our life?