Small California Backyard Transformation: Water wise and Dog Proof!

It all started with a stressful day, one fed up dog “mama” and a shovel…small-backyard-water-wise-and-dog-friendly-makeover-before-pic-.jpg

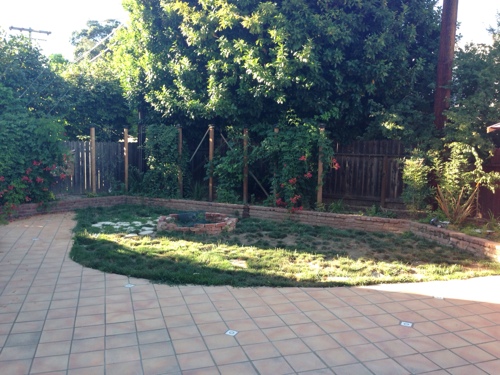
What should’ve been a quick project, or rather a band aid, for our lawn destroyed by two huge pups…Turned into a week long project of; a few broken toes, half dozen trips to the Home Depot, two bottles of wine and several expletives.

However the end result has been amazing! We now have a  beautiful, water wise, (nearly) dog proof backyard…That we will never have to mow again!

Before we reveal some final pics, we have another great Ikea hack and our new pergola to share.

sears-garden-oasis-steel-arched-pergola-under-400-8x10ft.png

We originally wanted to build a pergola from redwood, but reigned our DIY dreams in and realized this project was big enough. We then started hunting for a prefab steel pergola (that was budget friendly). Sears seemed to have the best option for our dimensions…It was also free delivery and on sale! SCORE! (FYI-Last time I looked these pergolas are still available at the same price)

sears-steel-pergola-in-box.jpg

It comes in a box and was super easy to assemble with 3-4 people…We had only 2, a ladder, and several bungee cords. Without going into the gory details, just take our advice and bribe a few friends with beer and pizza before you attempt to assemble one of these on your own.

However we managed to get the steel beast up with only minor injuries…

sears-garden-oasis-pergola.jpg

steel-metal-arched-pergola-sears.jpg

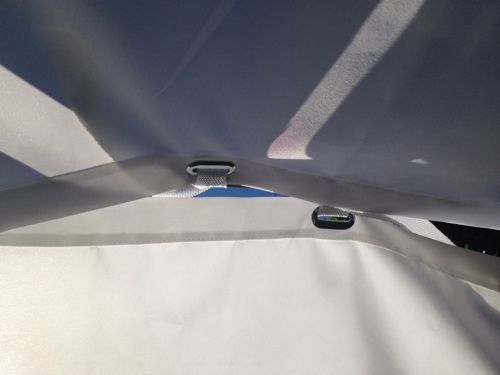
The next part of the project was to “sew” a custom pergola canopy…And when I mean “sew” that’s code for hacking something from Ikea. In this case we found the Ikea Dyning balcony wind barriers. These are meant to line your balcony or deck railing, but because of their dimensions, and crisp white outdoor fabric they were perfect as a draped canopy. Also at only $12 each on summer clearance, they are cost effective compared to other ready made pergola canopies.

ikea-hack-dyning-balcony-screens-for-arch-pergola.jpg

Super easy to install and drape, we will probably take them down at the end of each summer.

using-ikea-dyning-balconey-wind-block-for-pergola-roof.jpg

using-ikea-dyning-for-pergola-.jpg

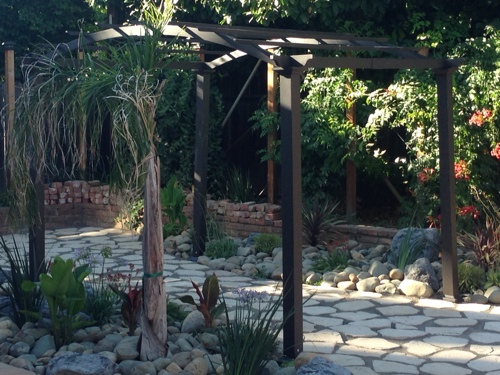
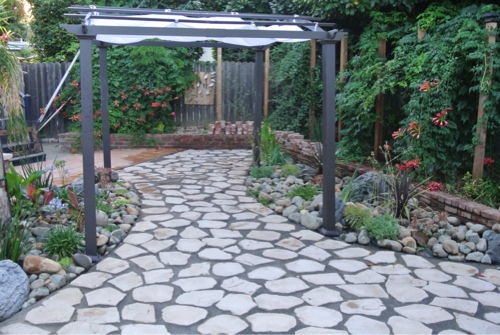
Now we finally have a cabana-esque, pergola ready for cocktails and summer BBQs… Our before and after pics…
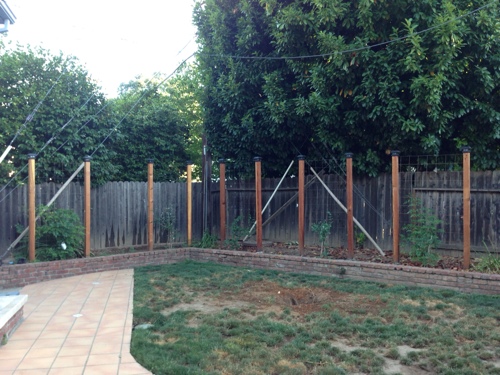
BEFORE…

epp3C4Sp6k7Lk9Gn.jpg

ugly-backyard-before-pic-weeds-brick-and-flagstone.jpg


small-backyard-water-wise-and-dog-friendly-makeover-before-pic-.jpg

before-pic-small-california-backyard-transformation-water-wise-dog-proof.jpg

AFTER…

water-wise-small-backyard-with-flagstone-patio-pergola-and-drought-tolerant-plants-small-california-backyard-with-big-dogs.jpg

small-water-wise-backyard-for-big-dogs-.jpg

small-water-wise-backyard-with-pergola-and-flagstone-patio-.jpg

There are still several more backyard projects to do and little plants to grow, before we have those  “perfect” After pictures. However we couldn’t be happier with the progress we’ve made and money saved by putting in the labor now. We’re so excited to finally enjoy our low maintenance, dog proof yard. We also hope we inspired a few people to consider a lawn-free, water wise backyard. Cheers! enjoying-the-new-backyard-with-a-glass-of-red-wine-california-small-dog-friendly-water-wise-backyard-make-over.jpg

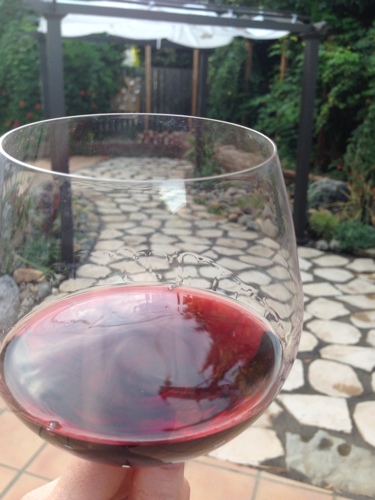
To a Happy Summer and Happy Sunday everyone!


Ikea Hack: Hallo Cushions To Foldable Dog Bed

“Hey mom! The blog is Little Houses BIG DOGS…Where’s the dog projects!

20140405-211551.jpg

We took a break from home projects this weekend to reconnect, spring clean, and play with the pups. Luckily we did have a doggy inspired project up our sleeves.

During spring cleaning we found four Ikea Hallo outdoor seat cushions. (Originally they were meant for an outdoor dining set we never bought a year ago, and now just stored as miscellaneous cushions) Hubby was ready to take them to the Goodwill as a donation when I realized they could serve a “puppy” purpose.

The dogs aren’t allowed on our couch, but that doesn’t mean they can’t be comfortable when we all hang out in the living room. However we have two big dogs and lack space so a standard dog bed was not going to work. Hence out came the sewing “Tupperware” (I do not sew). Then over a (much needed) glass of wine attempted to hand stitch cushions together.

20140405-214523.jpg

20140405-214537.jpg

20140405-214557.jpg

I basically squished the cushions together and thread the needle thorough one then back through the other (sorry I’m sure there is some technical sewing lingo, but I don’t know it) Once I had two separate sets of two cushions I stitched the two sets together lengthwise.

20140405-215844.jpg

20140405-215905.jpg
The stitch lengthwise actually acts like a hinge and allows the cushions to be folded in half.

20140405-220318.jpg
But the best part is that when the cushions lay flat, the dog bed slides right under the couch when not in use.

20140405-220601.jpg

20140405-220611.jpg
Overall the dogs seem to love their new bed and not bad for a project that just cost me a few hours and $0. We hope this inspires you to create for your small space. Happy Sunday everyone!

20140405-222635.jpg (The dogs are already looking sleepy on their new bed)

Ikea Hack Alert…Bench seating and dog bed

So where to put two monstrous dogs and two truck tire sized dog beds? ANY PLACE YOU HAVE A TILE FLOOR!

dog bed joke

This is why we created our previous two Murphy dog beds and strategically placed them adjacent to our first home’s kitchen nook and back slider.

murphy dog beds 009murphy dog beds 010

We’ve always loved little houses, easy to clean, less maintenance, however the obvious problem is less space. We have a “no dogs in bedrooms” policy because of shedding, and snoring. Also our two bruisers are magnets for anything dusty, dirty or muddy.

Another big reason, since we live near the river, wildlife ventures into our neighborhood quite often. Which means no sleeping outdoors or in the detached garage, where they can bark all night. Also when your husband has had to defend the pups from toddler sized raccoons, its best to keep the dogs indoors for safety sake.

In our new home we’ve had to be uber creative, since we lack extra seating in our tiled kitchen/dining area. We love to entertain and we wanted to create a seating bench/built in. Unfortunately the hubby had a good point, the dogs are getting older and to create a custom dog bed/seating bench may not be logical or economical.

Hence I found inspiration once more with Ikea furniture, and created our Seating Bench/Trundle Dog bed.

oar curtains and dog bed pillows 030

We bought another Ikea Hemnes day bed, (the same one we have in the office/guest) and hacked it to create a dog trundle bed:

In progress pic

Here is the inspiration and how we did it…

We utilized this odd, space near the backslider, for the dog beds. However not only were they ugly, but we lost critical floor space. (They also wrestled over the favorite bed)

dog bed before dog bed before 2

After we bought the first day bed we were able to figure out how to hack the trundle pretty easily. First follow the instructions to create the bottom trundle and drawer component, minus the slats, but still attach the  metal braces as the directions describe.

dog bed 002

This is critical, now measure the inside/interior edges of the bottom drawer component to ensure the plywood you purchase (separately from a hardware store) will fit perfectly inside and atop the wheel braces. It should look like the following picture. We also recommend buying a thicker plywood if you have abnormally large dogs like ours.

dog bed 006

Using the extra slats, we cut two of them to fit the entire length of the metal braces. (with a small hand saw) Use small wood screws (1/2″ phil mod, zinc lath self drills, from Home Depot) and a cordless drill to attach them through the metal brace holes. The reason we did this was to protect our rambunctious dogs from being sliced by the metal braces. The slats are made of soft wood and helped create a rounded edge.

dog bed 020

Once completed it looked like this…

dog bed 023

With the following materials/tools, we only used the front of the drawers and extra slats to drill and glue them to the front of the day bed. (The staples and staple gun were for upholstering the bench seat)

dog bed 050

dog bed 042

As you can see we cut two additional slats to fit the bed’s length and were careful to not drill through the front of the drawers. We made sure the edge of the drawer’s back was coated in glue before drilling them to the slats.

dog bed 043

Next we upholstered the bench seat. Using very light weight and sanded sheet wood, we had cut to the dimensions of the daybed. We set an old ikea curtain on the floor, the sultan florvog mattress on top of it, then the plywood. We folded the curtain over and stapled it to the plywood.

dog bed 046 dog bed 045

Finally Seating bench/Trundle dog bed complete! We placed a second sultan florvog mattress for the actual dog bed. These mattresses are fabulous, the covers come off easily and are washable. Also we can conveniently protect them with standard fitted twin sheets and waterproof covers should we ever need to. We plan to upgrade the bench seating with a different color scheme in the coming weeks. However we’re waiting until we figure out the kitchen’s future colors.

oar curtains and dog bed pillows 043


oar curtains and dog bed pillows 030

PS. We made sure the dogs actually “liked” their new bed before we started hacking. We might recommend you let your dogs give it a test drive first before the step of gluing, cutting and drilling slats. As well, ours like to sneak onto the upholstered bench so we protect it with a fitted sheet and plastic cover when not in use.

Here are the little hams posing for the camera during the test drive. (I swear we don’t pose them, they literally look and act like twins on their own)

dog bed 037

dog bed 038

Driftwood Wall Art

We are living f-r-u-g-a-l-l-y these days! As much as I’d love’on some newer Ikea wall prints and frames, I decided free wall art is better…

signs and office update 001

Here’s the How to break down on this fab freebie…

1. We had some metal braces and left over wood from the fences, so basically I lined them up, and screwed the wood together from behind. (What was so fabulous about using fence wood is that it is unfinished and imperfect, no distressing required. Yay!) Then stained the wood with Minwax Wood finish stain in gray, to give it the look of driftwood.

2. Later I stole the hub’s projector from the mancave, used microsoft Word and a sharpie to stencil the writing.

ipone pics 135

3. Then with left over interior white paint, (Glidden pebble white) hand painted the stenciled writing.

ipone pics 139

4. Once dried, I added picture frame hardware and wire to the back, and DONE! Wannabe- Driftwood Wall Art! Office/Guest room walls are completely decorated! Not bad for a freebie!

signs and office update 001

TV Stand Turned Wine Rack (Ikea Hack)

This is just a little spin off from the in progress Mancave Makeover… We are all about recycle, reuse, and re-purpose. Primarily because of our very little home renovation budget.  We had this old Ikea book cabinet/TV stand from our first home. I had hung some curtains in it just to hide the mountains of mismatched textbooks (Seen below in a First Home Flashback)

wine rack 1

Then it was passed on to the garage for storing odds and ends…(seen below)

before garage pic4

Finally after searching the stores for inexpensive wine racks that could handle 50+ bottles (We had a lot of left over wine from the wedding). Most costing $50 and up!

I found my way to home depot and bought about 20+ ft worth of wooden dowels and battery operated LED lights. (Total cost just under $25) Cutting the dowels by hand and to the width of the shelves, hammering them in, and attaching the lights with sticky tape…VOILA! Beat up Ikea shelving to basement wine cellar.

wine rack 2