Happy Monday! Jute wrapped pendant light, late blog post and some “mad” mischief…

Happy Monday everyone! Wait?! What a Monday morning post?! 

I have the day off recovering from some “Mad” mischief. For those who have been following us on Instagram you may have seen some of the pics already. For those who aren’t, here is a little hint…


Oh yeah, still cleaning today…But well worth the stiff muscles and ahem headache😉 More surprises and pics to come next Sunday…

As for this week here is the promised post about our jute wrapped hanging pendant from our guest house…


As all you dear friends know I can’t sew, loathe knitting, and can barely crochet. I wish I could but my little attention span is reserved for hot glue, sawing wood, and electrical wiring. As much as I wish, I can’t spare any for the fine art of macrame or the sewing arts. But…I can tie a knot…lots of knots especially when watching a marathon of Mad Men😉 (l still had to untie several knots and start over but I got through it)


Basically the project is really simple, find a pendant light you love, a large spool of jute (usually sold at your local craft stores) and lots of patience. The knot is the pretty standard- “tie your shoe” kind as well.


Here is a really fabulous how to on tying the knots, courtesy of Design Sponge, but ours is adapted to only one kind of jute, (and no hot glue). 

 Hope you all have an amazing day! We’ll see you all next weekend with fun photos! Happy Sun–err Monday everyone! 

Guest House and Concrete Counters: Finally a Before & After! 

Have you ever had a project you ignored, detested, put off or just wished you never started in the first place? (The one project you so desperately wanted to call the professionals for) Our neglected guest house was that project…

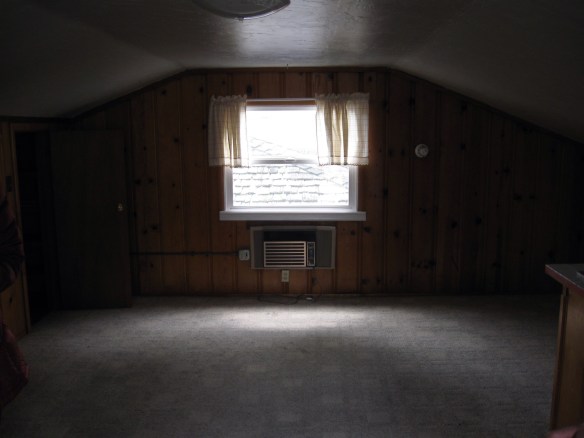
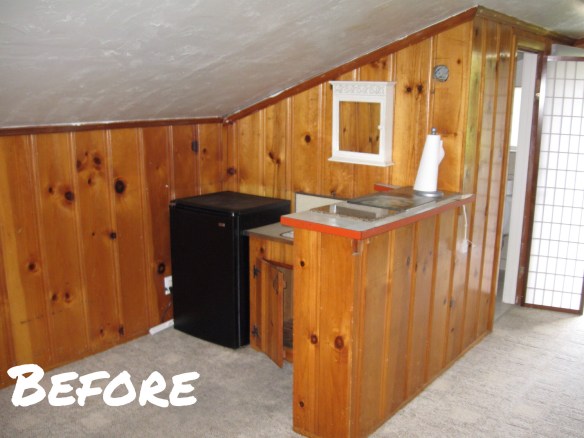
Aptly referred to as “The Cave”, the studio apartment above our garage just creeped me out. Someone even lived and cooked up there at some point during the previous ownership. How do I know this?…Grease, food stains, mold, dirt, etc.

(Also I was the one doing the massive clean up, painting, decorating, exorcising spiders and the ghosts of owners past.)

First step (in the very drawn out) guest house project was basic clean up and painting party. This was back in the summer of 2012, right after move in. My good friends Amber, Maggie and I all got “high” on oil based primer one evening as we tried to cover the nasty paneling. 

Those ladies were troopers! It was awful! Even with ventilation and masks we all got horrible paint headaches. It took two coats of primer and three coats of basic latex paint to prevent the orange stain from bleeding through. (Even three years later, I think I still owe them a couple more dinners to make it up to them😉) 

Then post wedding, and main house craziness; new roof, water heaters, plumbing, etc. The guest house became just a neglected storage space. Yet in the last three years we kept moving forward, (albeit very, very slowly) towards making it livable. 

Since our main house is only two bedrooms, we desperately wanted a cheery, space our family and friends would love to stay in (and not go running for the nearby Holiday Inn)

We also L-O-V-E the sea and dream of owning a coastal retreat someday. We’ve collected, and were given so much “beach house” decor that decorating the guest house in the style seemed perfect. 

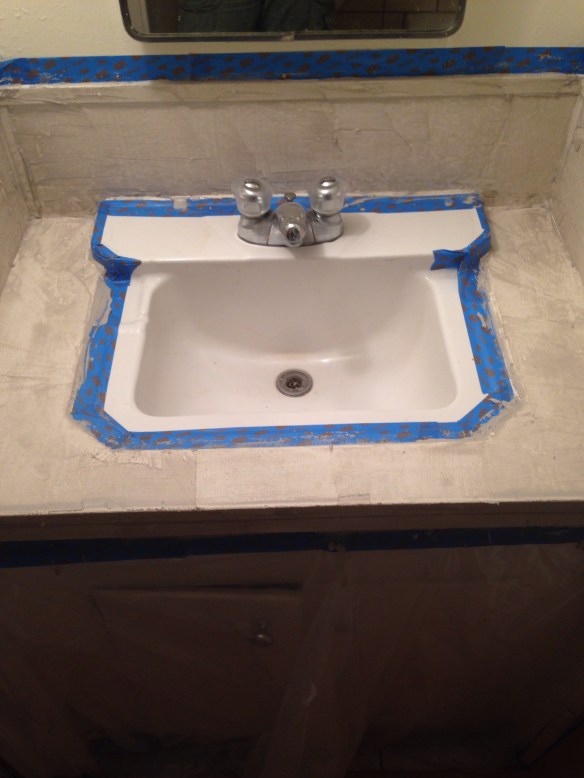
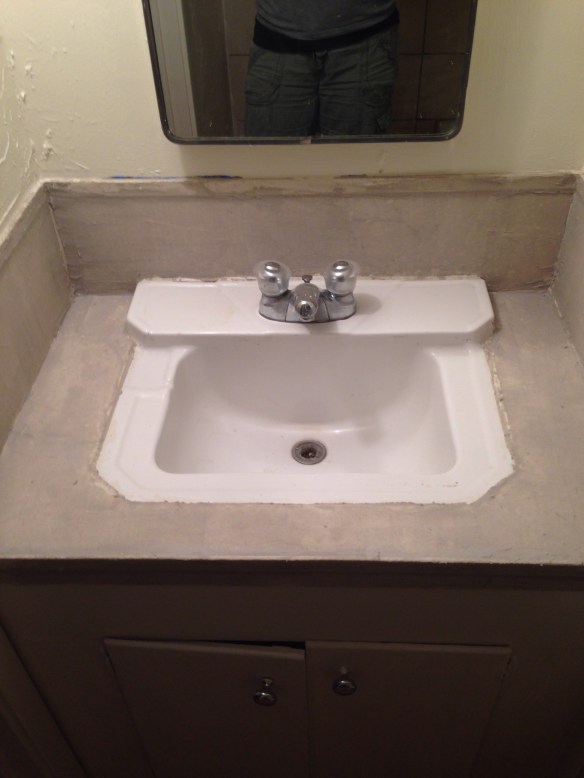
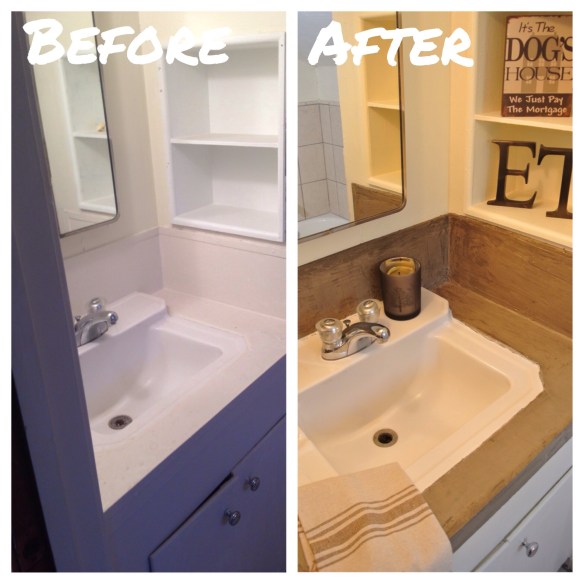
Only in the last month, the need for a guest house (and extra bathroom) has become a necessity. Therefore we put our efforts into overdrive; replacing the water heater, installing light fixtures, adding concrete countertops, deep, deep cleaning, decorating, etc. (even adding those aforementioned accent pillows😉) 

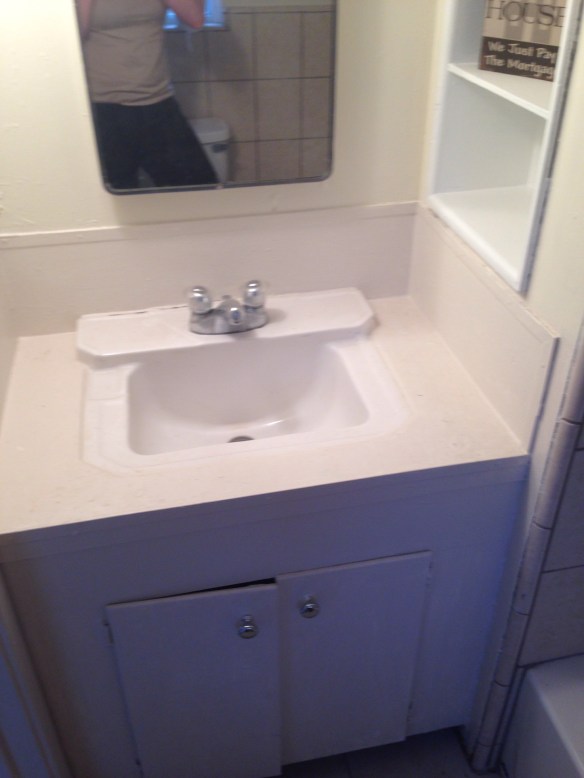
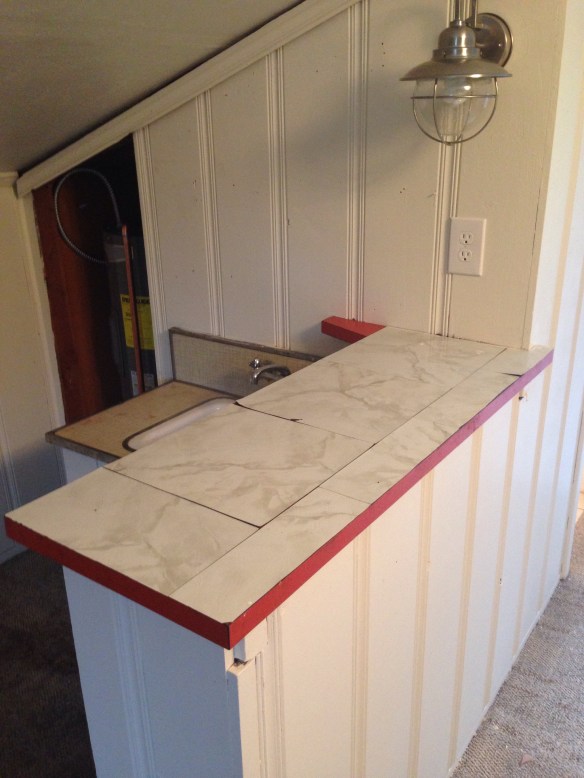
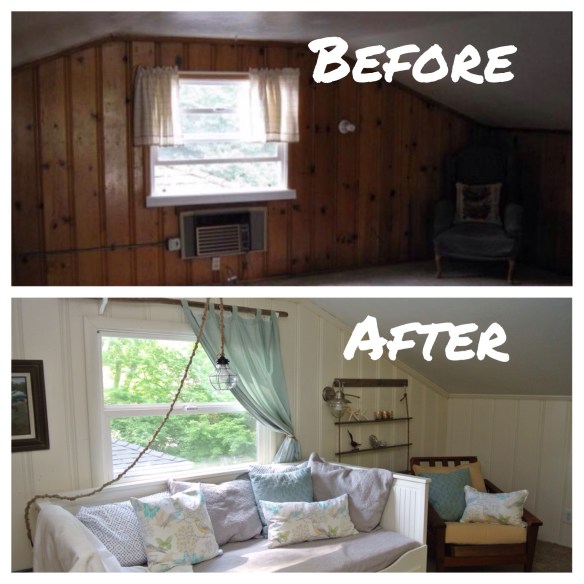
Now here are those much awaited “Before & After” pics!…

Edit

Edit  


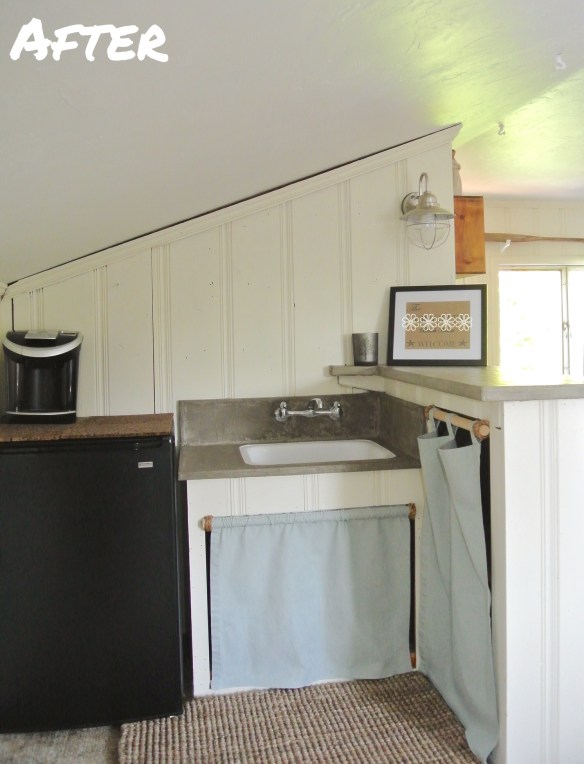
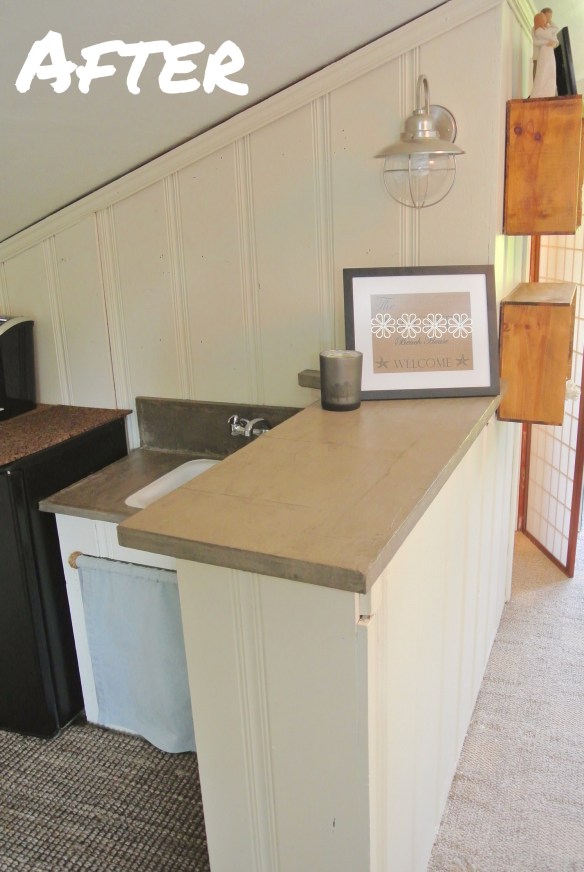
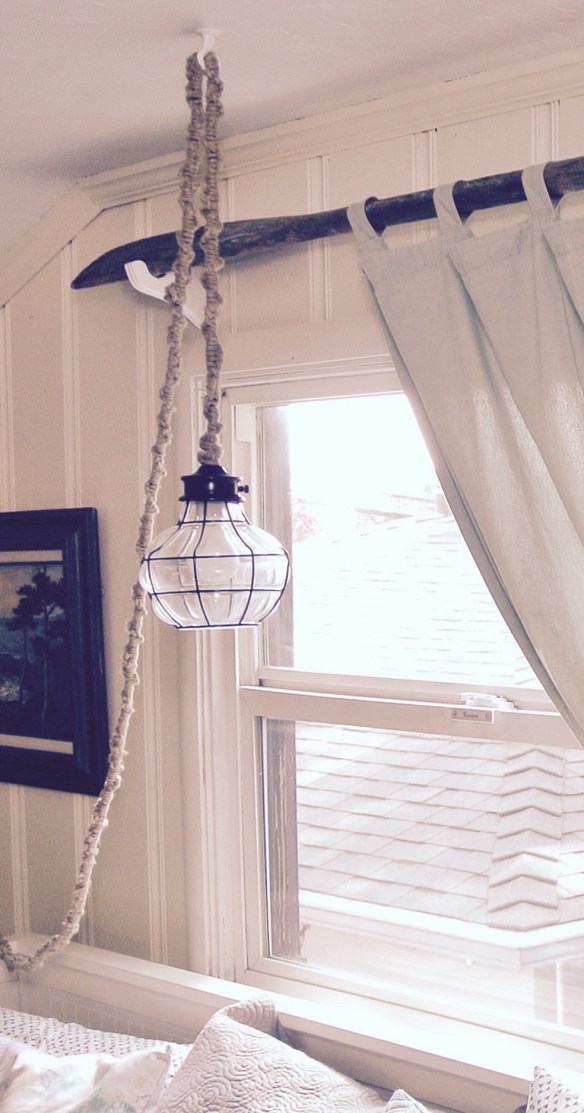
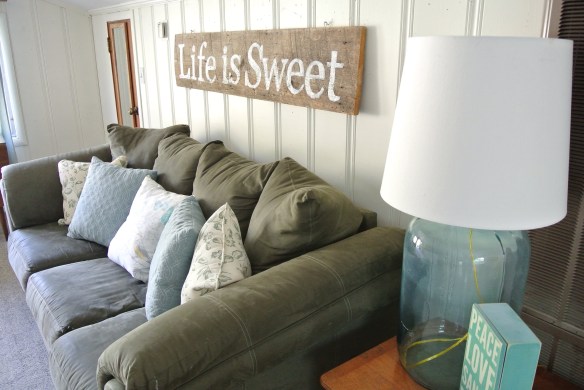
Here are some more fun “after” pics…(our glass bottle lamp now has a home!)

(My attempt at a panoramic pic of the guest house)


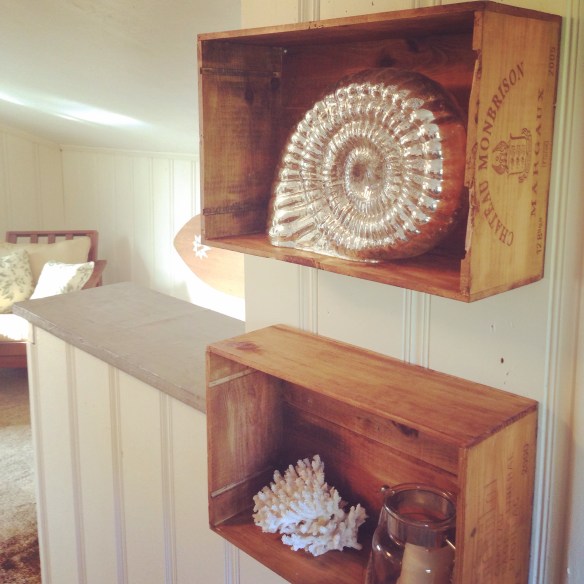
We also added these floating wine box shelves…

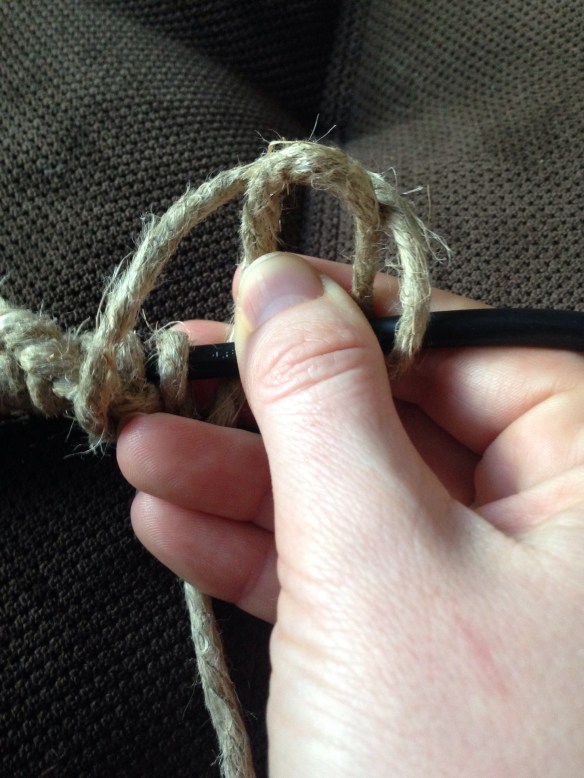
We’ll be sure to include a little “how to” on our jute wrapped pendant light in the coming weeks.

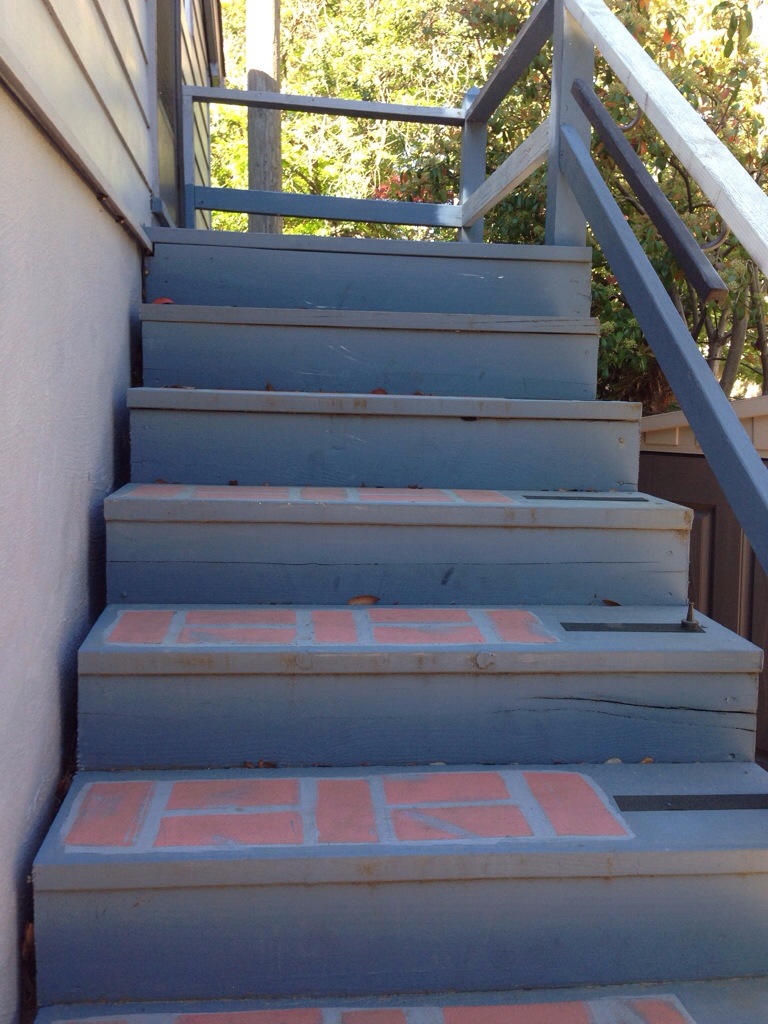
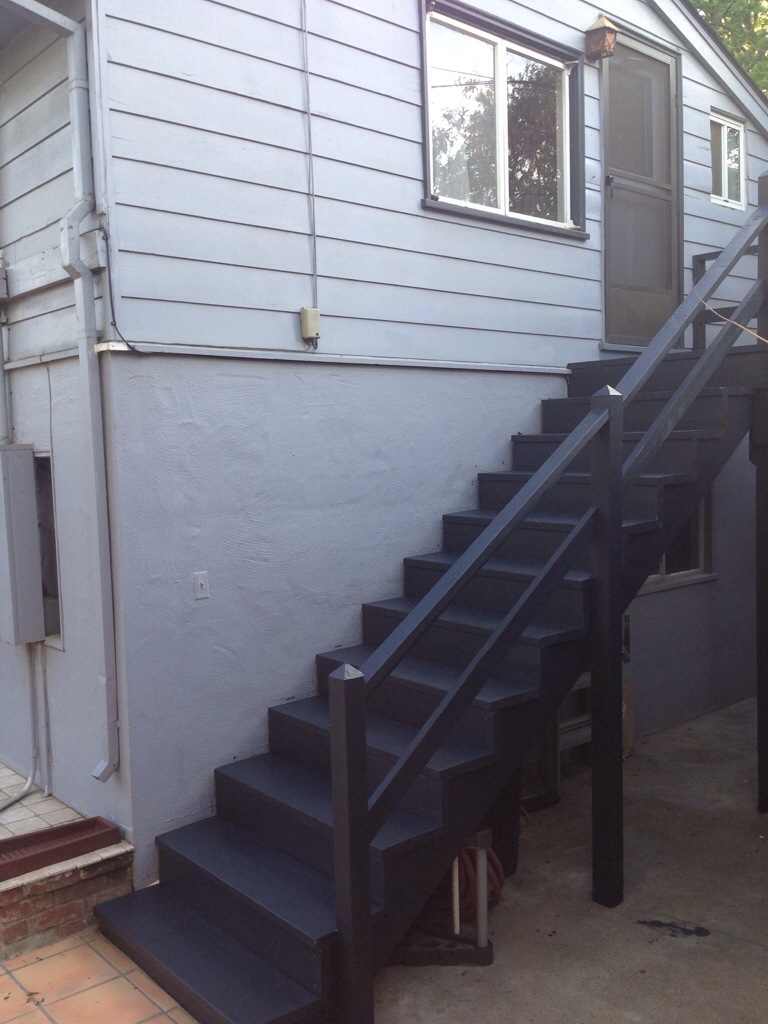
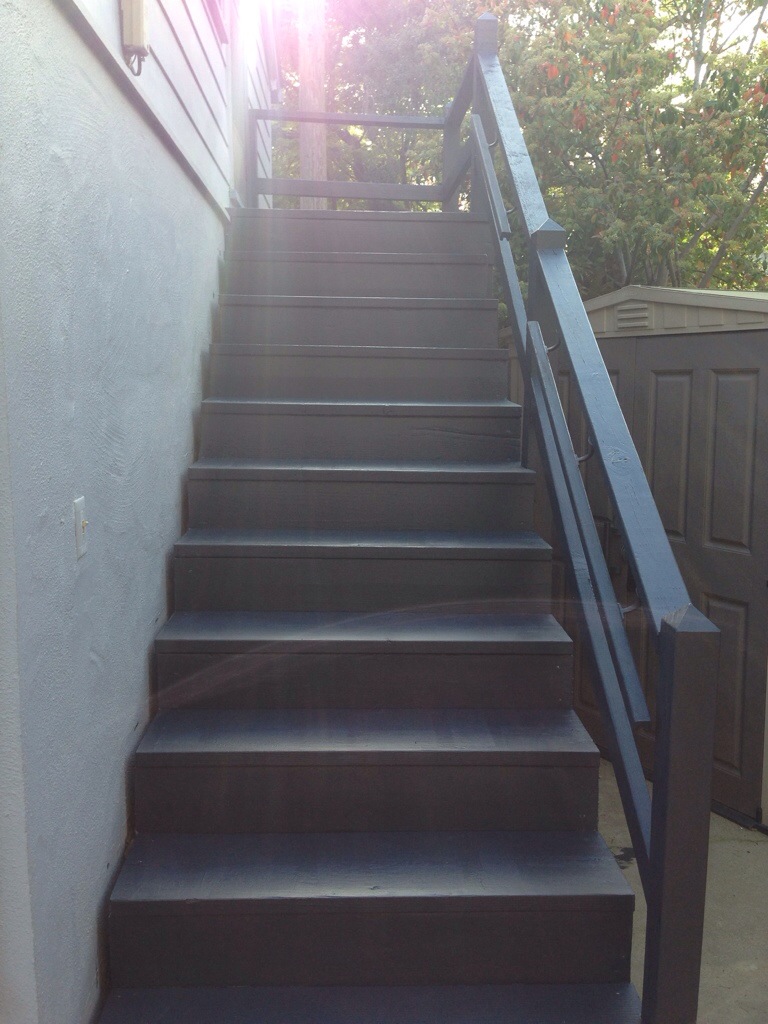
We do have a few more projects in store for this guest house; new hardwood floors, a new ac, new stairs and deck, etc. However our little budget does not match our big wish list so those projects will be on hold. (Hopefully not another three years though😉)

Also I need to convert the bed back to a pull-out King, but that will require an extra mattress and more Ikea slats. For now, a twin bed will do the job when younger brothers occasionally crash at our place. Yet I can’t wait to have it completely ready as a private retreat for our friends and family. (More on creating “Hotel LHBD” for another post)

We’re just so glad to finally have a clean, cheerful guest house and no longer “The Cave”. Happy Sunday everyone!

Are We Done Yet?! (Guest House Concrete Countertops Semi-Reveal) 

We started 10 days ago with a “hot mess”~I mean blank canvas…

(Like the light pinkish/grayish painted vanity?)


Also the  kitchenette to our very neglected guest house/apartment above the garage.

 All original from the previous owners and literally never touched by us. A nasty combo of grease coated, rusted out, painted over, sticky back linoleum, vinyl, wood and laminate surfaces. (Seriously I was two seconds away from calling our plumber and having both the bathroom sink and kitchenette torn out.) I thought the job impossible. 

Only Eric knew to make me a deal. If concrete wouldn’t work I get new vanities. But if it does work I get Carte Blanche on the decor budget. Which would mean…(what he hates the most)…Accent Pillows! Lots and lots of accent pillows!😄 Deal accepted! 

 This indeed would be the ultimate concrete countertop challenge. Especially when we didn’t have a complete Encore countertop kit! Yikes! (More on that later)

So here is where we started…Cleaning 10+ years worth of gunk. 


Like our last concrete project, Encore kitchen countertops, we knew to horde cardboard and stockpiling 3m painters tape. Next came repairing parts of the counter. (Ie re-gluing  down peel and stick linoleum) 


(And when you don’t have enough clamps, bricks work just fine) 😉

As I mentioned before we did not have a full Encore countertop kit available this time around. We were missing the actual concrete. Instead we had just a leftover gallon of superbond and the Proseal/activator concrete sealant. Therefore I took a gamble (because accent pillows were on the line) and picked up some Henrys feather finish at Home Depot. I also tested the combo out on a piece of scrap board:


Superbond and Henrys feather finish…They went together like peanut butter and jelly. However I must admit,  I prefer working with the Encore kit. Their concrete was easier to control, smoother/fluid and a bit more durable as it dries. (Which is another reason why the project took so long, I wasn’t experienced working with this brand of concrete and more sanding was required between layers.) Yet it all came together, so we were confident enough to tackle the counters. 

First layer of superbond…


Layer two of superbond and right before sanding…


Also quick reminder…Don’t forget to remove all the painters tape before the last coat of superbond dries. This will help immensely with clean sharp lines. 

Next came the Henrys feather finish concrete and concrete sealer…


This time we’re not delving into all the details and steps on our countertops as we did here. Unfortunately we don’t have perfect “after” photos yet. We still have to silicone seal the sinks and clean before final photos can be shot. Overall so glad to check this one off the list!😀…Now I’m off! I have accent pillows to buy! Happy Sunday Everyone!

Psst!..This is our 100th blog post today! And we’re finally on Instagram! Follow our guest house progress and check out the sneak peeks. 

Painting Stairs…So Romantic!

Eric can’t stand painting…He’ll gladly clean all the windows, spend hours working in the yard, and disinfect toilets before you see a paint brush in his hand.

Which is why I nearly fell over when he offered to paint this:

20140412-062122.jpg
And these:

20140412-062246.jpg

20140412-062313.jpg

How about those faux brick steps eh? Stylish right? (Let’s Pinterest those babies!) There were about 6 different colors painted on our granny suite stairs from the previous owner…Blue, black, white, brown, gray, and of course faux brick red.

I was ready to tackle this ugliness, (hubby gone on a guys trip), my paint matched up and ready to go when disaster struck…Sidelined by a stomach bug.

That’s when hubs came home and went to work.

20140412-064237.jpg

He even managed to snap a few pics with my phone along the way (I welcomed him to the “official blogging club” and asked him when he’ll write his first post) 😉 For now he’s holding out. Naturally a shy guy, he likes to think of himself as the Little Houses Big Dogs “support staff”

Two coats of custom match Exterior Glidden paint, one afternoon and we have these beautiful new stairs!

20140412-065013.jpg

20140412-065048.jpg

20140412-065106.jpg

It is amazing what paint can do! We hope in the future to extend the stair landing out and build a mini deck for (ahem… Best snobby voice) “ our guest house” but honestly we’re not fancy enough to ever call it that 😉 What kind of painting do you or your “anti-painting” spouse have this weekend? Happy Sunday everyone!