“Mad” for a Cure…Hosting a Mad Men Party and Private Charity Dinner! 

This post has been pulling on my heart strings for the past week. I will admit there were tears, and definitely deep gratitude to our amazing friends and family. Five years ago we made a promise, during one of the hardest times of our lives, to pay it forward. We didn’t know how we would do it, but we just would. 

Four months ago I reminded the hubs of our “karmic” promise of paying it forward and asked him what we should do? Surprisingly my very private, anti-party, husband came up with the idea of hosting a charity dinner…[Gasp] Did the world just turn upside down?!...Not really, he called my love for party planning, my “evil super power“, and that it should be used for good deeds.

Challenge accepted! 😉

Hence our Mad Men Charity Dinner came to be!

We used our “secret” five year wedding anniversary as an excuse to party.

 As “gifts” we asked friends and family to donate to two of our favorite charities: The Leukemia Lymphoma Society and the SAMFund. Most are familiar with LLS, but very few know of the SAMFund, it’s one of the very few direct grant charities for cancer patients/survivors; financially assisting those with medical debt, medication expenses, utilities, etc. (Because getting to “cancer free”, isn’t free.) 

This is where our friends and family were amazing (and I tear up)…Just from our little “shindig” and, those who couldn’t attend, we raised $3000.00 of direct and indirect donations! (The post office clerk thought I was probably insane when I mailed all the checks this week…Mascara running down my cheeks and “ugly crying” from tears of gratitude) 

Now let me stop with the mushy stuff (or the water works will start all over again) and let’s get on to the fun party details, Mad Men decor and a little harmless “debauchery”, circa 1960s…


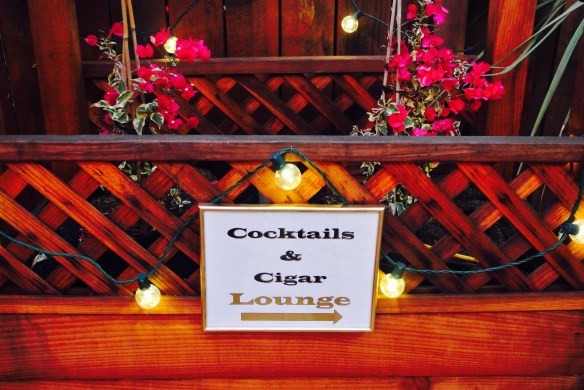
Thrift store entrance signs and  gold flamingos on the lawn. A “must” for any Mad Men party (found pink flamingos at Ross and spray painted all of them with Rustoleums gold metallic paint) 

First off, to those following our little blog, know I’m a Midcentury addict and lover of vinyl records. Any excuse to bring out my collection of vintage serving and barware, or play some records is my “bag” baby😉


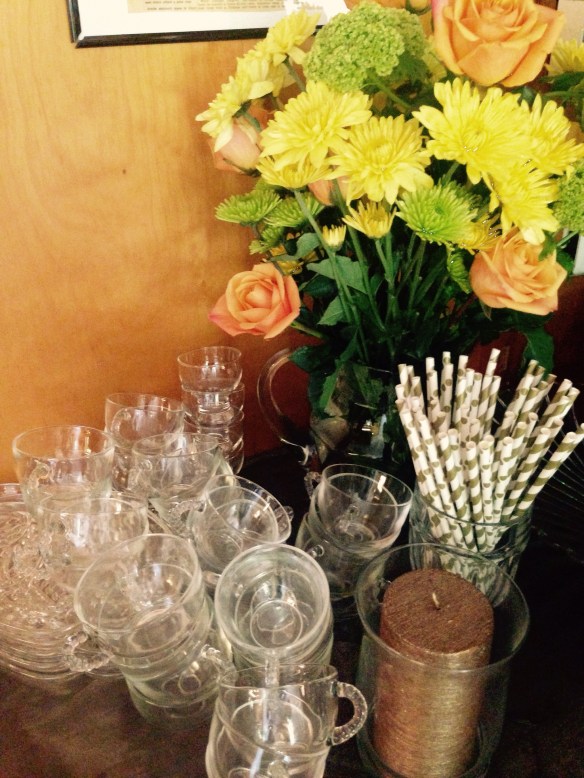
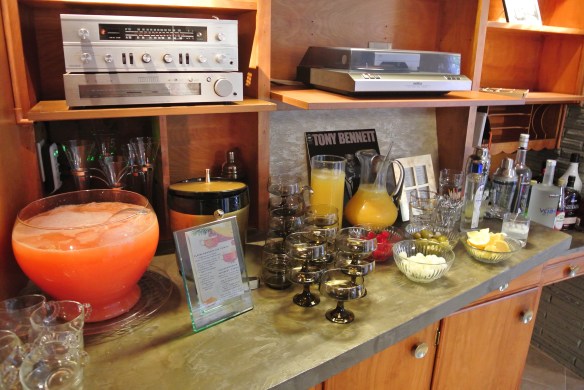
We offered a sparkling gin punch, all the fixings for Manhattans, Mai Tais, Martinis and Lemon drops. Tony Bennett, and Brazil 66 played in the background. 


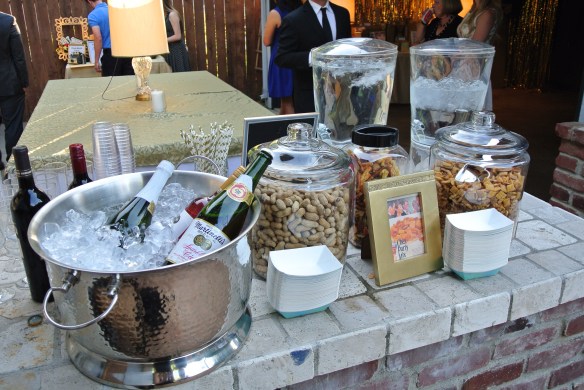
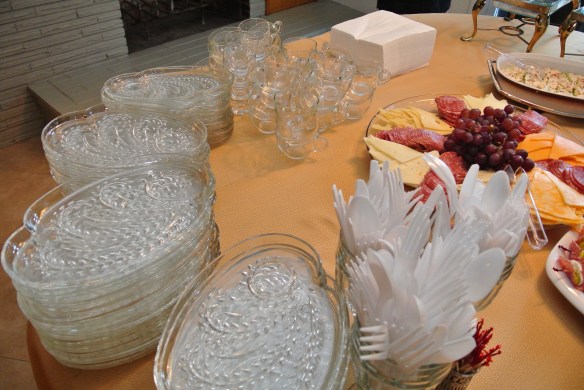
Beer, wine, sparkling apple cider, coke in bottles, and water were all outside. To  keep tummies from rumbling we filled two large jars full of peanuts and Chex mix. Our guests could fill paper trays and serve themselves snacks. 


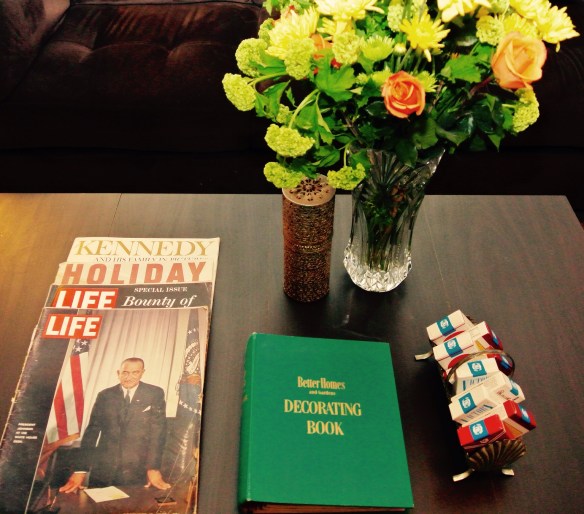
Decorating was sooo much fun! I found tons of vintage ads, put them in dollar store frames and displayed them around each table. I scored a 1960s Betty Crocker “Dinner for Two” cookbook at a garage sale, for our guests to sign. 

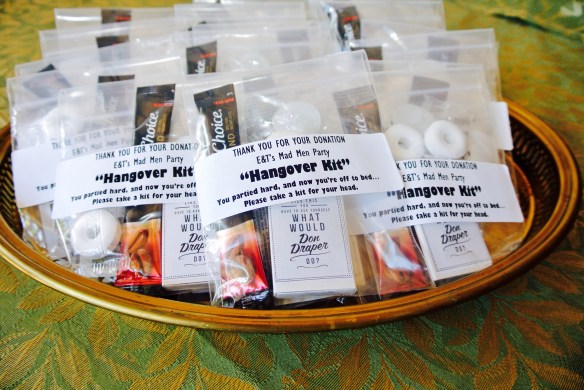
 As a way to say thank you to our guests we had a raffle drawing. For every dollar donated guests received a raffle ticket for a chance to win prizes. Also everyone received “gag” thank you gifts/party favors ~Hangover Kits (we’ll have the free printables and details for the kits next blog post)
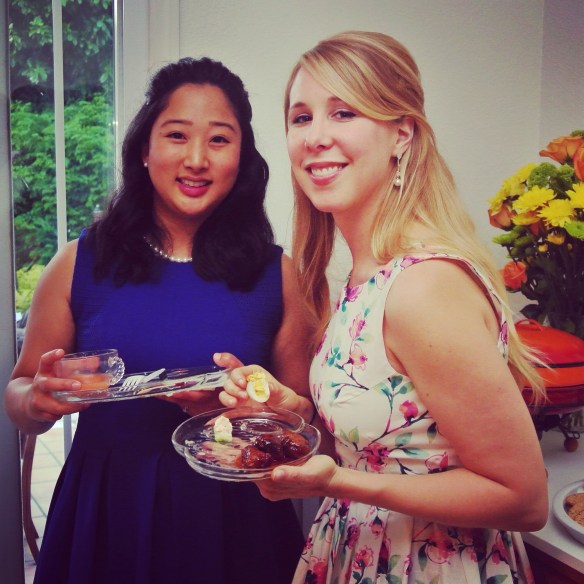


Dinner” started as heavy on the appetizers; cheese plate, dips, and small bites. We were sure to stay true to the era and included, Swedish meatballs, a molded dip, relish trays, stuffed celery with pimentos, deviled eggs, rolled salami bites, Hawaiian rolls, ham, wedge salads, etc. By 9pm as our family tradition, we had pizzas delivered to help absorb the alcohol😉


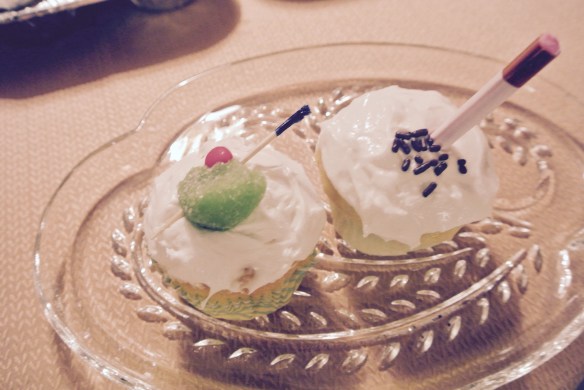
Dessert was cupcakes I decorated with gummies rolled and skewered into “martini olives” and bubble gum cigarettes “stubbed out” with chocolate sprinkles


We offered bubble gum cigarettes displayed throughout the house, along with my collection of vintage books, magazines and vinyl records. 


I resurrected a 1960s Polaroid land camera. We found film and I was able to snap a few photos before the sun went down. 


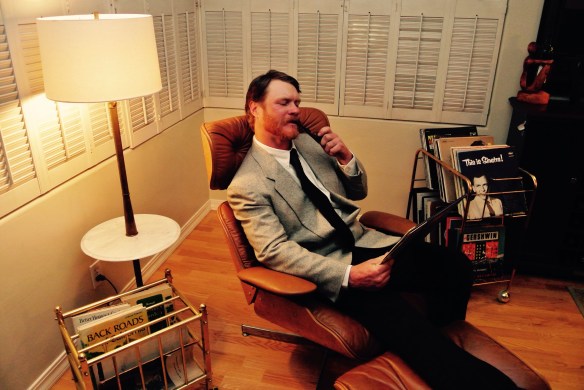
Little brother hamming it up for the camera “Don Draper” style 😉


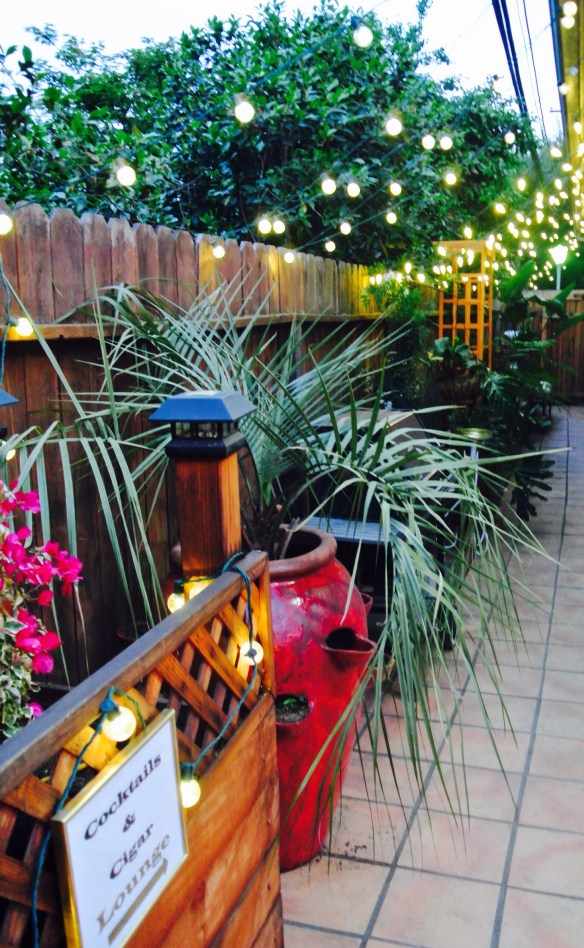
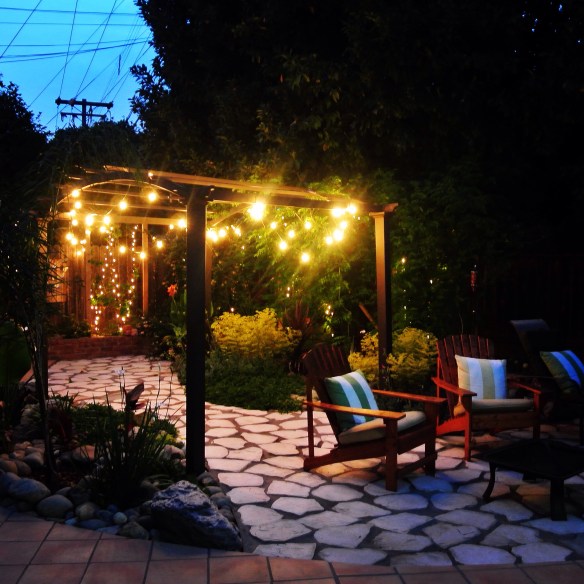
The party was mainly outside, (and where most of the fun happened). Thank  goodness for perfect weather, since our little house was at max capacity. However we tried not to disappoint by decorating the backyard. 


My friend who owns a thrift store lent us some vintage lamps which we used for accents and just to add ambience.


We created centerpieces from thrift store cocktail shakers, and green mums. 

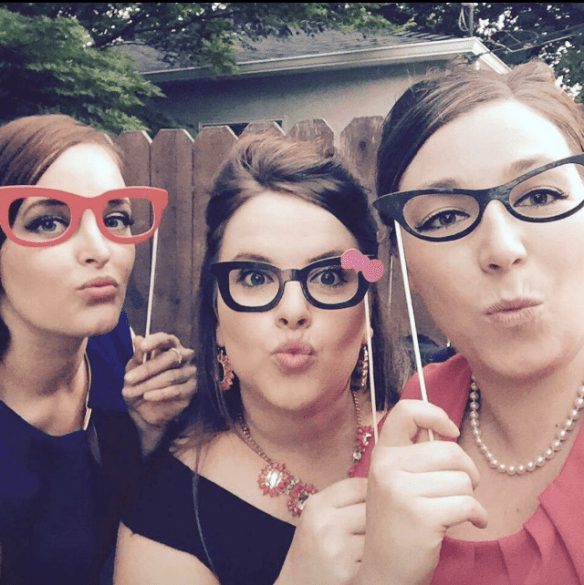
 Now onto my favorite part…Our guests! One of my best friends has the most darling Etsy shop Lenore Loves where she sells hand made party and event items. She loaned us some fabulous photo booth props for the event and the swanky pictures speak for themselves!


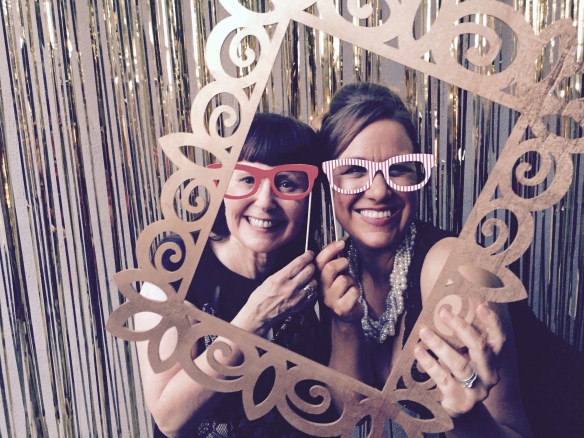
Oh and the pics get even better…We have the most glamorous friends and family…


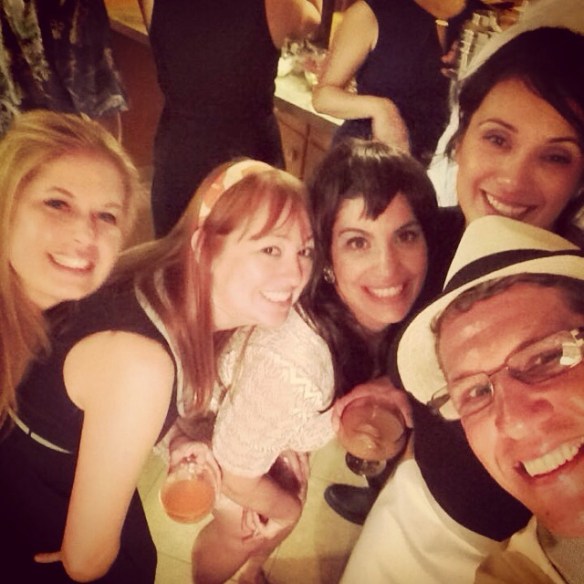
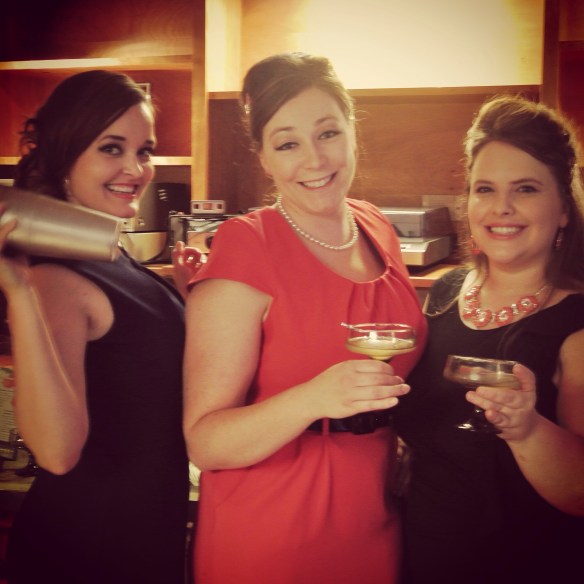
Seriously this is one of my favorite pictures of the night…


We are so, so, so thankful to our guests and all the generous giving! We hoped to provide them one outstanding party and a little inspiration to others. Maybe host your own charity event and “Party” Forward for a good cause?

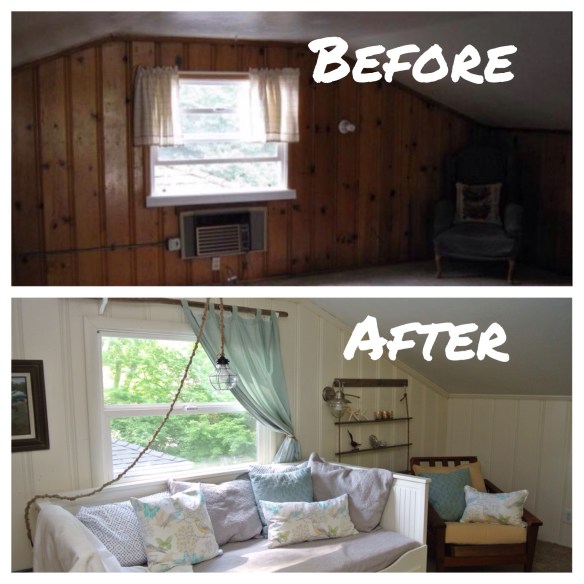
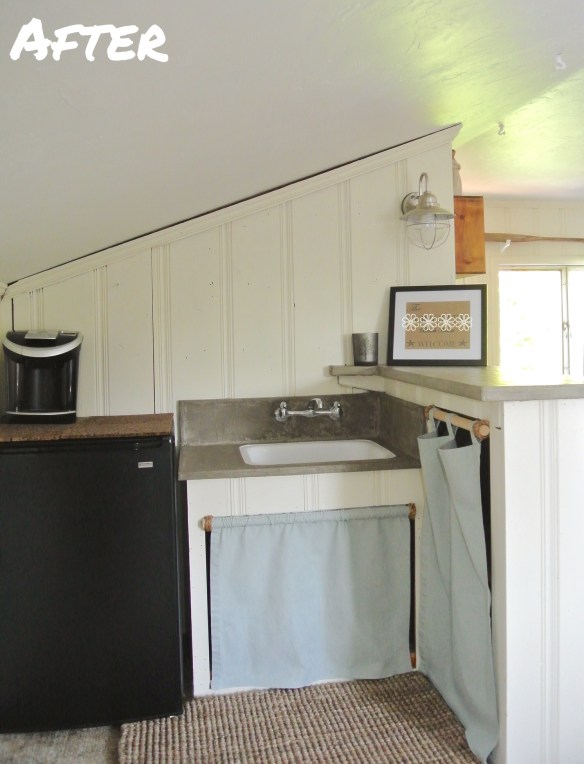
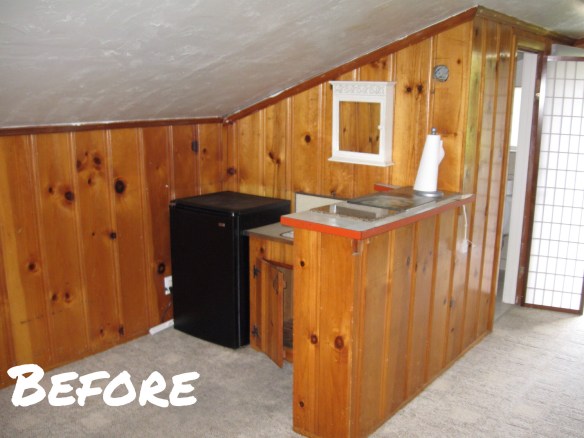
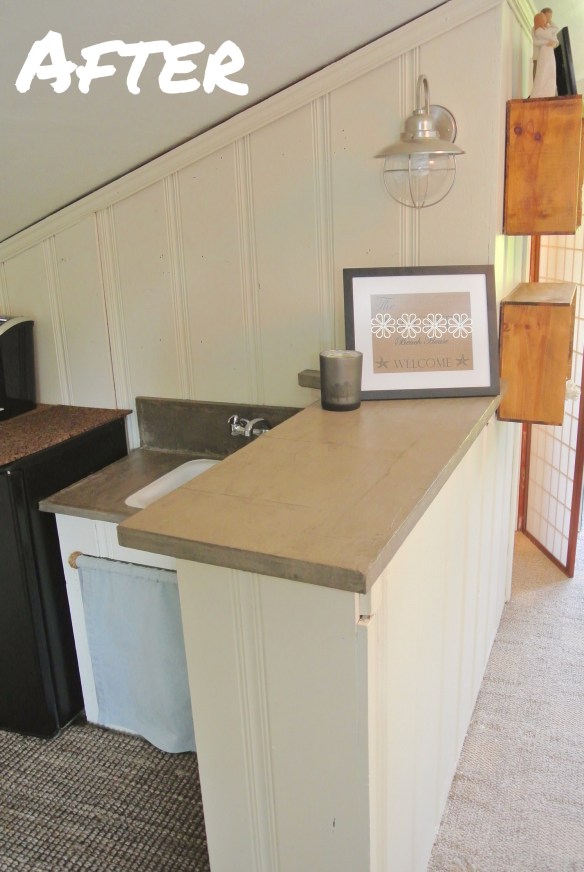
When our houses are small or maybe not fully renovated, we are sometimes intimidated to host parties. Yet with a little kitsch, a whole lot of inspiration and good guests your party is bound to be a success! Happy Sunday everyone! 


Happy Monday! Jute wrapped pendant light, late blog post and some “mad” mischief…

Happy Monday everyone! Wait?! What a Monday morning post?! 

I have the day off recovering from some “Mad” mischief. For those who have been following us on Instagram you may have seen some of the pics already. For those who aren’t, here is a little hint…


Oh yeah, still cleaning today…But well worth the stiff muscles and ahem headache😉 More surprises and pics to come next Sunday…

As for this week here is the promised post about our jute wrapped hanging pendant from our guest house…


As all you dear friends know I can’t sew, loathe knitting, and can barely crochet. I wish I could but my little attention span is reserved for hot glue, sawing wood, and electrical wiring. As much as I wish, I can’t spare any for the fine art of macrame or the sewing arts. But…I can tie a knot…lots of knots especially when watching a marathon of Mad Men😉 (l still had to untie several knots and start over but I got through it)


Basically the project is really simple, find a pendant light you love, a large spool of jute (usually sold at your local craft stores) and lots of patience. The knot is the pretty standard- “tie your shoe” kind as well.


Here is a really fabulous how to on tying the knots, courtesy of Design Sponge, but ours is adapted to only one kind of jute, (and no hot glue). 

 Hope you all have an amazing day! We’ll see you all next weekend with fun photos! Happy Sun–err Monday everyone! 

Guest House and Concrete Counters: Finally a Before & After! 

Have you ever had a project you ignored, detested, put off or just wished you never started in the first place? (The one project you so desperately wanted to call the professionals for) Our neglected guest house was that project…

Aptly referred to as “The Cave”, the studio apartment above our garage just creeped me out. Someone even lived and cooked up there at some point during the previous ownership. How do I know this?…Grease, food stains, mold, dirt, etc.

(Also I was the one doing the massive clean up, painting, decorating, exorcising spiders and the ghosts of owners past.)

First step (in the very drawn out) guest house project was basic clean up and painting party. This was back in the summer of 2012, right after move in. My good friends Amber, Maggie and I all got “high” on oil based primer one evening as we tried to cover the nasty paneling. 

Those ladies were troopers! It was awful! Even with ventilation and masks we all got horrible paint headaches. It took two coats of primer and three coats of basic latex paint to prevent the orange stain from bleeding through. (Even three years later, I think I still owe them a couple more dinners to make it up to them😉) 

Then post wedding, and main house craziness; new roof, water heaters, plumbing, etc. The guest house became just a neglected storage space. Yet in the last three years we kept moving forward, (albeit very, very slowly) towards making it livable. 

Since our main house is only two bedrooms, we desperately wanted a cheery, space our family and friends would love to stay in (and not go running for the nearby Holiday Inn)

We also L-O-V-E the sea and dream of owning a coastal retreat someday. We’ve collected, and were given so much “beach house” decor that decorating the guest house in the style seemed perfect. 

Only in the last month, the need for a guest house (and extra bathroom) has become a necessity. Therefore we put our efforts into overdrive; replacing the water heater, installing light fixtures, adding concrete countertops, deep, deep cleaning, decorating, etc. (even adding those aforementioned accent pillows😉) 

Now here are those much awaited “Before & After” pics!…

Edit

Edit  


Here are some more fun “after” pics…(our glass bottle lamp now has a home!)

(My attempt at a panoramic pic of the guest house)


We also added these floating wine box shelves…

We’ll be sure to include a little “how to” on our jute wrapped pendant light in the coming weeks.

We do have a few more projects in store for this guest house; new hardwood floors, a new ac, new stairs and deck, etc. However our little budget does not match our big wish list so those projects will be on hold. (Hopefully not another three years though😉)

Also I need to convert the bed back to a pull-out King, but that will require an extra mattress and more Ikea slats. For now, a twin bed will do the job when younger brothers occasionally crash at our place. Yet I can’t wait to have it completely ready as a private retreat for our friends and family. (More on creating “Hotel LHBD” for another post)

We’re just so glad to finally have a clean, cheerful guest house and no longer “The Cave”. Happy Sunday everyone!

When You Don’t Have Cabinet Doors… DIY Rope and Dowel Curtain Brackets with No Sew Cabinet Skirt

When you can’t clean the grime, then sometimes it’s better to throw it out…


Which is what I had to do with the old cabinet doors from our neglected guest house kitchenette. (Where even oil based primer refused to stick to them) 

So here we are now, concrete countertops done, and no cabinet doors…


We literally didn’t want to spend a cent on this project (especially after a recent splurge on accent pillows😉) Luckily we already had extra curtain panels from our oar curtain rods so a “no-sew vanity skirt” seemed to be a good idea (plus it would be free). With that in mind I rooted around the house for some kind of bracket or dowel to hang a vanity skirt. Dowels I found…Brackets I did not, but I found rope…

With a little creativity and lots of hot glue, I set to work on making looped brackets out of rope. 


I used the dowel as a guide and glued the loops of rope together. 


Then cut the ends off. I created the four loops and then drilled them in place with screws. The dowels slipped in snugly.


Next came the no sew vanity skirt. Disclaimer: I DO NOT SEW. You will see very few projects on LHBD that require a sewing machine. I literally have broken every sewing machine I’ve ever touched. (Also I think the person who invented Stitch Witchery tape was a genius. I always keep a roll in the house)

Basically I measured out the cabinet space, then using a straight edge, cut the curtains to size. 


I made sure to use existing corners that were already sewn. Then folded the cut sides over and adhered them with Stitch Witchery and an iron on steam.


Basically the curtains slipped right on the dowels and we have no sew “cabinet skirts”.

Beachy, easy and above all free! Can’t wait to show you all the before & after pics of our guest house next week. Happy Sunday everyone! 

Are We Done Yet?! (Guest House Concrete Countertops Semi-Reveal) 

We started 10 days ago with a “hot mess”~I mean blank canvas…

(Like the light pinkish/grayish painted vanity?)


Also the  kitchenette to our very neglected guest house/apartment above the garage.

 All original from the previous owners and literally never touched by us. A nasty combo of grease coated, rusted out, painted over, sticky back linoleum, vinyl, wood and laminate surfaces. (Seriously I was two seconds away from calling our plumber and having both the bathroom sink and kitchenette torn out.) I thought the job impossible. 

Only Eric knew to make me a deal. If concrete wouldn’t work I get new vanities. But if it does work I get Carte Blanche on the decor budget. Which would mean…(what he hates the most)…Accent Pillows! Lots and lots of accent pillows!😄 Deal accepted! 

 This indeed would be the ultimate concrete countertop challenge. Especially when we didn’t have a complete Encore countertop kit! Yikes! (More on that later)

So here is where we started…Cleaning 10+ years worth of gunk. 


Like our last concrete project, Encore kitchen countertops, we knew to horde cardboard and stockpiling 3m painters tape. Next came repairing parts of the counter. (Ie re-gluing  down peel and stick linoleum) 


(And when you don’t have enough clamps, bricks work just fine) 😉

As I mentioned before we did not have a full Encore countertop kit available this time around. We were missing the actual concrete. Instead we had just a leftover gallon of superbond and the Proseal/activator concrete sealant. Therefore I took a gamble (because accent pillows were on the line) and picked up some Henrys feather finish at Home Depot. I also tested the combo out on a piece of scrap board:


Superbond and Henrys feather finish…They went together like peanut butter and jelly. However I must admit,  I prefer working with the Encore kit. Their concrete was easier to control, smoother/fluid and a bit more durable as it dries. (Which is another reason why the project took so long, I wasn’t experienced working with this brand of concrete and more sanding was required between layers.) Yet it all came together, so we were confident enough to tackle the counters. 

First layer of superbond…


Layer two of superbond and right before sanding…


Also quick reminder…Don’t forget to remove all the painters tape before the last coat of superbond dries. This will help immensely with clean sharp lines. 

Next came the Henrys feather finish concrete and concrete sealer…


This time we’re not delving into all the details and steps on our countertops as we did here. Unfortunately we don’t have perfect “after” photos yet. We still have to silicone seal the sinks and clean before final photos can be shot. Overall so glad to check this one off the list!😀…Now I’m off! I have accent pillows to buy! Happy Sunday Everyone!

Psst!..This is our 100th blog post today! And we’re finally on Instagram! Follow our guest house progress and check out the sneak peeks. 

Spring Has Sprung! (Unless you Live in California, then it  was Back in January)

We were hoping to share our latest foray into concrete countertops…


…But it just wasn’t meant to be. 

I should know by now that no DIY project goes according to plan.(Especially when you tell all your readers ahead of time-then its a sure thing your project will run over schedule) So instead of showing you our new concrete counters in the guest house, we’ll distract you with pictures of pretty flowers…


Yes we’ve been in full bloom out here in California since January. Lovely weather but unfortunately we all are expecting a long hot summer. (No really the east coast should start selling us snow, we’re in a water crisis over here) 

In the meantime we’ve  taken the opportunity to add a few new flowers and finish another unfinished project that has sat around since last spring. Like these hanging baskets…


Which have been hanging around without any plants, and just collecting leaves all through the winter. (Project procrastination” it’s a real sickness people)

Last year we were so busy landscaping our drought tolerant, “dog proof” backyard, I’d forgotten about the baskets in the sideyard.  

One thing we’ve learned with our dogs is that they are magnets to new plants and fresh soil. (Especially soil mixed with manure – they go nuts for the smell) Therefore we’ve learned to plant “up”. Whether that be with tall pots or hanging baskets, the technique keeps curious wet noses out of our plants. Also when you do plant “up” it means you can add not so “pet friendly” plants to your garden. Like jasmin, lilies and begonias, which may be poisonous to dogs. 


Although the jasmin was not planted in a basket (the papyrus died so we had an extra tall pot sitting vacant) We instead wrapped it with green chicken wire to keep the dogs out. Also the sideyard is shaded  and sheltered enough for the lillies and begonias withstand the summer heat. To conserve water/moisture we’ll probably add mulch to all the pots and baskets. 

We still have more updates for the sideyard and cleaning  up but it feels good to cross another unfinished project off the list.


This area is still one our favorite places to sit in the shade. Now you’ll know where I’m drinking my coffee this morning and beating  the spring heat. Happy Sunday everyone! 

Lights, Water Heater, Arbor…Action!

We stumbled unintentionally onto another “blog series”…Its called finishing projects…


(This second lamp sat in a box for two years and we finally installed it this weekend)

Every home dweller can relate to the unending list of projects or house maintenance. We often ignore certain issues and take the road of “if it ain’t broke, don’t fix it”. Only when something is glaringly ugly and/or integral breaks do we call the handyman or pull out the hammer. 

I am soooo guilty of project procrastination. Literally I kept a Big Lots arbor for 6 years and only until this week put it together…Yeah it’s that bad…


So why the sudden change and working on projects that have sat around? (some apparently for years) Well we have a deadline of sorts. In only a month we need to decorate a few rooms, do some major spring cleaning, and finish the unfinished…And there is no better motivation to knock out pesky house projects than giving yourself a deadline right? (Just as long as you’re not giving yourself an ulcer too😉) 

I wish we had an amazing project or fabulous “after” reveal but to be honest, this week has been spent schlepping boxes of stuff to goodwill. The guest room/office is in complete chaos as we’re trying to reconfigure it for more usable space. Also we can finally walk through the guest house without tripping on camping gear or college textbooks (oh yeah we said goodbye to three boxes of our undergrad books! Happy Day!😊)

Unfortunately our only “after” reveal was replacing this rusted out 70s style outdoor light with a brand new “beachy” style one from homed depot. 


As well we’ve finally replaced our second water heater (in the guest house) Another boring maintenance project but necessary. In two years since we’ve bought our home we’ve replaced two water heaters. I’m hoping now that I will not have to budget for new ones within the next 10 years. (Grrr…money that could’ve been spent on new flooring)


Yet having running hot water for guests is probably a good thing. We’re also setting up for (hopefully) another concrete countertop project. This time we’re tackling a mini bar, and bathroom. I’m crossing fingers that we’ll be done by next Sunday. Especially since countdown is now 30 days away! Yikes gotta get back to work! 

Unlike us, we hope you have an amazing weekend full of fun times. Don’t be like us kids, just say no to project procrastination. Or you end up digging holes and shoveling mulch on your Sunday. #TakeBackYourWeekends people! Happy Sunday everyone!

Finishing the Unfinished…(IKEA Hack Pax Side Murphy Dog Bed)

On our blog we don’t try to hide the mess, the mayham or the unfinished…


(We just pretend it was meant to look that way) 😉

Last year we hacked a clearance Ikea Pax wardrobe to create a simple Side Murphy bed. Super easy and fun project! (Even though we use this for our dogs, the bed could work for us two legged folks as well) 


You can click here to read the original How-to, however we’ve made some minor changes recently (like actually finish this project) …


What an improvement! Subtle, but changes the look completely. (It’s like  having braces on your teeth to now a perfectly white, straight smile)

  To be honest, it was out of necessity that we changed it from an awkward, not-quite-bar, into a faux Midcentury sideboard/buffet. The necessity turned out to be Super Bowl 2015, and we needed a very tall snack station. Mainly to prevent super-sized puppies from sticking their noses in bean dip when no one was looking. (Sutter is the height of a small Great Dane so standard tables are no obstacle for him) Heres what we did:


Moving the wood front piece was pretty simple, we just unscrewed the piano hinge connected to the Pax. Placed the board at the edge of the bottom piece (towards the front) and screwed it back in place.


The second change required more thought but still pretty easy. First we went shopping for matching board and had it cut to size at Home Depot. 


Then if you have ever hacked IKEA furniture I’m sure you have extra dowels hanging around the house (if not they are normally available to buy at Home Depot). 


We drilled holes in the board the size of the dowels and then lined up the board at the end of the pax. 


Once satisfied with the placement we glued the pieces in place with gorilla wood glue. The weight of the boards kept the side piece in place but we had to get “creative” when gluing the small front piece…


The one safety tip we highly recommend is to add a “safety chain” to the inside of the pax wardrobe and drill it to the front piece. In case the latch slips or you have little ones you don’t want the front piece to fall on a toe, etc. (Unfortunately we can’t recommend a specific kind because it’s based on the weight and how you customize the front piece of you Murphy bed) These types of door safety chain kits should be available at your local hardware store. 


Overall the  dogs are happy, and we’re happy with the final outcome to this project. 


For someone with limited space, it is absolutely fantastic to hide away a bed. As a pet parent, it’s even better to hide dog beds, toys, etc for two massive pups! Hope our Ikea hack helps your doggy dilemma! Happy Sunday everyone! 

Ikea-hack-side-murphy-bed-dog-murphy-bed-pax-wardrobe-twin-murphy-bed-diy-midcentury-sideboard-bar.jpg

Psst…We’re hanging out at the Remodelaholic link party this month…Check out all the budget friendly ideas!

 <a href=”http://www.remodelaholic.com&#8221; target=”_blank” rel=”nofollow”><img class=”nopin pib-hover-img” border=”0″ alt=”I party with Remodelaholic” src=”http://www.remodelaholic.com/wp-content/uploads/2014/04/remodelaholic_party.jpg”/></a&gt;

Resurrecting 67 Year Old Sound!

Do you remember our last picture of the built in’s speakers? If not, here they are again….

IMG_4790
67 year old speakers in our attic, buried under roof debris, blown insulation and rat nests. (Oh yeah, our house originally came with a bad roof and a family of rats).

For those of you new to the blog, in the last two years we’ve been “respectfully” renovating a 1948 home. In the beginning, it felt like the house was just one huge money pit. (New roof, water heater flooding our basement, evicting rats, etc) Yet in the last year we’ve managed a few fun projects, and finally feel like we’re making progress towards “beautifying” a house versus just “maintenance”. Some of the fun projects has been uncovering little surprises, like our Midcentury built in with speakers!

IMG_4809-0
We also found out our home was once a designer “showcase” house on the block. Hidden cabinetry, unique mid century details and amazing craftsmanship. In this case we chose to restore versus demo the built-in. Even though open concept is the popular thing our hearts (and wallets) weren’t in it. Now we’re glad we never picked up that sledgehammer. Especially when your electrician friend comes over to help replace the speakers. What we didn’t expect was this (ps. I apologize ahead of time, my voice sounds so annoying through a cell video. Quoting my brutally honest husband, “no hon, your voice does not sound like that in person, I think our readers will understand, and not want to punch you in the face😉”)~thanks hon, and hopefully you all don’t… Thank goodness hubby and friend were curious enough to test if the original speakers still worked! We expected (just based on first glance) there was no hope for them, that we’d have to pry off the built-in speaker grills and buy completely new ones. Instead we’re blown away Tony Bennett can still hold a note on these 67 year old speakers, despite years of abuse and neglect.
Even though the quality could be improved we decided in the short term, use them till we lose them. Why replace when the point was to try to keep the original vintage qualities of the built in?
Hence our friend shuffled around in our attic for an hour, cleaning and rewiring at least one speaker on each side. image
image
He placed a couple thin boards over each temporarily (just to keep the dust away). We really will need to replace these old girls, just for sound quality alone, but for now we’re content to listen to the warm tones created by 60+ years of age. Add the tube receiver and vinyl, it’s like taking a trip back in time to the 40s and 50s. Here is my attempt to recapture the listening experience of our grandparents since many of us youngsters have never heard it…
(FYI the clicking sound in the beginning is not the sound system but the puppies in the kitchen, they were curious about the sound coming from the attic and were enjoying it too)
We are really happy with keeping this vintage piece. All I need now is more vinyl and some staging ideas for the shelves. (Admittedly I have a severe “styling bookcase” disability) Any suggestions will be gladly appreciated😉. Happy Sunday everyone!

It takes a Village to Make a Bottle Lamp

This Sunday should’ve been the last post on our Midcentury Built-in series. Instead it turned into this…

IMG_4743
Our electrician was stuck at a job last week and is now coming today. Hopefully we’ll have working speakers by the end of the week. In the meantime I thought I’d fill the blog-post void with a “quick and easy” lamp project. (Notice the quotations…this is to denote heavy sarcasm)

First I’ve been admiring glass bottle lamps for quite a while. Except their price tags…

IMG_4754-0

IMG_4753-0
Even at Home Goods, Ross and Target these lamps were pushing $65-$85 a piece! Also the lamps were puny, I wanted something BIG, to light up our very dark guest house.

Luckily I already had an antique water bottle, picked up at the Sacramento antique fair for $5. Also a huge lamp shade sitting idle around the house (I think the shade was a Ross clearance for $6 since it has a small tear)
Lastly I bought a lamp kit with extra gold cord (together for $16) at Home Depot. Total cost out the door for this project $27 buckaroos if you’re starting from scratch. Since I already had some items on hand I’m calling it my BIG, “designer” glass lamp for $16.

As for making the lamp, I watched a couple YouTube videos on drilling into glass wine bottles, vases etc. Looked pretty easy, and quick right….WRONG!

IMG_4718
That’s my awesome Uncle Joe on our third battery pack for the cordless drill!(and an hour into the project) I had underestimated the thickness of the antique glass. 😝

Luckily I had the foresight to bring the project up to my parents place for guidance, the correct tools and just safety sake. Also considering my penchant for diy injuries and knowing there would be 4 EMTs and a Nurse on the premise, in case I took out a finger or an eye.

Only to find out this project needed a dremel, (which my dad didn’t have one) and a family of DIYers who enjoyed “cocktail” hour” in my parents garage watching our progress.

IMG_4720
Everyone got into the blogging action. Notice I’m holding the bottle, my fabulous uncle is drilling the hole, my cousin Craig is holding up a work light, and my sweet cousin Danielle is taking all the pictures on my phone.

IMG_4722
(it’s not a true family gathering without power tools and home project conversation)

I’m going to spare you the “how to” on how we drilled the hole since I don’t know if we even did it correctly. However per pinterest and videos we used painters tape on the bottle, a tile/glass drill bit, and lots of patience to drill the hole.

IMG_4708
Once I got the project back home, the light kit was super easy (15 minutes to complete the project)

I found a relish lid that snapped onto the bottle opening perfectly, and punched a hole in the middle of it.

IMG_4729 Next I fed the lamp cord from the bottle to the opening.

IMG_4727
Then I assembled the kit following the instructions:

IMG_4730

IMG_4731

IMG_4732

IMG_4733

IMG_4734
Finally I added the bulb, lamp shade, and plugged her in…

IMG_4739

IMG_4743-0
Not too shabby right?😉 When the guest house is finished and staged I will take new pictures of our lamp in the proper setting. For now I’m just grateful for awesome family and that I didn’t accidentally shock myself or take out an eye. Happy Sunday everyone!