Spring Has Sprung…Let’s Set Them Free!

We actually had a question come our way…“Did your technique for protecting those tropical plants from frost work?”

20140322-201340.jpg
We decided this would be a great time to put the paint brushes down, celebrate spring, and also our plants survived the winter!

20140322-202311.jpg
In case you weren’t here for our how-to, we tried a technique that used burlap and wooden stakes. We then stapled the burlap to the stakes, essentially creating a burlap wrap for each potted plant. Then we dumped dried, fallen leaves around the base of each plant. The technique was budget friendly, super easy and honestly…We thought it would never work. (It was a cold and very dry winter; not the best conditions for tropical plants)

Now we’re hooked! The plants made it through! Overall there were a few frost bitten leaves that were exposed to the elements (outer leaves not fully protected)

20140323-070822.jpg

20140323-070842.jpg

20140323-070857.jpg
Yet the plants are already recovering and new growth replacing the old. We’re not sure how well this technique would work in colder climates, but we dipped into the low 30s-high 20s at times. The only downside was having to sweep and dump leaves away in the spring, but worth it for saving our tropical plants from frost.

20140323-071010.jpg
We hope you are enjoying the first days of spring, and are so excited to unveil some projects in the coming weeks! Happy Sunday everyone!

Mustard Yellow Walls…And the Best Dog Toy EVER!

Oh yes, I said mustard yellow walls! Combine those with red brick, lime green/orange accents, popcorn ceilings, tye dyed yellow brown countertops…Nice visual right? Luckily we saw through the ugliness and bought this little gem of a house. Now we’re going through the slow and tedious process of bringing it back to a neutral color scheme.

Back to mustard yellow walls…Here…

20140315-090606.jpg
Up above here…

20140315-090719.jpg
Oh and also in the laundry/mud room…But since it’s laundry weekend no pics today (I think hubby draws the line at the world seeing his boxer briefs) 😉
Now we’re in the process of priming and ousting the yellow…(I like mustard on my veggie burger, not on my walls!) Also check out this wall texture…

20140315-091403.jpg
It took us three coats of primer just to cover up our “French’s” yellow and spray on texture, but entirely worth it in the end…

20140315-091746.jpg
We haven’t chosen the final paint colors yet, because we still need to make over our box light. Learning from our fireplace experience, lighting is crucial in selecting the right paint color for your space. Yet for now we’re just happy so see the yellow gone. (Sooo happy!)
In the meantime the dogs have been amazingly well behaved despite our marathon painting weekends. The reason? We have these toys to thank for it…

20140315-093317.jpg
Nature’s Champions training treats and treat ball combo pack. (We found this at our local Costco) This is not a sponsored post, we just L-O-V-E these toys! Why? Because they’re:
1. Budget friendly (meaning you can replace the training treats with regular dog kibble)
2. Keeps the pups occupado, (especially when you have many walls to paint)
3. Mentally challenges our dogs (which is important if you have super smart dobermans) .
4. Lastly these balls are pretty tough (And with these two bruisers we need tough toys)

Basically you fill the balls up with the training treats or kibble, and the dogs have to roll them around to release the treats. Us and our pups are smitten…Sierra even sleeps with her “busy ball” and Sutter carries it around in his mouth like a pacifier.

20140315-094524.jpg
For $13 each these are the best, budget friendly dog toy for us year to date. We hope this little review helps a few desperate pup parents out there. Happy Sunday everyone!

“Disclaimer: This is not a sponsored post, but a personalized experience. Dogs and their owners are different, therefore all results and experiences using the Natures Champions Omega training ball will vary. Always follow the manufacturers instructions, cautions and disclaimers.”

Ceiling Fan Re-deux

Here’s to the easiest DIY improvement year to date! Any homeowner or renter has encountered ugly ceiling fans at some point. Many replace them, others paint them, and then a few of us disguise them. Hands down disguising is the easiest and cheapest technique. Here’s a shot of the infamous 1980s, “mosquito fan” in the kitchen/dining room:

20140308-063432.jpg
It also doesn’t help with the ugliness, that this is the only room in the house with remnants of popcorn ceiling (albeit shaved off and painted). We also have a love-hate relationship with the original midcentury, tweed half- drapes (behind the fan) but that’s another story for another time.

However the fan is a high quality, Casablanca. Quiet, multiple speeds and fabulous light. Not bad for an 80’s throwback? Yet the fan needed an update. During our two weekends of marathon painting I finally grew tired of looking at it. Grabbing a drum shade from another light in the house and extra extenders I gave it the ol’ college try.

We used the same technique as our last, except we were able to use a smaller extender.

20140308-072213.jpg

20140308-072238.jpg

Yet altered our technique by adding a large washer between the shade and connectors in order to stabilize the shade. We also did not add extra chain and threaded the main chain through the middle of the shade. This allowed for a cleaner look.

20140308-072911.jpg

Lights on!

20140308-072956.jpg
Such an improvement! It’s almost pretty!
We actually are warming up to the cream colored fan blades and hint of gold brass. Originally we had the notion to paint the whole thing oil rubbed bronze, but the dark color would’ve drawn the eye towards ugly ceilings.
Also brass is starting to make a come back, and the fan ties in well to our mid century gold knobs in our built ins.

20140308-074434.jpg
Now the light is complementary and blends well with the room.

20140308-074621.jpg
Slow and steady seems to be our slogan these days. I’m sure you’ve all been in that frustrating place, torn between a budget and beautification? I think the muddy paw prints all over newly painted floors did me in. I am seriously close to entering us into one of those home make over contests! Ahmed of Yard Crashers may have a DIYer stalking him soon(just kidding Ahmed, nothing but love)

Who would’ve thought bringing a kitchen back to a neutral color pallet has been more work than expected. At least this was one easy and cheap update.

20140308-075600.jpg
Back to painting…Happy Sunday everyone!

Here’s to the crazy ones…

The home decor rebels, the DIY pioneers, the homeowners on a budget…And when we see a paintbrush we see genius. Because the people who are crazy enough to think they can paint their floors, are the ones who do…

20140301-195857.jpg
Oh yes we finally got crazy and said goodbye to red, brown, orange, yellow, and lime green glass tile inserts.

20140301-200029.jpg
Some may argue the glass tiles don’t look too bad, some may say they’ve seen uglier…How about a close up then?

20140301-200244.jpg

20140301-200306.jpg
After we painted the fireplace gray and started priming away the mustard yellow walls, the tile was now the last piece of the ugly puzzle.
WARNING: Painting tile by hand is not for the faint of heart. You WILL be sore and curse yourself an hour into it. Imagine painting at least a hundred finger nails and you’ll get the idea.
However if you have a tiny budget (and are half way desperate) then this project is for you.
We already planned to patch the kitchen grout and even lighten it up with grout renew. While out shopping we discovered that grout renew in antique white was nearly the exact shade as Glidden’s natural linen paint. (The guys at Home Depot let me test it) It was a sign, so we asked them to match Glidden’s gripper primer to the color.

20140301-203229.jpg
We also picked up a can of clear high gloss paint, since the primer would need a protective coat.

20140301-203352.jpg
Once home, and still asking ourselves should we really do it, we cleaned and sanded each of the tiles.

20140301-203816.jpg

20140301-203829.jpg
The painting required two coats of primer and two coats of clear enamel. I worked in rotation and strategically blocked areas off from the dogs who wanted to help.

20140301-204328.jpg The hardest part of painting tiles was the tiny black dog hairs. Despite a pre painting vacuum and mopping, I was still picking and brushing them away from wet paint. It was tedious at times but a vast improvement from lime green and burgundy.

20140301-204801.jpg

20140301-204812.jpg

20140301-204849.jpg Our little eat-in kitchen is slowly coming together. Are painted floors going to stay? Maybe, or maybe not, but for now they are a low cost and even easier alternative to chipping out and tile replacement. We’ll be sure to post updates on how our floors stand up to high traffic, dogs and parties in the weeks to come. In the meantime, to all our fellow crazies, have a Happy Sunday everyone!

A Fireplace of a Thousand Shades of Gray

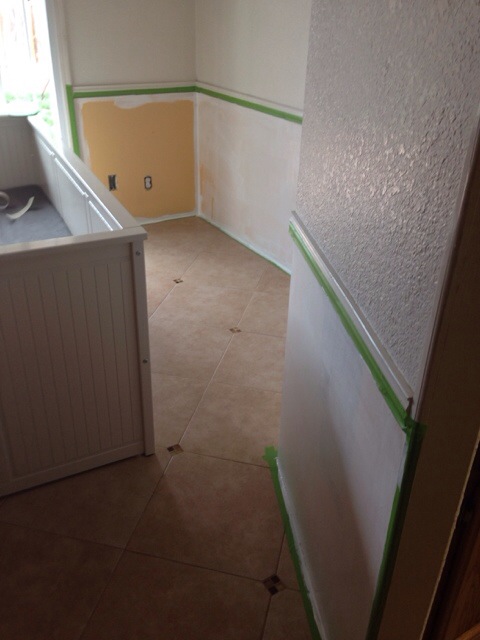
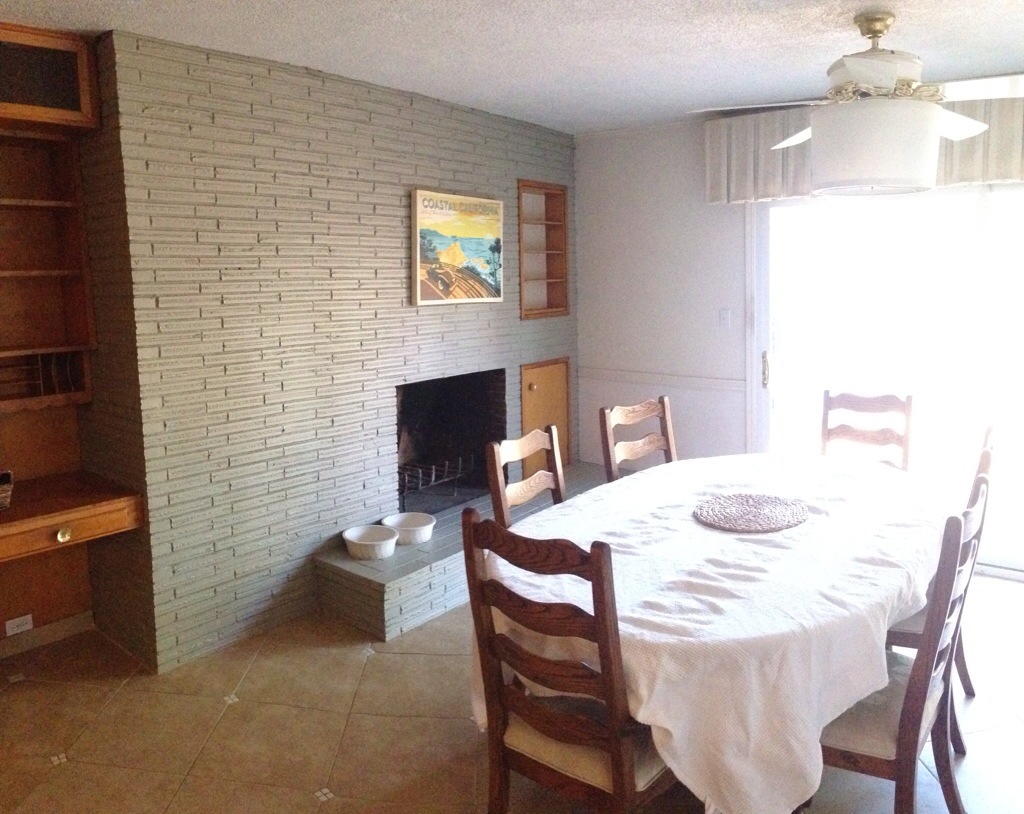
This is a tale of everything you shouldn’t do, and everything you should do when painting/staining a fireplace gray. Especially a mid-century, burgandy stained, brick fireplace that takes up half your kitchen/dining space…Oh yeah baby bring on the ugly pics…

20140222-191949.jpg
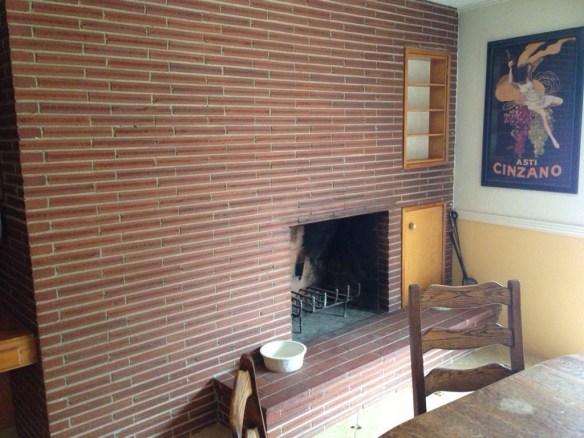
Take it all in…Yes, that is mustard yellow walls. Yes, those are pecan/orange built-ins with gold hardware. And yes, that is my half-attempt of making it all work together with a hand me down piece of art.

Now here is the instigator…The Valentines gift from hubby that threw us into action, and made us get off our duff after a year of living with ugly…

20140222-192250.jpg
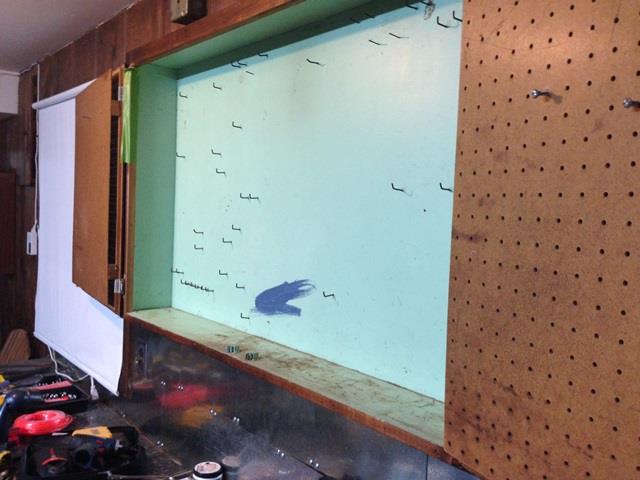
Back in October when the basement flooded, we found this relic from the hubby’s bachelor days. During the clean out I had made an off-hand comment, “how great would it be to have a TV in the kitchen so I can watch the news or Food Network while cooking…” And guess what…MY HUSBAND REMEMBERED!!!!!!!

I swear our spouses surprise us sometimes! You wonder how they can forget to buy the milk at the store one day. Then suddenly they remember an inconsequential comment from four months ago. (Who knew?! I totally love this man!)

However hubs had one caveat, a TV would have to wait till our savings caught up to it, but that doesn’t mean it couldn’t be installed? And a fireplace could be painted?

Now that is love! He hates, painting, I mean H-A-T-E-S… In fact as a rabid UCLA fan he’d rather watch USC kill his bruins in football than paint…

20140222-194519.jpg

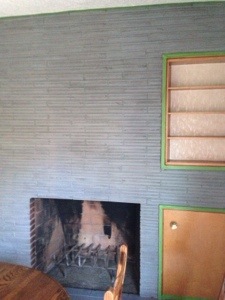
I FEEL SO LOVED! First he prepped and cleaned the fireplace. We had researched a couple of diy brick staining projects and decided to give it a go. We settled on Waterstone semi transparent masonry stain by Behr. It was the lightest gray available, since charcoal would’ve been too dark for our room.

20140222-195013.jpg
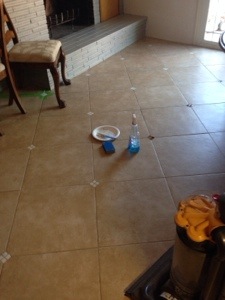
As for the dogs, they had to hang with us because of the weather…They were great supervisors.

20140222-195259.jpg
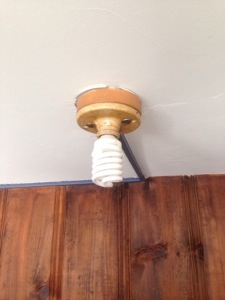
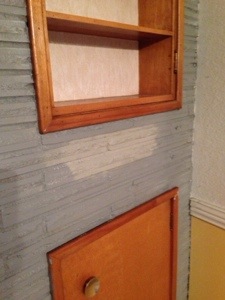
At first we were pretty satisfied, yet as the day wore on and lighting changed we noticed the gray turn bluer and bluer…You’d never guess based on the pic below that this was a robin egg blue to the naked eye.

20140222-195554.jpg 
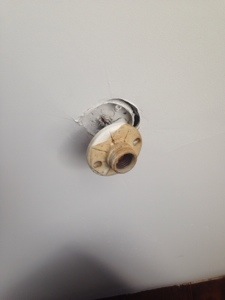
So we started to get a little desperate and try a new technique…Like paint it with leftover cement gray by Glidden (the same perfect shade of gray we used for the garage) Nope! Still blue!

20140222-195958.jpg
Poor hubs, he dealt with me as I went through all the stages of grief that Sunday. The Moms were called, and became our color counselors, (the pics and texts were flying furiously that day!)
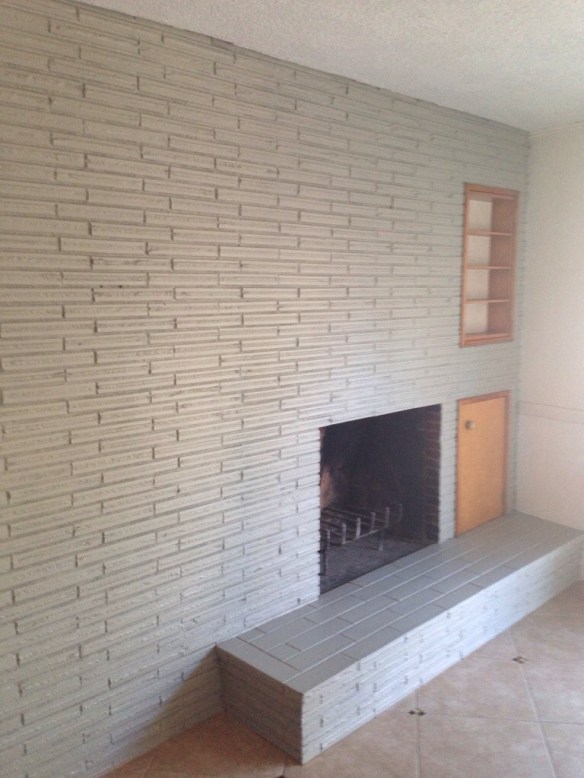
Finally in a moment of exasperation I just had to leave the room. Then for the first time noticed our olive wood accent wall in the living room, in the afternoon light was gray! I mean the perfect shade of mossy light gray! Immediately I splashed some paint on the fireplace…Voila! Gray!

20140222-200647.jpg
It wasn’t the stain or paint at all, our backslider lighting was the culprit! See our house is a cute blue exterior and the light from the backslider reflects off the garage and patio creating blue light in our little house! So here it is…

20140222-201000.jpg
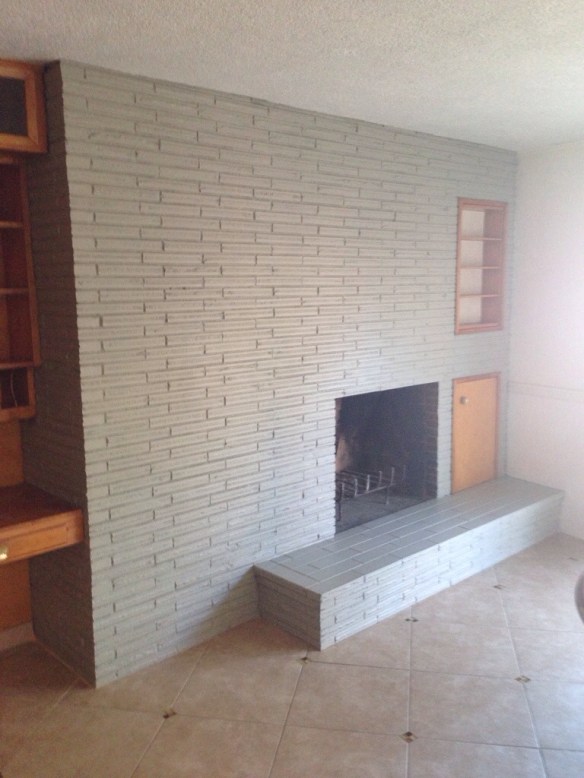
Yay! Color crisis adverted, a light mossy gray that seriously brightens the room..Some before and after pics shall we?

20140222-201152.jpg

20140222-201215.jpg
Of course hubs still has some more work to do, (including setting up the TV wall unit) but we are finally tackling this room. We have several big updates in the coming weeks and so excited to share! Happy Sunday everyone!

The never ending Valentines Day…

I had a few more surprises up my sleeve for hubby’s v-day. Again, the rule was to not spend any money…Well I sorta cheated…First I used a leftover target gift card for $8 worth of hooks for organizing his tool cabinet. The second time I cheated was for these…

20140215-194632.jpg

20140215-194648.jpg
I bought these lights nearly a year ago for about $15 each at Home Depot with the intention of installing them in the garage. However they somehow got packed away in an old card board box and forgotten. Only after I started organizing the garage I was able to find them. BONUS GIFTS ROCK!
Here’s the before cool industrial lights…

20140215-195152.jpg

20140215-195206.jpg

And now the after…

20140215-195304.jpg

Yes I know not the most exciting post, but hubby is in the middle of my Valentines day presents…We can’t wait to show you all next weekend! (Super excited! He’s doing such a great job!) Happy Sunday everyone!

The “Beast” is gone! Hello new garage door!

I’ve been woefully neglecting to post “before and afters” and “house tour” photos…(For good reason.) We don’t really have any photos to be proud of. Between replacing water heaters, a new roof, new fences, asbestos abatement, etc these are all high cost projects but none are really Pinterest- worthy. Yeah cause I’m sure you all want to see close ups of a water heater right? (Ooh a Rheem 2000, I’m going to pin that!) We’ve been responsible homeowners and savers. We’ve paid cash, (instead of taking the easy route of plastic) and sticking to a strict renovation budget. Putting aside our “wants”, we’ve focused on the “needs”. B-O-R-I-N-G!

But today we finally get to cross a project that was a “want” and sort-of a “need”. Our 1948 solid metal garage door is gone! Or rather what we called the Beast! All metal, no insulation, original springs about to snap, it seriously needed to go! 200-300 lbs of scariness! Our garage guy even had to saw through the rusted metal springs. (It was nail biter today) .

20140208-202218.jpg

20140208-202321.jpg
Here is the hubby and installer straining under the weight of it…(looks like some rainy day fun). These guys were troopers!

20140208-202533.jpg

One of the trickier aspects of the new garage door was to install the modern day springs/pully system. They had to cut into the ceiling to account for our low garage overhead.

20140208-202725.jpg
Yet I will trade holes in the ceiling for this beauty any day!

20140208-202839.jpg

Yay to our first true “before & after” shot!

20140208-203007.jpg

20140208-203018.jpg

Happy Sunday everyone!

The hubby’s $8 Valentines Day gift…Before & After Tool Storage

organize tool cabinet diy quick easy (29)

Hubby and I have this “no money gift” policy right now…Maybe after a new roof, a water heater blow up, new fences, asbestos abatement…The “no money gift” policy starts to make sense. I don’t know if this happens after marriage or buying a house, but apparently we’re not the only couple who adopt this policy.

However that does not mean we don’t give each other sweet and thoughtful gifts, or lack in romantic gestures. Hub’s birthday, Christmas and Valentines gift request was ALL organized storage and cabinets.(Every one of them in the entire house!) He and I are both “closet” organization nerds (we love the idea of organization, but not always the doing). His official slogan is “no stuff”, but after two homes, even he realized stuff can accumulate. Hence the inspiration for my next project; including before & after shots, and tool organization tips!

Disclaimer and wife confession…Yes items were bought for this project… $8 for random hooks at Target on a gift card

[RECAP] You’ve seen the Before and the Progress Pics of the husband’s previous Man Cave present…

before garage pic4progress-garage-pic-1

(See more on the Man Cave Make-over by clicking on the pics!)

However what you haven’t seen is what we have hidden behind the cabinets…(cue “Jaws” music)

First the ugly before shot…

organize tool cabinet diy (40)

(For a supposed DIY couple, we’re pretty ashamed of this photo)

You’d think we’d show more respect for the tools, or at least have more of them. However this is pretty much it. We’ve made it through two homes with barely middle-of-the-line grade, and/or hand me down tools. The only few “quality” tools came as Christmas gifts. (I.e. our dads staging an intervention)

So with Super Bowl and Valentines day approaching I needed to quickly fix this mess…First paint over the really awful original paint with left over cabinet/workbench paint (custom match Glidden denim blue).

organize tool cabinet diy (43)

organize tool cabinet diy (47)As you can see two coats became necessary… ( A powder puff teal and blue tool cabinet would not meet man cave criteria)

Next I actually left the original hooks, they did serve a good purpose…The tools just needed to be reconfigured…

organize tool cabinet diy (48)

TIP #1 – Take advantage of Magnets! We already had an Ikea magnetic strip, normally used for knives. This became a great idea for storing our eclectic mix of screw drivers and  tool randomness.

organize tool cabinet diy (52)

TIP #2- Take advantage of storage cases the tools come in. We just unrolled, hooked and even nailed the current storage cases to the pegboard doors.

organize tool cabinet diy (26)organize tool cabinet diy (27)

organize tool cabinet diy (32)

Lastly we still had random odds and ends of power tools that had found their way into the tool cabinet from the cardboard box of power tools (No I did not take a picture of the card board box of tools… There are just some “before” pictures I am beyond ashamed of)…So using a left over metal shelf from our dog proof garden box project, I installed it in another cabinet. Then started the process of reorganizing the power tools. (BONUS tool cabinet!)

organize tool cabinet diy power tool storage (25)

TIP #3- Random hooks sold as hanging bike or yard tool hooks are also fabulous for storing power tools. This entire pack at Target cost about $8 and look at all the great ways to use them. I even found a dowel and with the hooks it became instant paint/duct tape dispenser.

TIP #4- Take a picture of the “after” organization, then place in the cabinet. This will remind husband, you and everyone else how it is supposed to look. (Taking the “thinking” out of reorganizing)

20140201-104949.jpg

20140201-104959.jpg

We hope these tips help you on your goals for an organized garage and tools. Happy Sunday everyone!

The White Board is Back Baby!…DIY Framed Weekly Menu Plan (free printable)

If you scour Pinterest or Houzz kitchens all you see these days are diy black chalkboards, (and they are everywhere)! But what if you’re not ready to commit to painting your cabinets with black chalkboard paint? What if you’re a renter? What if you just have really ugly handwriting? Originally I wanted a sexy black, chalkboard cabinet too, but then had to ask the question, “what would I really use it for?” The next step was logical, a weekly menu planning board! Yet before jumping into the land of chalkboard with both feet, and go crazy with paint. I decided to just dip the feet in and see if I’d actually keep up a weekly menu plan in the kitchen. Forget the chalk, we’re bringing back the white board marker!

free weekly menu planner

I have to give credit to the hubby for this project and a recent discussion we had. Over the past several months he’s felt a little left out of the weekly menu planning process. In all my nerdy excitement over couponing and meal planning this past year. The weekly menu consisted of scratched notes in my Busy People Budget binder.  I had overlooked his desire to be part of the planning process. We figured this board, would allow the two of us to work together, make changes, and both contribute to the weekly menu.

Also the intended surface in our kitchen has an old telephone jack, hiding it versus removal seemed the better option for two insanely busy people.

free weekly menu planner 5

This project was so incredibly simple, no mad crafting skills necessary. Just find a big picture frame with a glass insert that you have around the house, some patterned paper or even use wrapping paper like we did. Print out our Free Weekly Menu Planner.

Free Weekly Menu Plan printable

Weekly Menu

Then tape the planner to your patterned paper with double stick tape and place in said frame.

free weekly menu planner 1free weekly menu planner 2

Hang and you’re ready to start  weekly menu planning. Super simple, inexpensive, and a great first step to turning a money saving/organization goal into a habit. You’ll just need a fine tipped white board pen, to get started.

free weekly menu planner 4

This is a great alternative to paint and diying a chalkboard.(Plus no ugly chalk smears.) A little windex and/or a paper towel and you’re ready for the next week! Happy Sunday everyone!free weekly menu planner

It’s the most awful time of the year…(Putting Christmas Away)

Free Storage Solutions for Christmas DecorationsOh yes, the Christmas decorations are down, and everyone is in “Resolutions” mode…No play, all work, and everyone saying words like “goals”, “organization”, etc. For a nerdy, goal oriented, semi-organized, person 11 months out of the year, saying good bye to Christmas (that one month where I let my hair down) is one of the saddest times of the year. (If given the chance my Christmas decorations would be up till Super Bowl, but then of course the neighbors would hate us). In the meantime I thought we would share some of our money saving/organization tips for storing away the clutter with free stuff you may already have at home. Because seriously, who wants to spend $40 on ornament storage…(as seen below from Amazon) Yuck! (Doesn’t this defeat the purpose of that resolution to save money?!)

.ornament storage

Especially when you can spend $6 for organic apples at Costco AND doubles as ornament storage…inexpensive ornament storage

(This idea is brought to you by my dad, he’s a pretty clever guy, no Pinterest necessary) Also if you’re a knitter/crocheter then this same idea is great for storing your yarn/twine…

inexpensive yarn caddy

Another awesome and free idea to store away those pesky Christmas lights is by using an empty tissue box…inexpensive christmas light storage

If you don’t care what it looks like then skip the next couple steps (but in case you need to get rid of some left over Christmas wrapping paper…) Wrap the box in wrapping paper, and make sure to cut away the paper at the tissue box opening, then  tape on the inside of the box.

inexpensive christmas light storage 1inexpensive christmas light storage 2

Then loop your Christmas lights, place in box and Voila! Instant Christmas light caddy…inexpensive christmas light storage 4

Again if you already put away the Christmas lights, then this idea can double as a plastic grocery bag caddy…(And with two supersized dobermans, plastic bags are a hot commodity for dog walking, if you know what I mean…)

inexpensive christmas light storage 3

Third idea is for all those pretty ribbons and garland you wanted to save…You just need a clean, leftover plastic container (i.e. cottage cheese, etc).

inexpensive christmas christmas ribbon caddy

Cut a cross in the lid, then place an end of your looped ribbon through the hole.

inexpensive christmas christmas ribbon caddy 1

Place the lid back on and you have an instant ribbon storage and caddy for next year’s decorating.

inexpensive christmas christmas ribbon caddy 2inexpensive christmas christmas ribbon caddy 3

Remember this same idea can be used as a yarn, or any type of ribbon/string caddy. Finally, our last storage tip is for storing those mini ornaments…Again with two large dogs who L-O-V-E tennis balls, we tend to accumulate many empty tennis ball canisters…inexpensive christmas christmas ornament caddy  We put these to good use by storing all the mini ornaments… And if not ornaments, these canisters make great paint brush caddys!

inexpensive christmas christmas ornament caddy 1

inexpensive paint brush caddy

All in all we hope these little storage ideas will help you check off two resolutions…organize and save some cash! Goodbye Christmas, (you do fit nicely away in one storage container) and Happy Sunday everyone!

storing away Christmas decorations


P.S. Check more amazing storage and organizational ideas at Remodelaholic’s Link Party! Oh and if you’re wondering where this post is at the Link up party…Its #58 under “Tandra” instead of the actual name “Free Storage Solutions for Christmas Decor”…Sad right?! (No this wasn’t me needing attention) Instead the computer copy/pasted the wrong info and then said computer/wifi froze up during my link up…Hopefully the 49ers have better luck than me today =) Again Happy Sunday everyone!

remodelaholic-party