What to do with extra posts?…

That was the question…I desperately wanted a vegetable garden, but there were two big obstacles standing in my way:

1) Two monstrous dogs who literally eat everything in sight (including vegetables).

2) Moving shade, due to all the trees in our neighborhood. The only place with full six hours of sun was on the tile patio.

Using extra material from our Privacy Screen project

The rolling, [dog proof] vegetable garden was born!

rolling garden cart side view

rolling garden cart baby plants 4

This cart stands about 4 ft tall, with two lattice sides for added height to keep wet noses out of the tomatoes. Here’s how we did it…

1) Using two left over 8 ft x 4 inch redwood posts, cut in half and 4 (6ftx 3/4 inch) redwood planks cut into two pieces ( a 2 ft cut and 4 ft cut). We also had 2 left over boards of 6 ft x 2 inches, (again cut into 4ft and 2 ft pieces). We connected the bottom with the sturdier (6ft x 2inch) boards and posts using tan deck screws, and essentially framed a rectangular box like the diagram below: (Extra tip: To add stability we added an extra piece of scrap wood, cut just shy of 2 ft and it helped stabilize the frame by screwing it across the middle of the box)

rolling garden card diagram 1

2) Working our way up the top we stacked and screwed the 4 ft and 2ft redwood planks to the outside of the posts.

rolling garden card diagram 2

3. To add additional height and protection from hungry dogs we cut and added redwood lattice to two sides of the cart. Then we screwed heavy duty wheels with breaking mechanisms to the bottom of the 4 inch posts. As well as brace two 2inch x 4ft boards running parallel along the inside of the framed box. (see pictures below for a better visual) This would allow for heavy duty metal wire racks to lay on them. The pots of plants sat on top of these racks, since we needed to allow for proper drainage when watering the vegetables.

rolling garden cart inside

rolling garden cart baby plants 2

4. Add a few solar post lights for decoration, and using Geopots, we now have a rolling [dog proof] vegetable garden. Here are the tomatoes starting to spring up…

rolling garden cart baby plants 3

And here again are the tomatoes that actually survived the Sacramento heat spell we just endured a couple weeks back…

rolling garden cart baby plants 4

We hope to make a few more carts in the future. Only instead plant them with different, lusher, and decorative plants for under our future pergola. These also work great for blocking off the outdoor dining space from our two big chow hounds.

How to display dog decor and not be that “crazy dog lady”

Ok, our friends know we’re big fans, of the wet noses and furry kids…However we don’t want the house decor “dog centric.” Therefore to clear up any confusion here are some of my dog decor tips without being that “crazy dog lady”

1. Stake out one small corner of your house. In this case we have this over-sized ugly built in. It was just this wall of orange shelves. See before pic:

built in before pic

(Don’t judge this was before we moved in. We are still trying to figure out what we’re going to do with it. Unfortunately we’ve found the extra storage, shelves and desk are pretty functional, so a complete knock down is not an option right now)

2. Mix in and re-use some of your other home decor so it doesn’t seem entirely dog focused.  Rather think dog, use decor that reminds you of them. Our dogs are all about chasing squirrels and sticks so I displayed a little metal squirrel nutcracker grandma gave us and added a large piece of polished wood.

built in squirrel built in stick

3. Why not give it function? Display those dog treats proudly! Your furry kids need a cookie jar too. (We reused some of our wedding cookie jars for dog treats and bones)

built in bones

Sweet! Dog decor subtly displayed and ugly built in looking a bit better…

ipone pics 080 watermark

Driftwood Wall Art

We are living f-r-u-g-a-l-l-y these days! As much as I’d love’on some newer Ikea wall prints and frames, I decided free wall art is better…

signs and office update 001

Here’s the How to break down on this fab freebie…

1. We had some metal braces and left over wood from the fences, so basically I lined them up, and screwed the wood together from behind. (What was so fabulous about using fence wood is that it is unfinished and imperfect, no distressing required. Yay!) Then stained the wood with Minwax Wood finish stain in gray, to give it the look of driftwood.

2. Later I stole the hub’s projector from the mancave, used microsoft Word and a sharpie to stencil the writing.

ipone pics 135

3. Then with left over interior white paint, (Glidden pebble white) hand painted the stenciled writing.

ipone pics 139

4. Once dried, I added picture frame hardware and wire to the back, and DONE! Wannabe- Driftwood Wall Art! Office/Guest room walls are completely decorated! Not bad for a freebie!

signs and office update 001

DIY Winebox Centerpieces

One of the questions I’m always asked about the wedding, “how did you create your centerpieces?” We wanted centerpieces that would be “green” and also double as wedding favors. (The flowers are potted and guests could take them home with them)

120929__kristyweldonphotography_079

Believe it or not they are really simple, quick and inexpensive to make…Here’s how we did it:

(Pssst…the following How to is a reenactment…)

1) You’ll need a smaller winebox, 4 small pots of flowers (for this I used Lucia dark blue), a foil baking pan, 1 large can of tomatos (yes, I know this sounds weird so far), crinkle paper filler, ribbon pieces of your choice, a medium sized candle and holder. (Recommendation: water the flowers the evening before and outside of the arrangement. Don’t try to water them once the centerpieces are made)

DIY centerpeice and home depot details 002

2) Bend and fit the aluminum baking pan into the wine box upside down.

DIY centerpeice and home depot details 001DIY centerpeice and home depot details 006

(Its ok if it looks ugly, the purpose is for it to give your plants a little lift)

3) Place your tomato can in the middle and surround it by the plants (1 plant in each corner is a good rule of thumb)

DIY centerpeice and home depot details 008

4) Once all the plants are in place, add the candle and glass holder on top of the can. Then add the crinkle paper filler and ribbon pieces along the top of each pot. (For the sake of this how to, I used some left over materials from a recent gift. Craft stores have a variety of crinkle paper colors, the ones used for our wedding were a natural brown color.) Then hide the top of the pots with the paper filler, you want them to look as if you just opened a box full of flowers

DIY centerpeice and home depot details 012

5) Here are some variations to the idea…Don’t like the crinkle paper filler? Then use pieces of sheet moss instead…Don’t like the ribbon?  What about burlap instead? You can easily attach burlap ribbon to the outside of the box by using a hand held staple gun.

DIY centerpeice and home depot details 013 DIY centerpeice and home depot details 015

6) Don’t need a centerpiece? Then use them as pretty garden or porch decor…

DIY centerpeice and home depot details 016 DIY centerpeice and home depot details 019 DIY centerpeice and home depot details 020

Best piece of advice for brides and to save money…Start collecting the supplies a little at a time if you have enough time. (Every time we had a Michael’s coupon we were off buying ribbon or paper filler) We also spread out the cost of the materials over a year and stockpiled them until use. We asked ahead from the local home depot which flowers would be on sale and available in September which was why we used mums and daisies. You can also save money by growing your own flowers, but beware this would take a lot of planning, care and a green thumb.

A Few Inexpensive Updates…Drum light Ceiling Fan

I’ve been ever so slowly updating the office/guest room for the past….ummmm…year! We’ve  been in “hunker down and save” mode these past several months. That said, I hope to someday post some killer “after” pics but for now here are a few inexpensive updates anyone can do.

1) Add a $20 rug…I found this lovely one at Ikea…Our dogs are like magnets to a new rug…They are the official rug “flatten squad”. ipone pics 090

2) Update the room’s lighting…I traded out an old sit-a-top desk lamp for this plug-in Target pendant on clearance for $24. (Luckily I had a left over gift card handy so it was a freebie) I also washed, ironed and re-used hand me down drapes from the master bedroom.

ipone pics 068

3) Go crazy with drum shades! Total cost ($23 thanks to a few Ross finds and some connector pieces at Home Depot)

#1 light update, here is a lamp given to us for free…[Sigh] the difference a drum shade can make…

Before lamp before piclamp after pic After

#2 shade update, modernize an old ceiling fan with a drum shade…

ipone pics 115

Very easy project…Just see the following steps:

1) Find a triangle or old standard drum shade (not the kind where the shade attaches to the bulb base)

ipone pics 095

2) Based on the light fixtures you intend to hide, find an extender piece that will allow for enough space and hanging length. (Consider switching out or adding longer pull chains). You will also need some hex nuts and couplings. These can all be found in the lighting section of Home Depot normally next to the fan light kits.

ipone pics 101

3) In our case we flipped the shade over and secured it to the base of the fan light using a coupling and hex nut. Then adding a chain extender to the bottom chain, slid the chain through the shade extender and coupling. Next I screwed the shade extender into the coupling at the base of the fan. (See pics below)

ipone pics 103 ipone pics 098 ipone pics 106 ipone pics 108

4) We tested it to ensure the fan did not actually hit the shade. We also allowed enough air space between the lights and shade (After all we don’t need a fire hazard in the new home)

Yay! Instant update for a fraction of the cost of a new fan light kit.

ipone pics 112

TV Stand Turned Wine Rack (Ikea Hack)

This is just a little spin off from the in progress Mancave Makeover… We are all about recycle, reuse, and re-purpose. Primarily because of our very little home renovation budget.  We had this old Ikea book cabinet/TV stand from our first home. I had hung some curtains in it just to hide the mountains of mismatched textbooks (Seen below in a First Home Flashback)

wine rack 1

Then it was passed on to the garage for storing odds and ends…(seen below)

before garage pic4

Finally after searching the stores for inexpensive wine racks that could handle 50+ bottles (We had a lot of left over wine from the wedding). Most costing $50 and up!

I found my way to home depot and bought about 20+ ft worth of wooden dowels and battery operated LED lights. (Total cost just under $25) Cutting the dowels by hand and to the width of the shelves, hammering them in, and attaching the lights with sticky tape…VOILA! Beat up Ikea shelving to basement wine cellar.

wine rack 2

Guest Book Adirondacks?

One of the unique touches at our DIY wedding was that we opted for guests to sign wooden Adirondack chairs instead of a guest book.

120929__kristyweldonphotography_414120929__kristyweldonphotography_415

120929__kristyweldonphotography_416

Pictures courtesy of Kristy Weldon our uber talented wedding photographer!

Our guests and family had a blast both signing and later sitting in them when the heels were finally kicked off. Also the messages became more and more creative as the evening wore on and wine disappeared.

Originally I found these chairs on sale at Home Depot for $29 each, with the intention of making them my first pieces of outdoor furniture at the new house. Only problem my dad pointed out was the elements. If not protected the writing would eventually bleed and wood splinter with age.

The solution: Burn the signatures and messages into the wood so they’d be permanent, then stain the wood for protection from the elements.

Here’s the step by step guide:

1. I had a wood burning kit from several years back I had bought from Michaels. ($25-$30 price estimate). Be careful, read the instructions before use, and make sure you do not set the hot tool on the actual wood when not in use.

I used the largest blunt tip that it came with. Primarily because I didn’t want to spend my entire weekend on the project. WARNING: If you thought your hand was cramped from thank you card writing, you’ve felt nothing yet!

In our case there were some pretty lengthy messages and awkward hand angles for this project. However just take breaks and pace yourself, just like thank you cards, it doesn’t have to be done in one day.

photo (9)

We loved this next message, appealing to our weird sense of humor!

photo (10)

2. Once all the messages were burned in, I protected the garage floor with cardboard and set up the chairs for staining. I used the same old staining brush and some left over Preserva Wood stain in  pacific redwood. Since the chairs were not redwood but pine, and I wanted them to match the redwood in the backyard.

staining fences and screen posts 002 staining fences and screen posts 001photo (11)

Here is a side by side to see the difference in the color

photo (12)

3. Make sure to flip the chairs over for a good coating on the underside of each. Once done staining allow them to dry in a well ventilated area over night.

Voila! Ready for the summer evenings in the backyard!

photo (15)

PS. Might consider another coat of stain and a clear polymer later on…

AND HAPPY FATHERS DAY! We came home from our Dads Day BBQ to find Sierra waiting for us…

ipone pics 6-16-2013 061

Privacy Screens…Please…

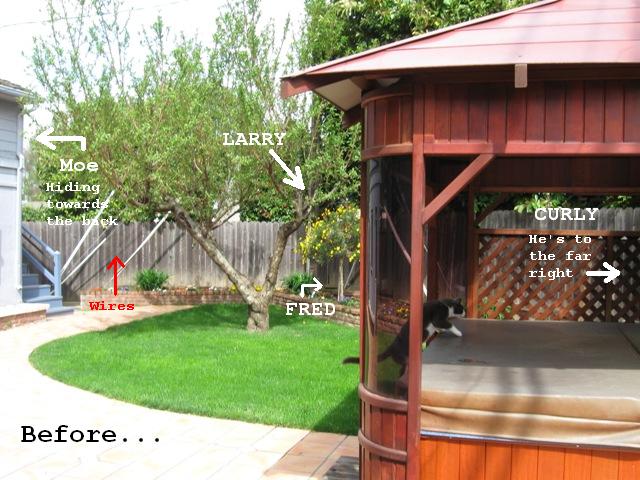
Unfortunately our little house came with some friends…In the backyard we have not one, but THREE electrical poles! These ugly guys (I named them Larry, Moe and Curly) are smack dab in eye view from my back slider. Not only are they really ugly, but these poles have wire appendages that mar my entire back fence.

privacy screen 013

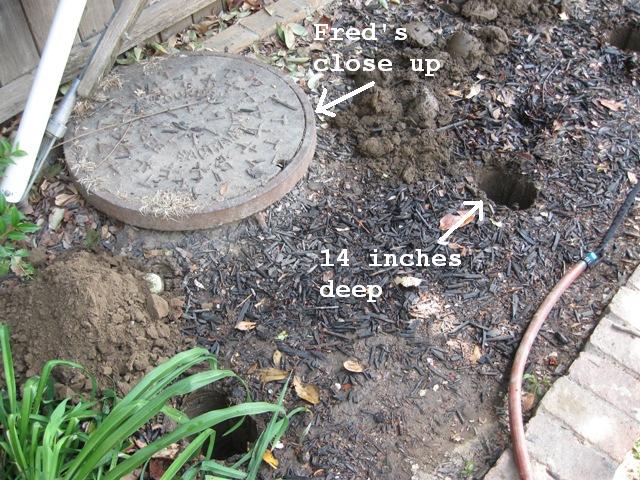
The fourth guy in this gaggle is a huge man-hole. (I named this guy Fred) Like an obnoxious group of ugly dudes crowding the bar, there is no way to avoid eye contact.

Therefore I figured building privacy screens may do the trick.

A few things to keep in mind:

  1. I checked with our local utility companies, they said as long as we didn’t try to cover, crowd their space, drill into them, cause damage or block access, we’d be ok. Also they said to make sure the screens would be cheap and easy to remove, so if they needed to be ripped out, no harm no foul.
  2. AGILITY POLES! My inspiration for these screens were those agility tests for dogs, and how they weave in and out of poles lined up. Therefore the screens would be dog friendly and make the backyard more interesting for them. (I.e. allow the dogs to weave in and out as they chase squirrels, and run the perimeter.)dogs 003
  3. THE MOST IMPORTANT…We wanted a “potty” privacy screen for the dogs, a place we could train the dogs to do their business, and at the same time HIDE IT!

Hence, the moment dad came to visit with the truck, we went on a home depot run…

Interaction went like this… “Hi dad, just got here, don’t turn off the engine, lets go to Home Depot!”

(Poor guy never even had a chance.)

Home depot shopping list:

  • 10 (8ft) redwood 4×4 posts, $7.60 each
  • 5 wire screens/panels, $7.49 each
  • 5 bags of Quick setting concrete for fences and posts (1/2 a bag per each post did the trick), $3 each
  • 1 box of horse-shoe nails, $5 for one
  • 10 black solar post lights, $4.88 each
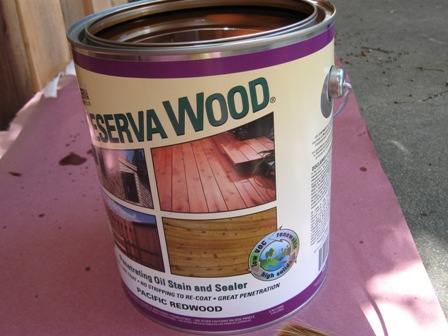
  • Left over Preserva wood stain from staining fence project (free)
  • Initial cost for bulk of project= $258.25

Time it took to complete: 1 day

(Allowing for ½ of a morning to dig and set the poles in cement, dry over-night, then a ½ afternoon to cut the wire and attach to the posts.)

Steps:

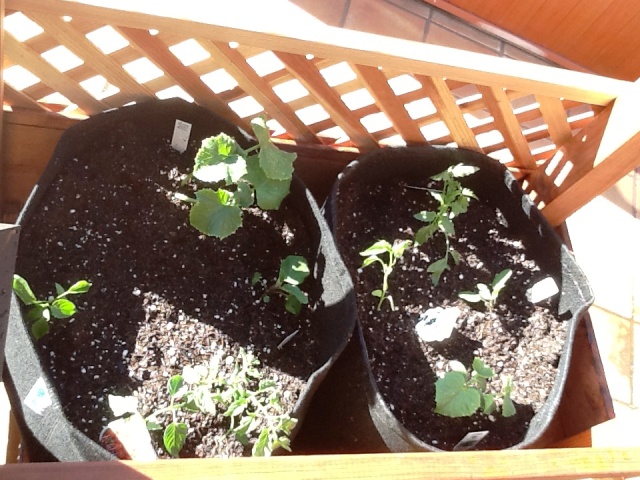
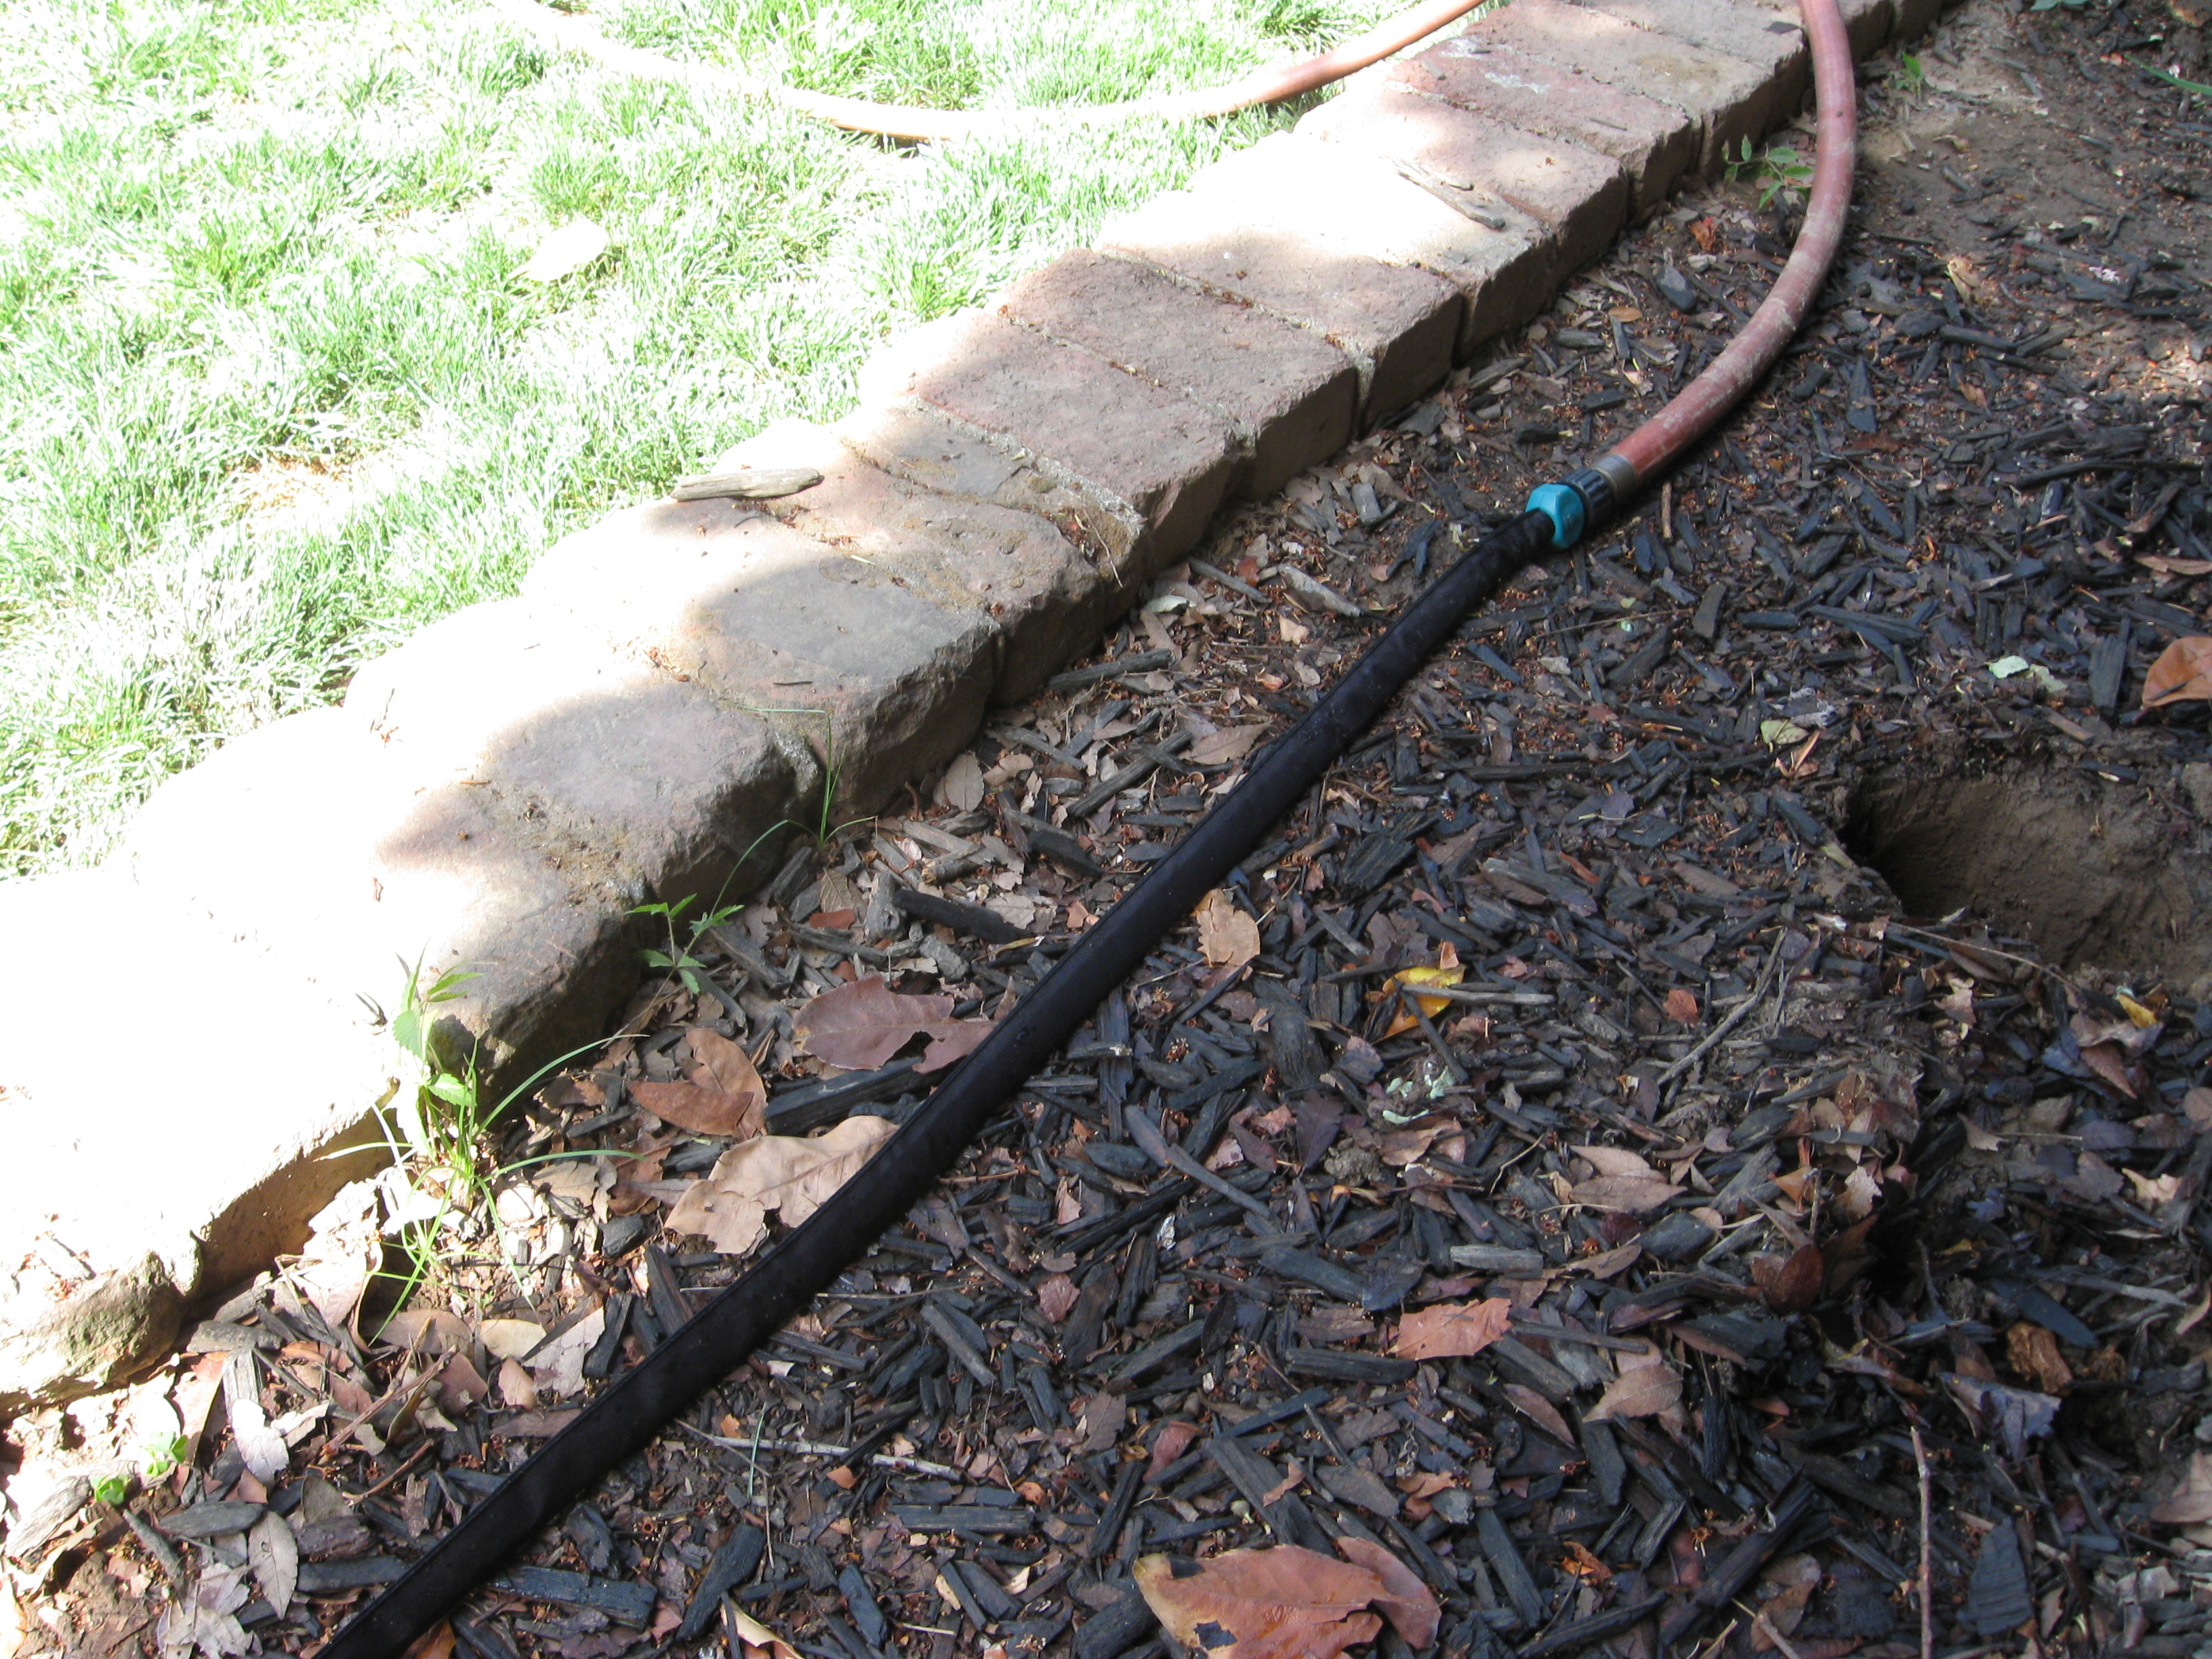
1. I soaked the raised bed of soil for a few hours to allow easier digging.

.soaked soil

Then using a tape measure marked each place I wanted a post to be with a little black spray paint I had around. Considering the width of the wire screen was just a bit over 48 inches I made sure not to go farther than 44 inches in order to secure the screens later to the back.privacy screen 031

I also wanted to make sure there was enough space (about the width of a standard door frame) between each panel should a utility worker need to maneuver in the space.  Then with a post hole digger/shovel, I dug down 14 inches into the soil.

privacy screen 030

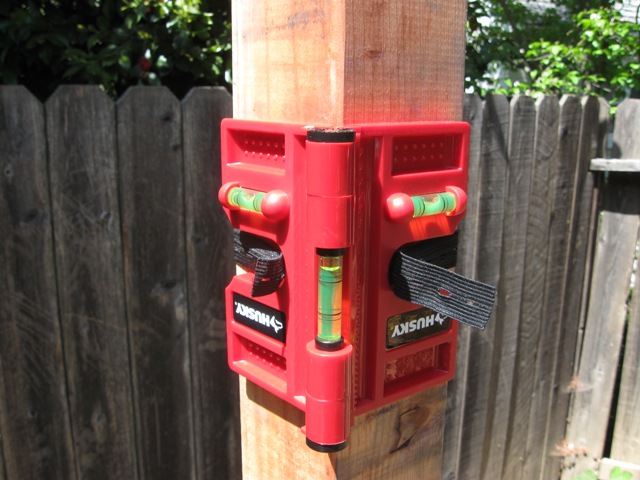
2. Once all the holes were dug, Hubby held the posts in place,  in each hole in order to check the height. (We used a yardstick level sitting atop each post to achieve this).

privacy screen 032
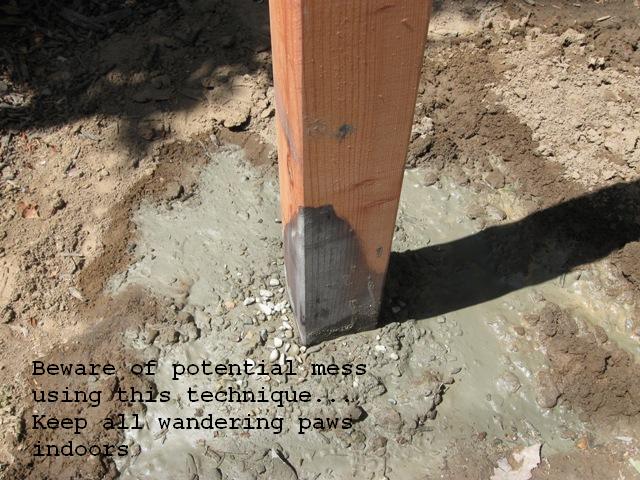
Then we strapped the post levels to each one and he kept them steady while I poured the quick drying concrete into each hole, following it with water from the hose. WARNING: Don’t fill the entire hole with concrete, instead pour a 1/4 in then add water, a 1/4 then add more water until you reach the top of the hole. (Look for a mud- like consistency with the concrete.) Also the thickness helped keep the posts in place so you can move on to the next batch.

privacy screen 034

3. We followed this pattern for the other 8 posts, bracing them with chairs when needed. Luckily it was a hot day and the cement was definitely Quick setting. (Really only 15 minutes and the posts were standing on their own) We let these set the remainder of the afternoon, and instead called it a day cause of the heat.

privacy screen 035

4. In the morning we set to work cutting and measuring the wire panels. Luckily we did a pretty good job setting the posts 4 inches shy of the panel width. This gave us room to cut off the rough edges, and allowed for perfect rectangles.

We cut the wire by hand with a hack saw and a blade specific for cutting metal. (Caution wear gloves and brace the wire on a level and strong surface, keeping hands free of the saw blade.)privacy screen

Luckily we only needed to cut  halfway into the wire, then with a little twisting and bending the edges came right off. We also measured the height of the posts to the panels, and realized we needed to cut the wire down to where the two wires met. This would give a clean edge. (Also we measured enough clearance from the top in order for space to add solar post lights)

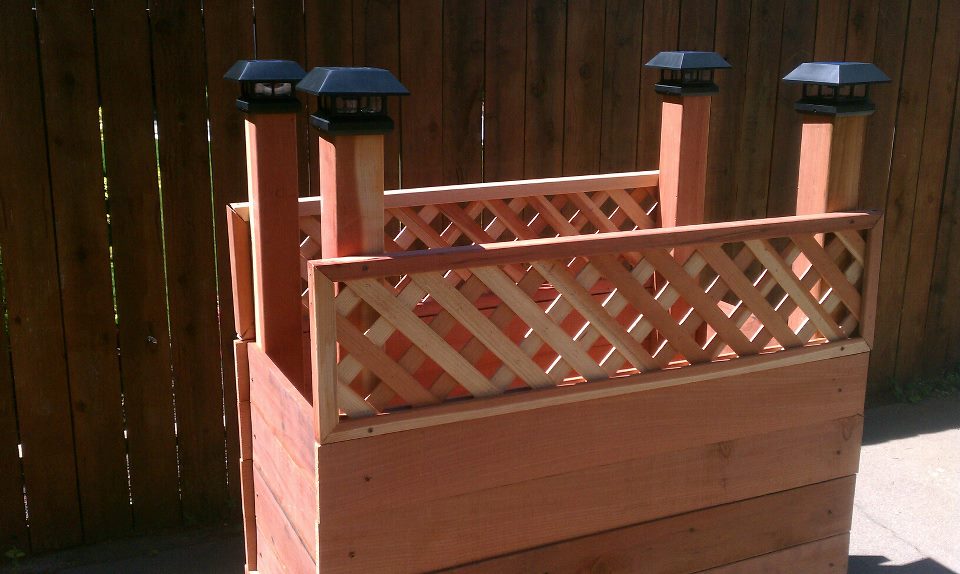
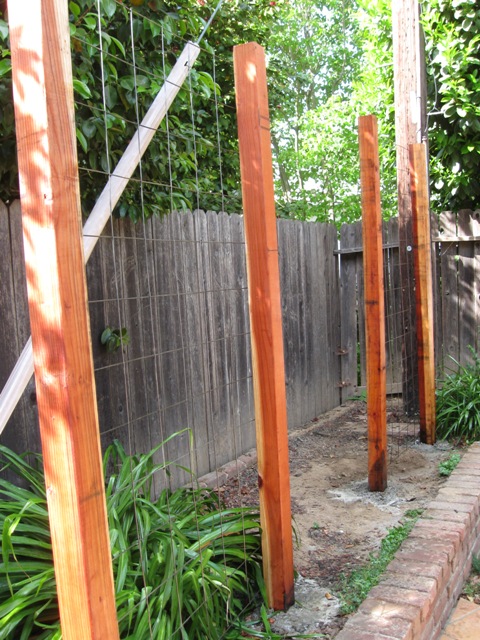
5. Using the yardstick level, verified each panel would be straight, then lay the panel against the backside of each post. While one of us held the panel, the other hammered the initial horseshoe nail to secure the wire in place.  We continued to hammer nails into each corner until the panel was securely fixed to the post.

privacy screen 043

6. Before adding the solar post lights, we sprayed the posts using a clean pump canister (normally a fast way to stain a deck) with left over Preserva Wood stain in clear. Spraying on two coats we let them dry until the evening.

7. Right before sunset we attached the solar post lights onto the top of each post following the manufacturer’s instructions.

privacy screen 024

privacy screen 021

The final part of the project was to plant climbing vines, but more on that in the next post…Privacy Screens PART II….The never ending project!

Flash Backsplash!

Breaking down a few garage projects, one in particular was hiding left over grout on the wood paneling. (I promise there will be cute dog cameos at the end)

The previous owner must have installed a tile backsplash for his workbench. Unfortunately that tile was long gone by the time we moved in and instead we had this: workbench backsplash before

I had two options:

1. Scrape away, sand, then attempt to stain which would probably take hours

2. Hide it

I opted for choice #2. Only problem was I’m a tiling “kindergartener” and I didn’t want to attempt to match up tile/workbench or spend a bunch of money.

This is when I stumbled into Home depot and found squares of roof flashing at $0.78 cents a pop! I decided to try and “tile” the backsplash with metal roof flashing and screws. At least if it failed I could just unscrew it and remove the flashing and no one would know my “flashing tile” craziness. Here are some initial  “in progress” picture where I tested one layer:

progress-garage-pic-5

workbench backsplash progress before

I realized the idea not only worked but it looked halfway decent and man cave-ish! I needed to finish off the rest and add another layer to hide old paint stains, holes in the wood etc. Here’s the step by step guide:

1. Gather the essential toolsworkbench backsplash tools*Ooops, lingo self-correction… The screws are not flat head, but standard phillips head, but “flat” in reference to how they need to be flat and flush with the flashing/wall, not sticking out where they can poke someone.

2. Temporarily remove any outlet covers. Then start measuring the amount of tiles you will need for the area, taking into account, wall outlets and staggering the flashing for a tile effect. Trace the cuts you will need with the sharpie and ruler. If you’re worried about a level line, you can also trace guidelines/points along the wall using the level yardstick and sharpie. (Because I was working over old grout I had to check the levels as I went)

workbench backsplash tracing on metal workbench backsplash fitting metal

3. Once you are satisfied with a flashing placement, hold it firm to prevent bubbling(helps to have a second hand) and drill 1 screw into each corner. If you’re worried about symmetry you can mark each corner with the sharpie where you want to drill a screw.

workbench backsplash drilling

4. Keep going, checking your progress with the level, until you’ve reached your intended end. Place your outlet covers back on, and step back to view your  finished product…Total cost about $12

workbench backsplash final

Pups did not want to be left out, and crashed a few pics as usual…

workbench backsplash Sierra

workbench backsplash Sutter

Fencing It All In

Before we could move into our new place, with two “raptor smart,” over-sized Dobermans… raptor dobe

Therefore we needed an over-sized fence. This house had been fence-less for 64 years!

(Good sign, it was that kind of neighborhood for that long!)

Two big problems though:

1) Anyone could walk up the driveway and access the backyard

2) Sutter and Sierra would escape to go on neighborhood squirrel hunting safaris.

squirrel hunting

Before we could officially move in we needed fences. There were two conditions:

1) The fences had to be really tall (Sutter can look over fences when he stands on his back legs) and really strong…(So escaped dobes would not terrorize the neighborhood.)

2) They also had to swing open to the backyard. Since the fences would double as garage and backyard access. (Maybe someday with automatic opening capability…pause for dreamily sighing)

Essentially these fences would be very big and very heavy!

We were in the midst of wedding planning and packing so we had a friend build them for us…

(At times, certain projects needed to be left to the pros.)

Or this would’ve been my poor hubby…

exploding-head

(He was already suffering through all the girly wedding planning and weekly jaunts to the in-laws)

Overall, and sadly have to admit, we forgot to stain our newly constructed fence doors. They lost their beautiful redwood sheen, and started to yellow from the elements. Which brings me back to re-staining the fences…“lazy- man style”

I used a staining brush, about $5-$6 home depot and a lower VOC Pacific Redwood stain by Preserva Wood ($26)

staining fences and screen posts 005 staining fences and screen posts 001 staining fences and screen posts 002

…See this Home Depot link for the proper use…but keep reading to see it done “lazy man style” http://howto.homedepot.com/videos/watch/1860740242001/Preserva-Wood-Howto.html

Laying down some left over (super thick) painting paper to protect the concrete we went to work on the fences. I tested a few spots to check if the color was right.

staining fences and screen posts 005

Second hubby was my brave “spider killer” brushing out all the nooks and crannies with a broom. (As people in Sacramento know how prevalent black widows are)…GET’EM HON, GET’EM!

staining fences and screen posts 007 staining fences and screen posts 010

(That’s me the scaredy cat with the extender pole above)

staining fences and screen posts 006

The staining was turning out well till, I spotted a gnarly BW…Yikes! Promptly ditching the hand brush and attached the painting pole onto it.

Overall staining was easy, it only took about an hour to complete two fence doors (front and back) Drying time was quick, and we scheduled the staining for a hot weekend. The one casualty in this project was my favorite golf hat which I had forgotten to take off. Nice red stain drops=New favorite painting hat

staining fences and screen posts 020

Considering how easy it was, we plan on adding this task to the “TO-DO” calendar for next year…Cinco de Mayo = Fence Re-staining day! A good excuse for a cervesa afterwards.

After shot…Cheers!

staining fences and screen posts 014